Make room for
everyday routines.
Bring washing, drying, folding and household storage into a coordinated cabinetry plan. Start with the way the room works, then connect appliance requirements, work surfaces and the details behind the doors.
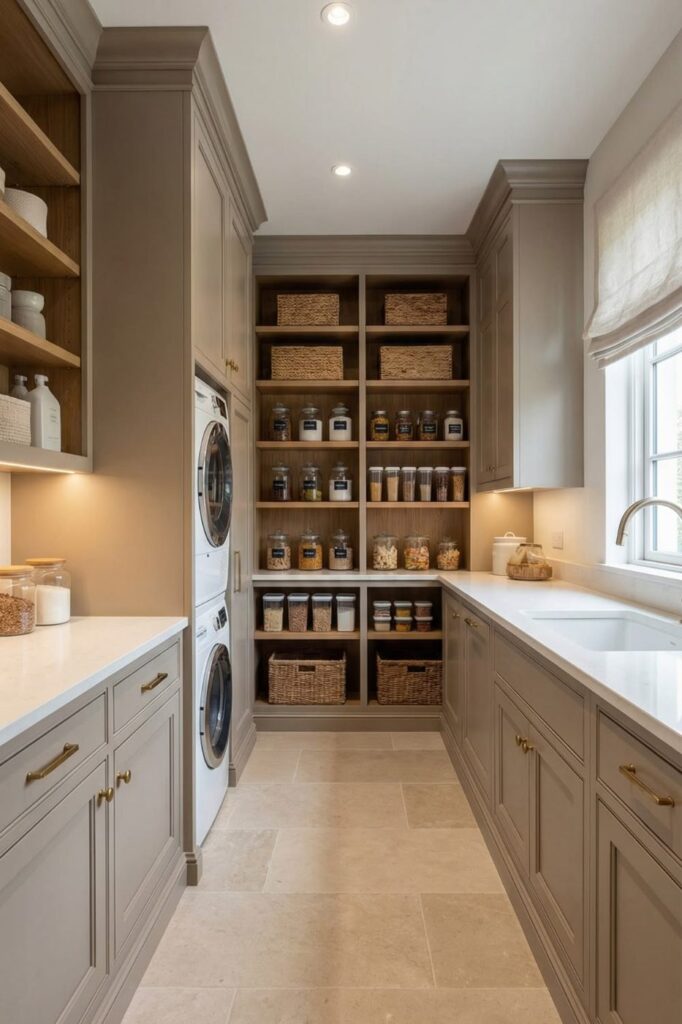
Choose the arrangement around the routine.
The right starting point depends on the room, the appliances and how much work happens here. Consider a dedicated laundry or a compact household zone.
Sort, dry and put away in one room.
A useful laundry combines the appliance arrangement with storage for the tasks before and after the wash.


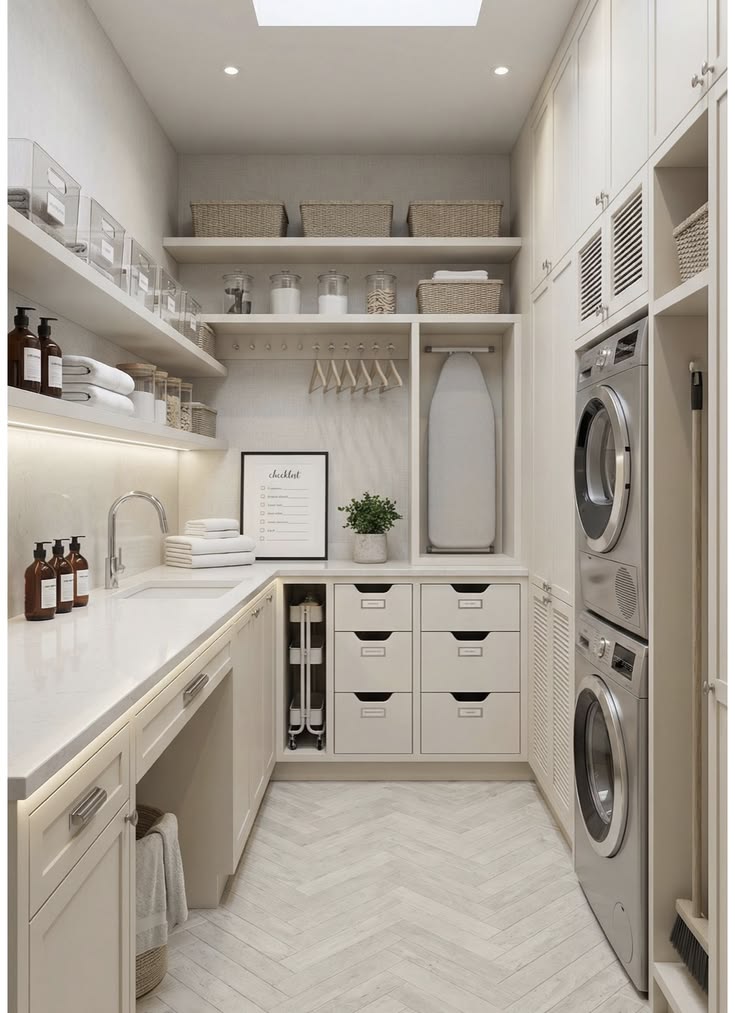
Product and design references from the supplied image library. Dimensions, hardware and finishes are developed for each project.
Make smaller spaces work harder.
Design references for cleaning-tool storage and a fold-out ironing surface. Record the actual fitting, operating space, support and access in the final specification.


Follow the load through the room.
Locate the work stages in sequence. Consider how the room shares space with a passage, kitchen or service entrance.
Provide space for the number of baskets the household uses. Check whether baskets stay in a cabinet, lift out or roll to another room.
Locate controls, doors and detergent access where they remain usable. Include the route for loading and carrying items between machines.
Reserve a clear working surface and a nearby place for folded linen. Keep the everyday storage within practical reach for the users.
Design the cabinet around the actual model.
An appliance name or nominal width is not a complete installation brief. Work from the selected model’s drawings and instructions, and keep service information with the room elevation.
Model, connection locations, opening doors and required clearances.
Sets the usable opening, adjacent fillers and access around controls.
Approved stacking accessories and the supporting arrangement.
Determines how the machine pair is supported without relying on decorative panels.
Water, drainage, power and any ventilation route specified for the equipment.
Keeps connections and shut-offs accessible and allows a service route.
How each appliance can leave the room after installation.
Avoids trapping a machine behind fixed countertops, trims or surrounding cabinets.
Give different tasks different storage.
Linen, cleaning supplies and equipment need different storage. Define the internal layout from an item list.
Size shelves to the folded items and baskets being used. Decide which contents should be visible and which belong behind doors.
List bottles, vacuum equipment, mop handles and boards. Separate storage zones as needed and include access to any charging equipment.
A pull-out shelf or temporary folding surface can be considered where space is tight. Confirm its usable size, support, rated load and operating clearance.
Specify the whole assembly.
Coordinate the substrate, decorative surface, edge treatment and countertop with the expected exposure. Confirm moisture and cleaning compatibility.
- Review the cabinet construction and all exposed edges around sink and service cut-outs.
- Agree countertop joints, wall junctions, sink mounting and the party responsible for sealing.
- Match cleaning-product guidance to the selected finish; do not assume all matt or painted surfaces behave alike.
- Record removable panels, kickboards and the access needed for later maintenance.
Connect a working room to the rest of the home.
Use a consistent palette and handle family while choosing the door profile that suits the room. Keep equipment accessible.
Send the information that shapes the layout.
A measured plan and daily-use brief identify the choices needed for a proposal.
- Room dimensions, ceiling changes, doors, windows and access route.
- Selected appliance models and their installation documentation.
- Sink, faucet and service locations, including anything still provisional.
- Items to store, basket sizes, folding needs and user preferences.
- Preferred front, handle and countertop references.
- Destination, project stage and responsibility for on-site connections.
Plan a room that works every day.
Share your plan, appliance list and storage priorities, including the details to compare.
Start a laundry briefExplore whole-home cabinetry →