

Custom cabinetry, specified for professional projectsSpecification guideFor the tradeStart a project
ARCAYACABINETRY
Start a project
MenuClose
Materials & details

Make every layer
an informed choice.

Build a coherent palette from veneer, painted faces, leather-category fronts, glass and metal. Keep the visible surface, supporting panel, edges and hardware distinct in the specification.

Explore material directionsStart a project brief
Material directions

Compare the look. Then choose the layers.

A cabinetry palette can combine different constructions and surfaces. Start with the part you want to understand, then connect it to the complete panel specification.

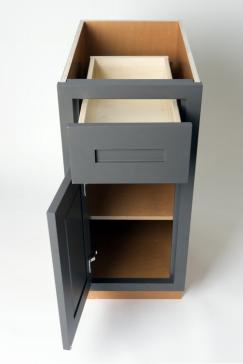
Construction photograph and catalog design references. The guides explain the materials behind each direction; screen colors are indicative.

Material library / Tactile surfaces

A different surface for the furniture face.

Compare the facing, the panel behind it and the adjoining materials as separate parts of one specification.

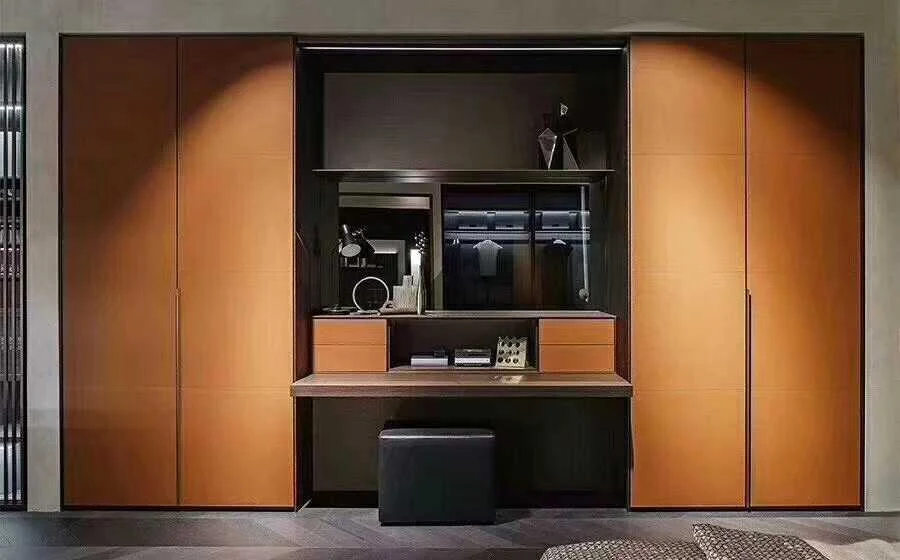
Leather faced cabinetry design study with tan tall fronts, dark shelving and a dressing desk
Design study / tan leather-category fronts with dark shelving and a dressing desk.
Gray leather category surface sample from the supplied material catalog
Gray / catalog reference.
Tan leather category surface sample from the supplied material catalog
Tan / catalog reference.
Cream leather category surface sample from the supplied material catalog
Cream / catalog reference.
01 / Design direction

Leather-faced fronts

Use a quieter, tactile face beside timber, dark frames and glass. A leather-category front can become the accent in a dressing wall or a small inset rather than repeating the same material across every surface.

Identify the facing
Confirm whether the proposed product uses natural leather, a microfibre material or another synthetic covering. These are different specifications; the catalog photographs do not establish the composition.
Complete the edge
Review the backing, bond, corners, joins, handle detail and exposed ends as a finished component. Agree whether seams or stitching are part of the design.
Choose where it belongs
Review contact, sunlight, moisture, cleaning and color transfer with product-specific care information. Request the relevant material sample and documentation before selecting a room or application.

Design language: Vitrine Natural

Discuss this direction

These samples and the application are grouped under leather. The exact facing composition, construction and availability require confirmation. These are design references.

Compare wood veneer families · Explore dressing-room systems · See the Vitrine collection

Materials / Make the palette work together

A face, a frame,
and the space between.

Wood, glass, metal and leather-category faces do different jobs. Coordinate the visible character while recording the actual material and construction of each component.

Tall glazed display storage and open shelving within a living space
Design study / wood-led storage, dark frames and glazed display in one room composition.

Wood and glazing

Use veneer for a quieter solid field and glass where visibility matters. Confirm the glass type, frame material and finish, lighting, shelf support and access independently of the wood face.

Compare five veneer directions · Explore glazed display

Slender metal uprights against a glazed display interior
Separate component study / a slim frame, glazing and handle detail; not the same system as the room reference.

The frame is a specification too

Coordinate the tone and sheen of metal beside the veneer and glass. Confirm the actual alloy or other frame material, coating, glass fixing, hardware and interfaces with the selected system.

Explore framed glass systems · Compare leather-category fronts

01 / Lay out the samples

Place the actual veneer, plain surface, leather-category face, glass and metal finish beside one another. Include the countertop and floor where they meet.

02 / Check the junction

Review the face, reverse and edges; identify where a fixed panel meets an opening leaf, frame, shelf or handle. Similar color does not establish a shared construction.

03 / Record the selection

Assign a sample or product reference to every component. Review sheen, lighting, acceptable variation, care and project-specific evidence before approval.

These are separate design references, not a tested combination or a confirmed Arcaya stock palette. Natural leather, microfibre and other synthetic coverings must be distinguished in the final specification.

01 / Explore

Find the right part of the specification.

9 specification topics · Selection guides

Swatches illustrate material families rather than exact colors. Review a physical sample with its substrate, surface, finish and edge details before approving a project specification.

02 / How to read a material

One name is not a complete specification.

Terms such as “wood”, “lacquer” or “paint-free panel” describe only part of a cabinet component. Record the core, decorative surface, finish and edge together, then check the documents for that exact product.

01Core

What the component is made from.

02Surface

The visible decorative layer.

03Finish

The final coating or treatment.

04Edge

How exposed edges and profiles are resolved.

05Evidence

The documents that apply to this exact product.

03 / Make a shortlist

Start with the component and how it will be used.

The right comparison depends on whether you are specifying a cabinet box, a visible door, an interior shelf or a countertop. Use each guide to prepare the questions and samples for your project.

011. Identify the component

State the room, function, dimensions and fixing or hardware interfaces. Do not apply a door specification to a cabinet box by default.

022. Compare the assembly

Shortlist the core, face, finish and edge as a complete component. Keep the chosen reference and sample code together.

033. Confirm the evidence

Request the product identification, applicable technical information and approved sample before the production specification is agreed.

Your next step

Build a material shortlist.

Share your plans, priorities and destination market.

Start a project brief