Custom cabinetry, specified for professional projectsSpecification guideFor the tradeStart a project
ARCAYACABINETRY
Start a project
MenuClose
Arcaya / Whole-home systems

Wardrobes & dressing rooms

Explore closed, glass, folding and sliding wardrobes, wall-mounted and post-and-shelf systems, plus dressing islands and accessory storage. Compare the structure, opening and room around the way you dress.

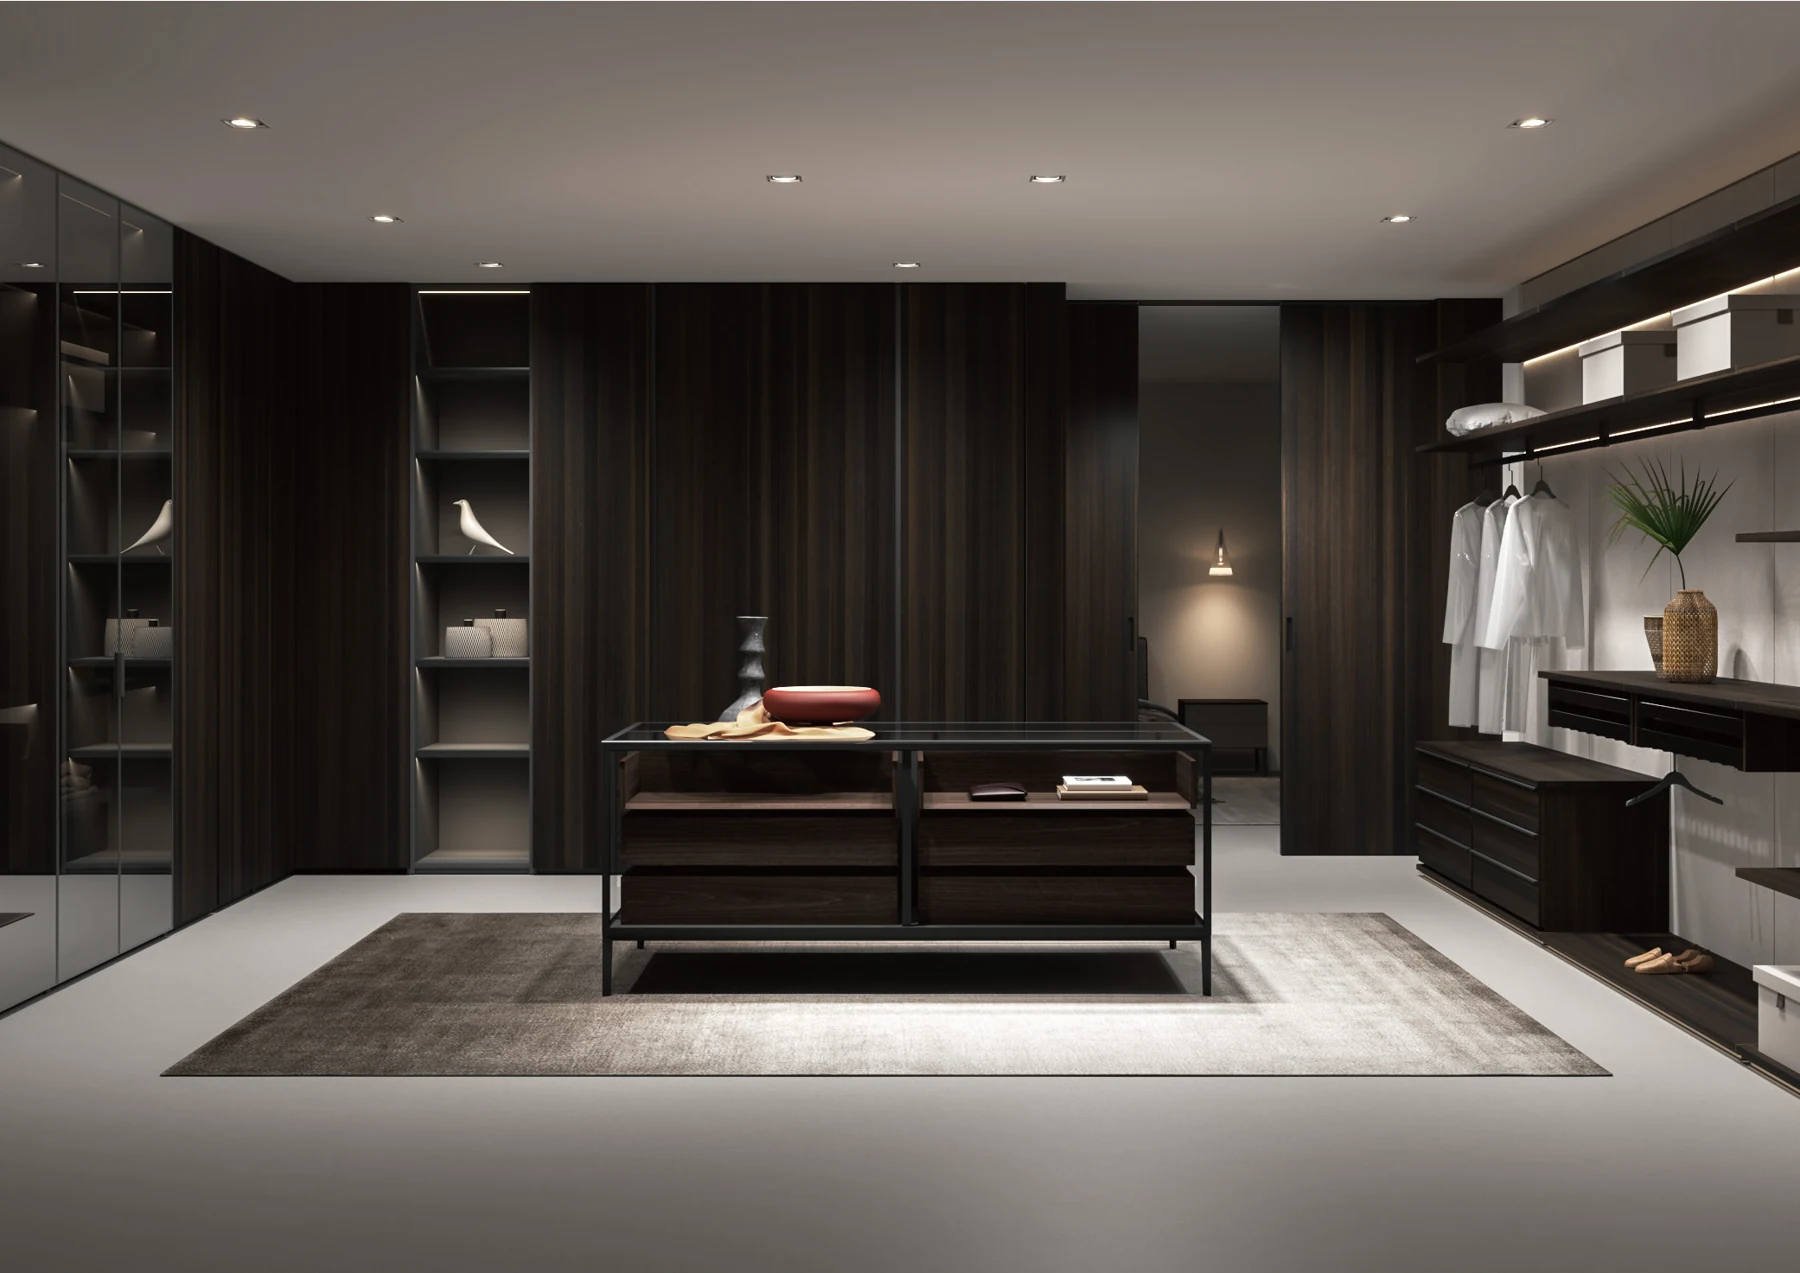
A dressing room with glass-fronted wardrobes, closed storage and a central island
Design study / glass fronts, closed storage and an island composed as a dressing room.
01 / Choose the structure

A wardrobe is more
than its front.

Begin with the room arrangement—fitted, freestanding or walk-in—then compare how the storage is enclosed and supported.

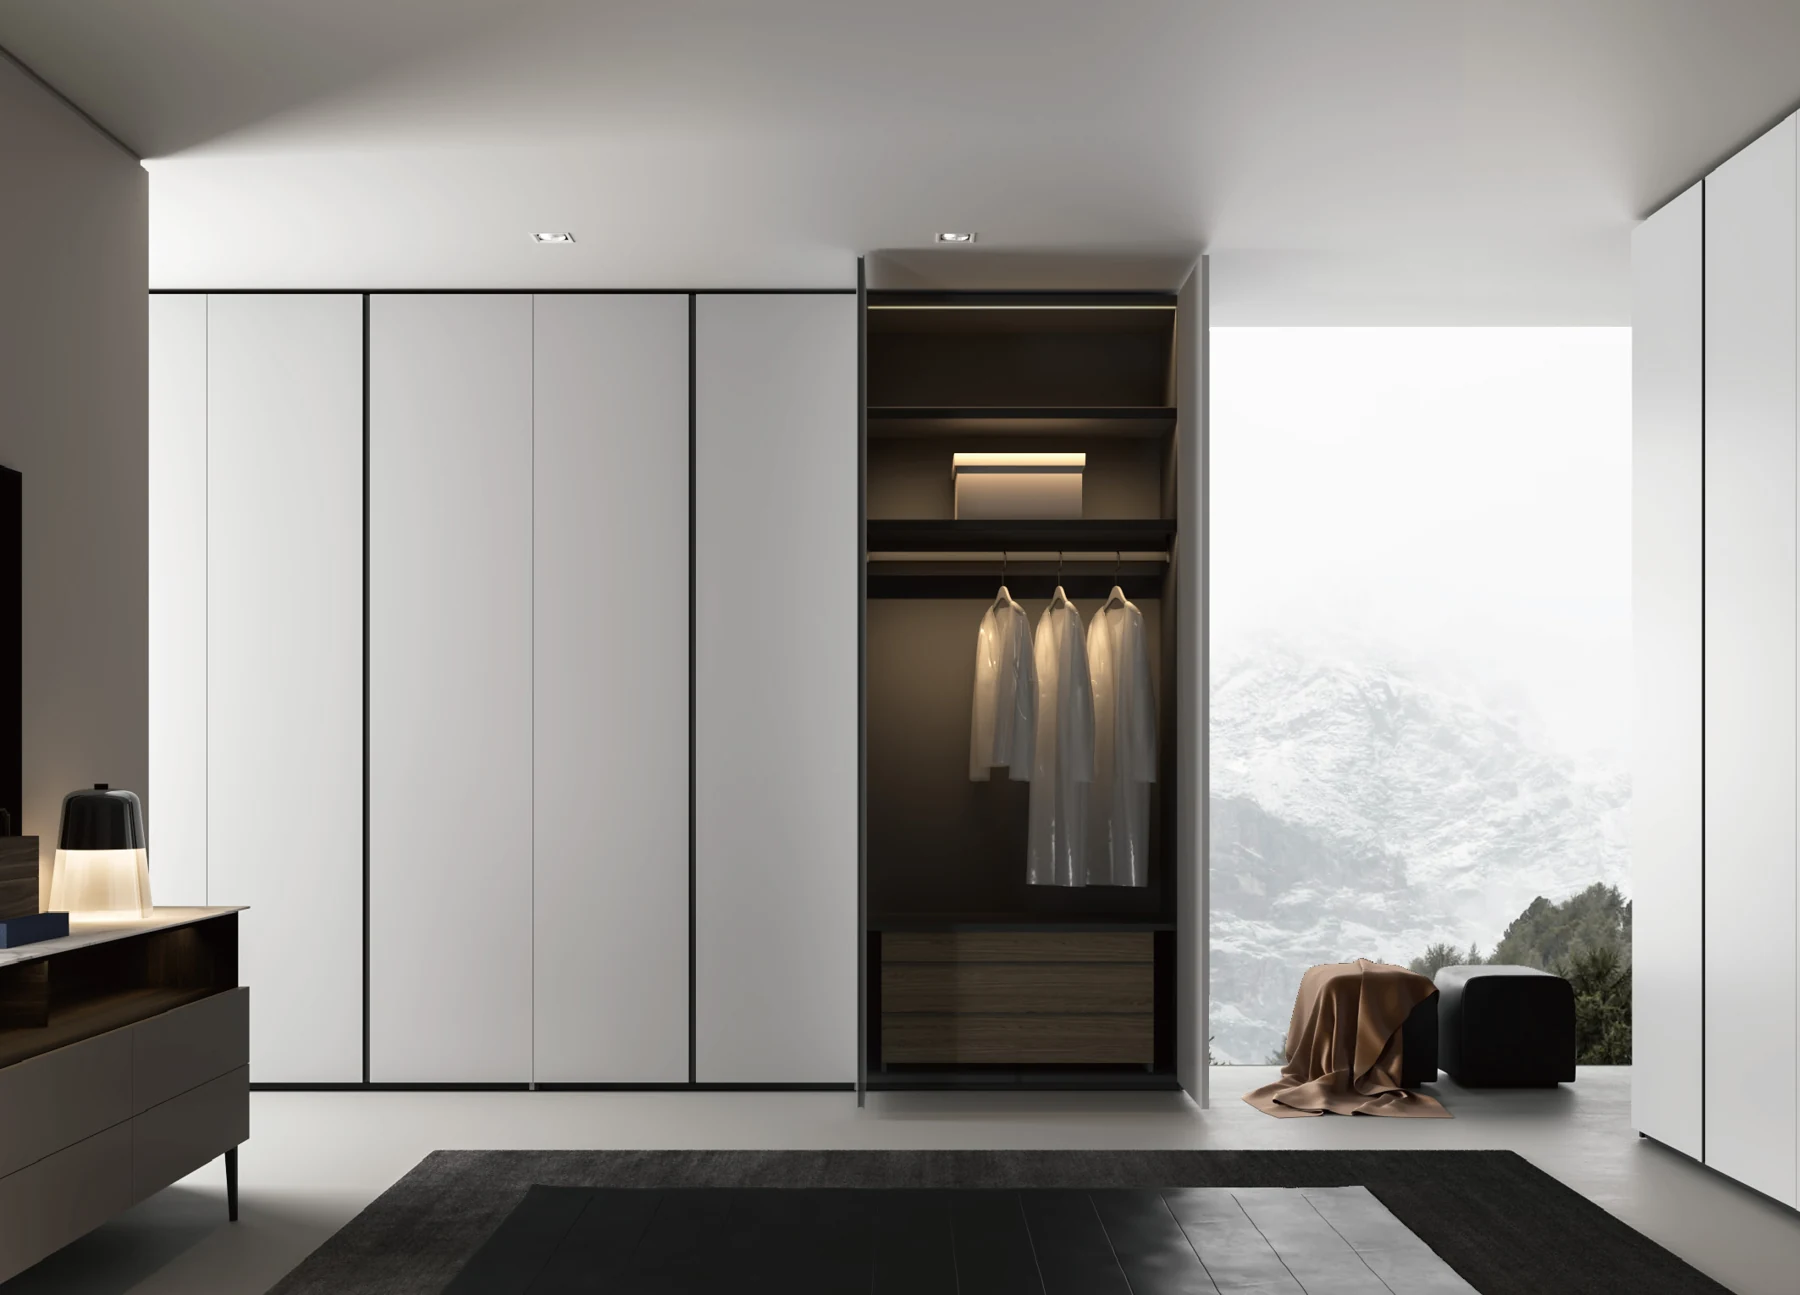
Light full-height wardrobe doors beside an open illuminated hanging bay
Design study / pale closed fronts beside a visible hanging bay.
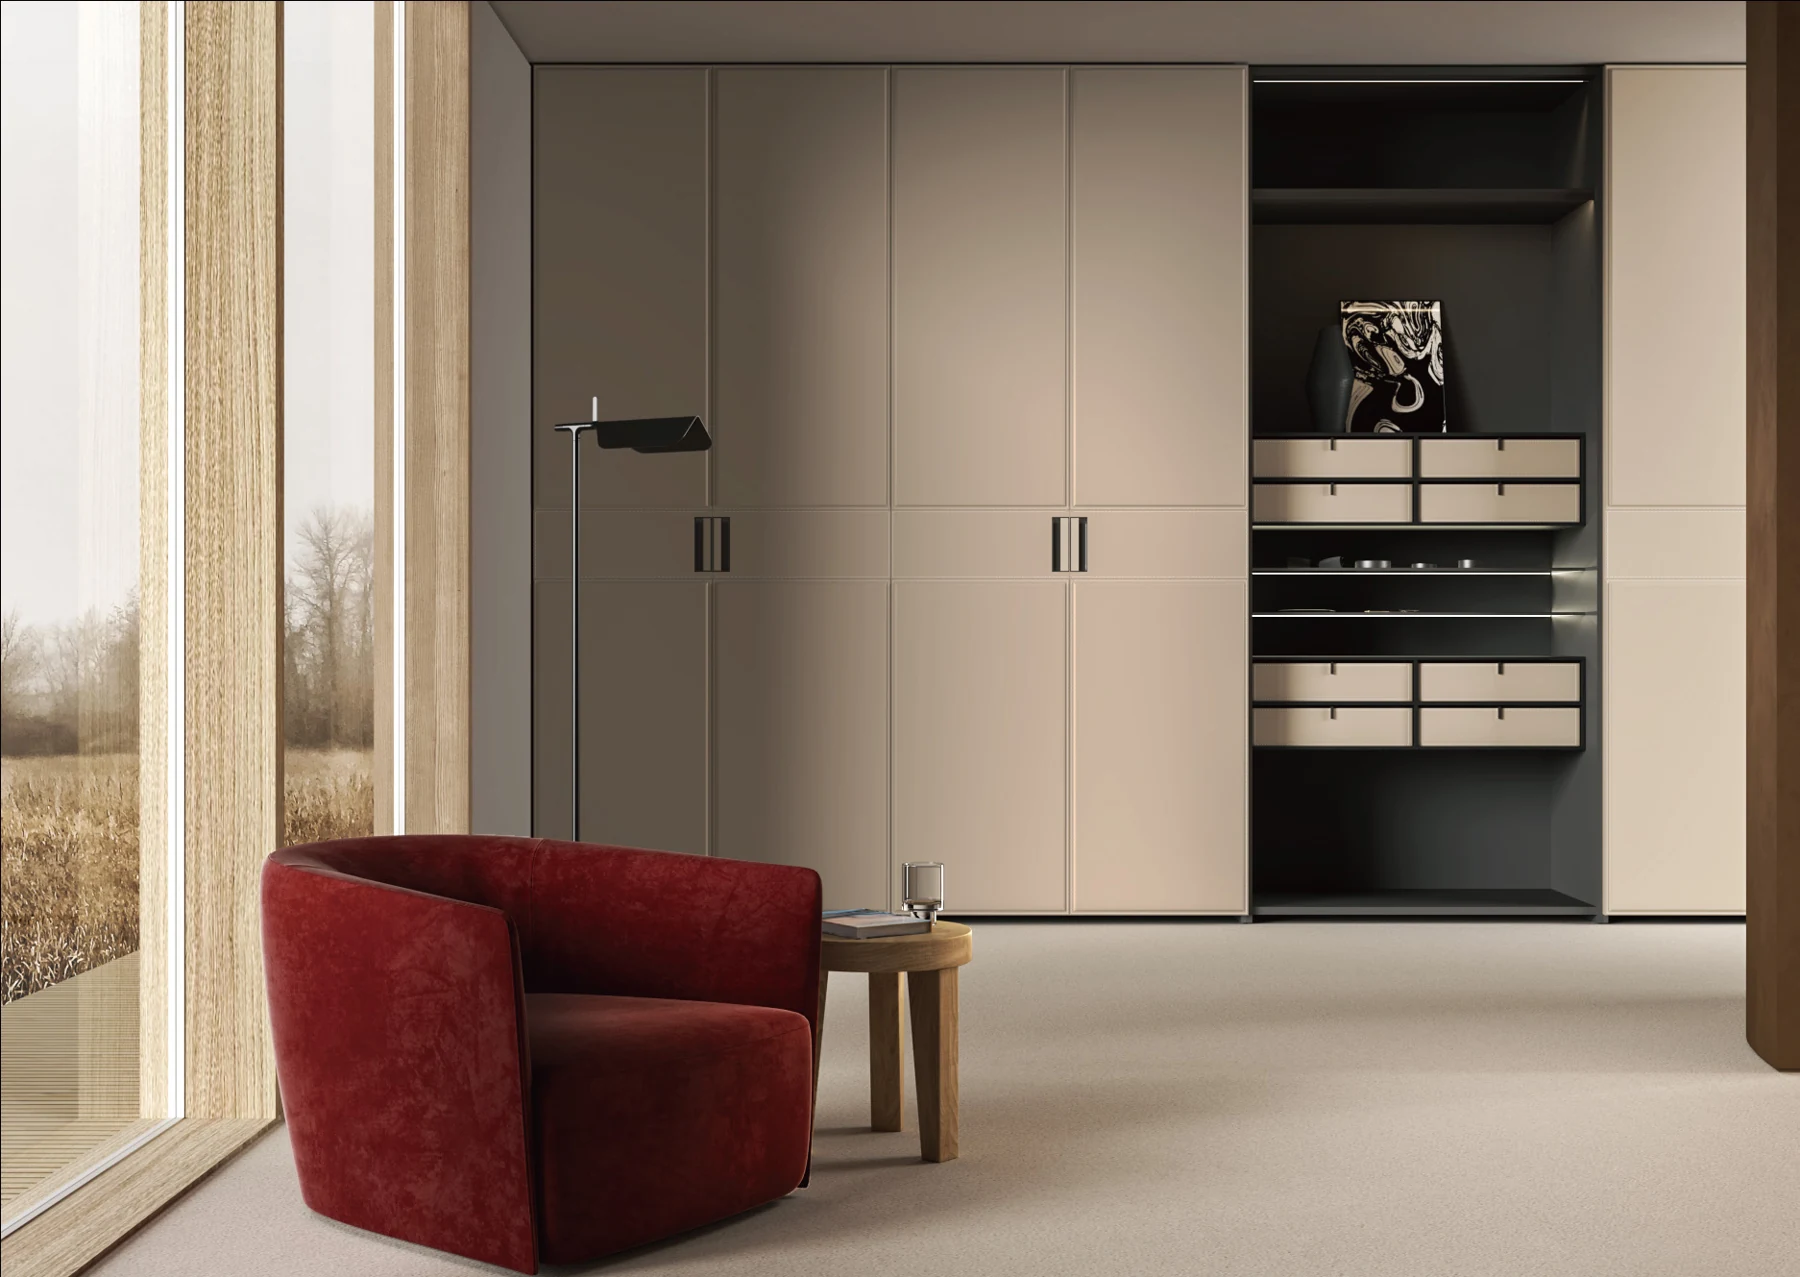
Taupe wardrobe doors, drawers and open storage in a bedroom
Separate study / solid fronts, open shelves and drawers in one elevation.
01 / Design direction

Closed-door wardrobes

Create a calm bedroom elevation while giving each category of clothing a place behind the front. A closed wardrobe can still include a useful open bay.

Choose the exterior
Compare a plain color with a wood-led surface. Confirm the actual decorative layer and edge detail through samples; a photograph does not establish the material.
Plan the interior
Allocate long hanging, shorter garments, folded clothing and drawers before dividing the doors. Record usable internal dimensions after hardware is included.
Check access
Show the door swing, extended drawers, bedside furniture and circulation on the same plan. Fitted and freestanding arrangements need different outer faces and junctions.

Design language: Linear Natural

Discuss this direction
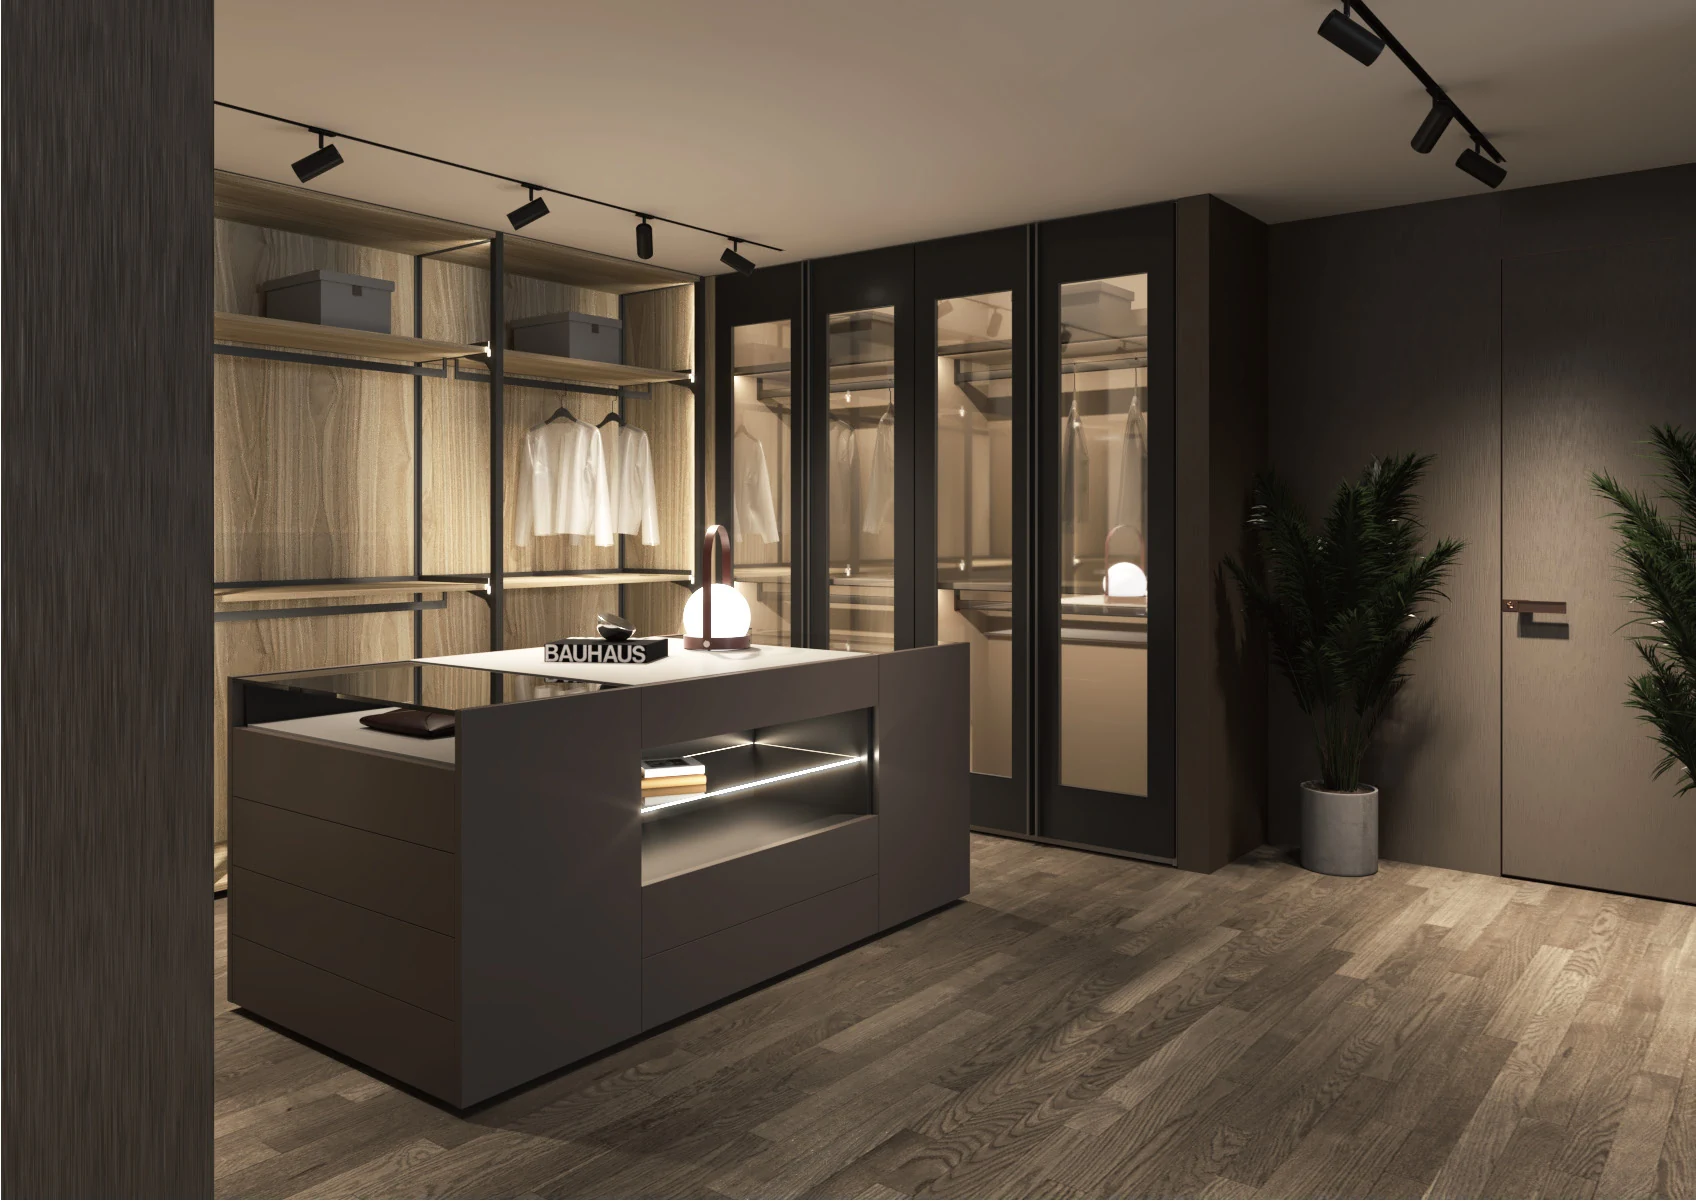
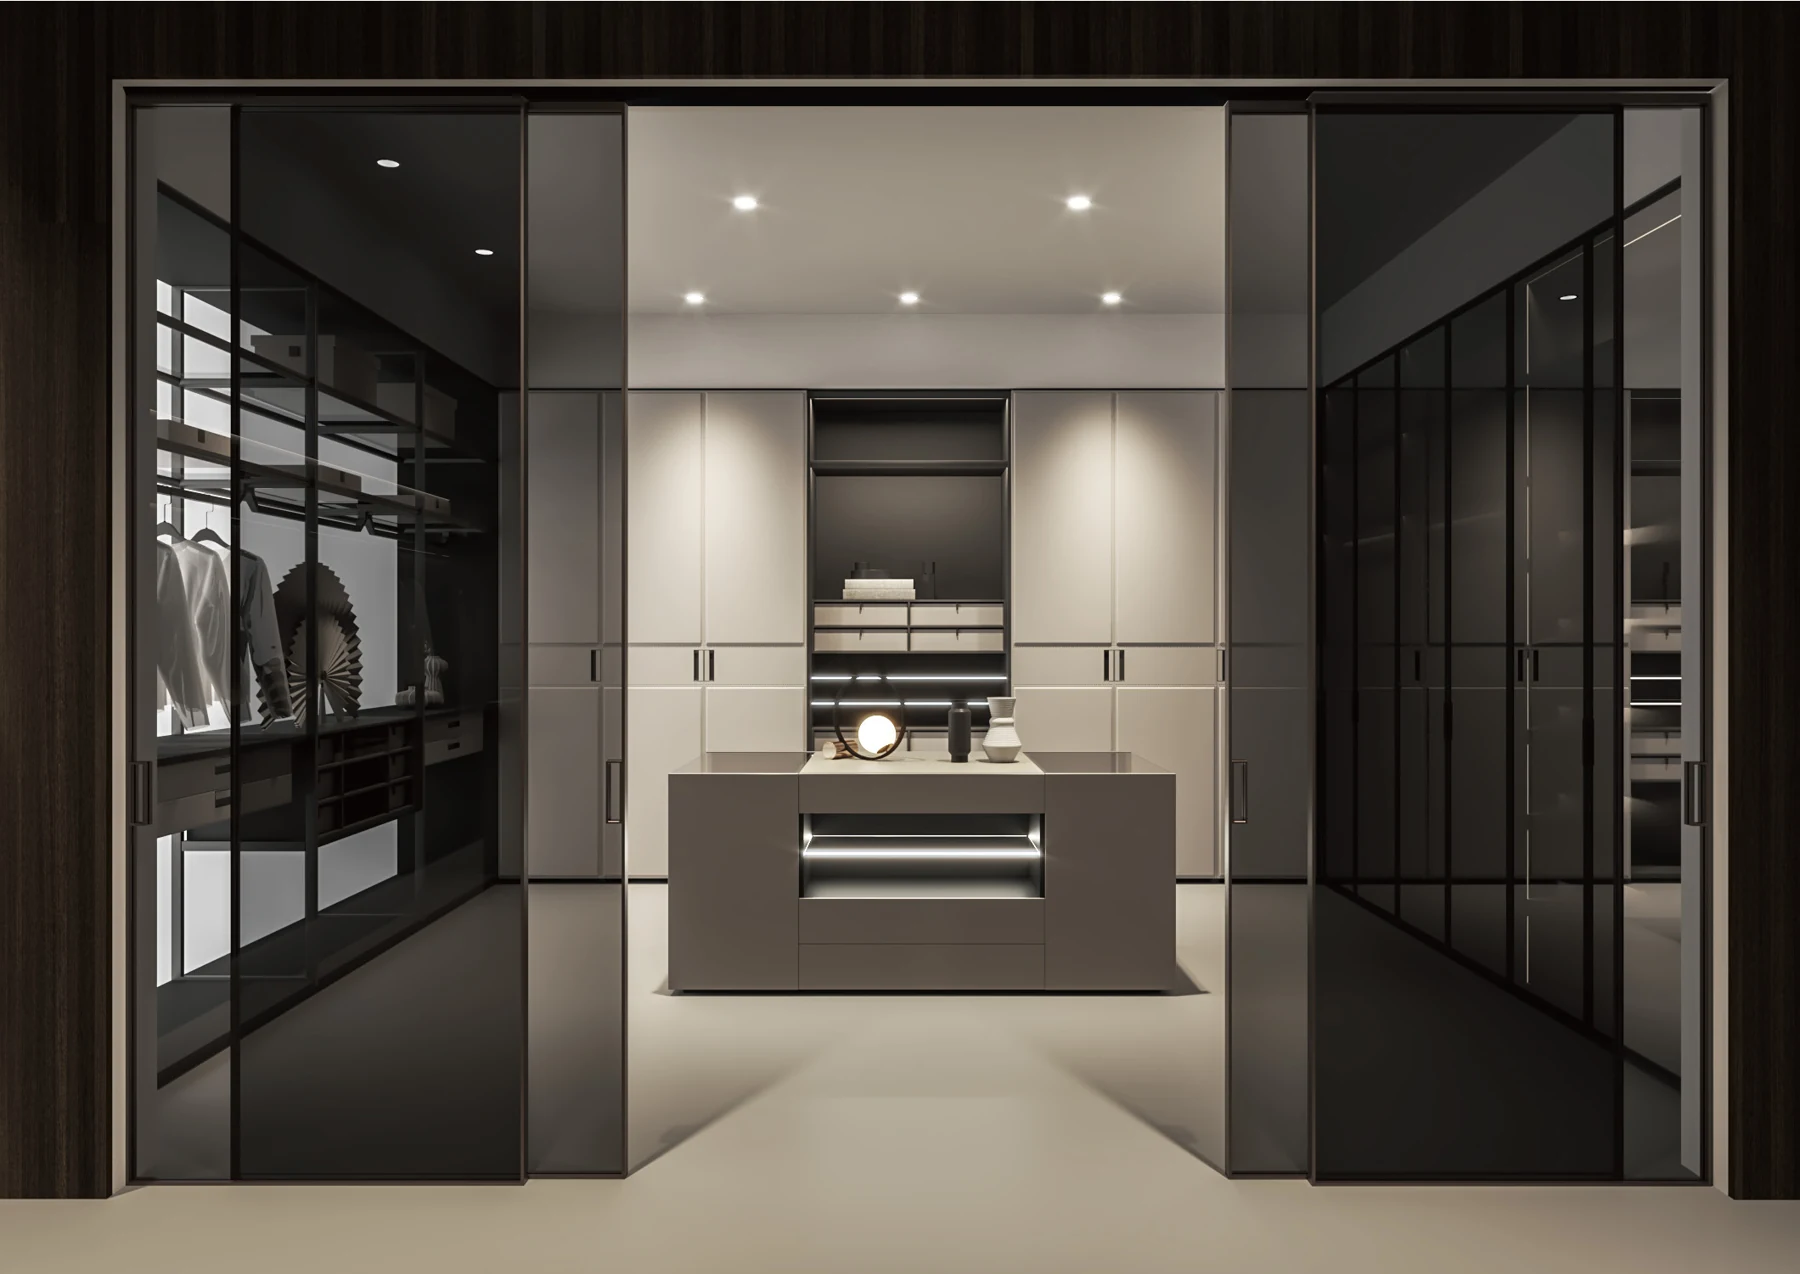
Narrow metal-framed glass wardrobe doors around a dressing island
Design study / narrow framed glass fronts around a dressing island.
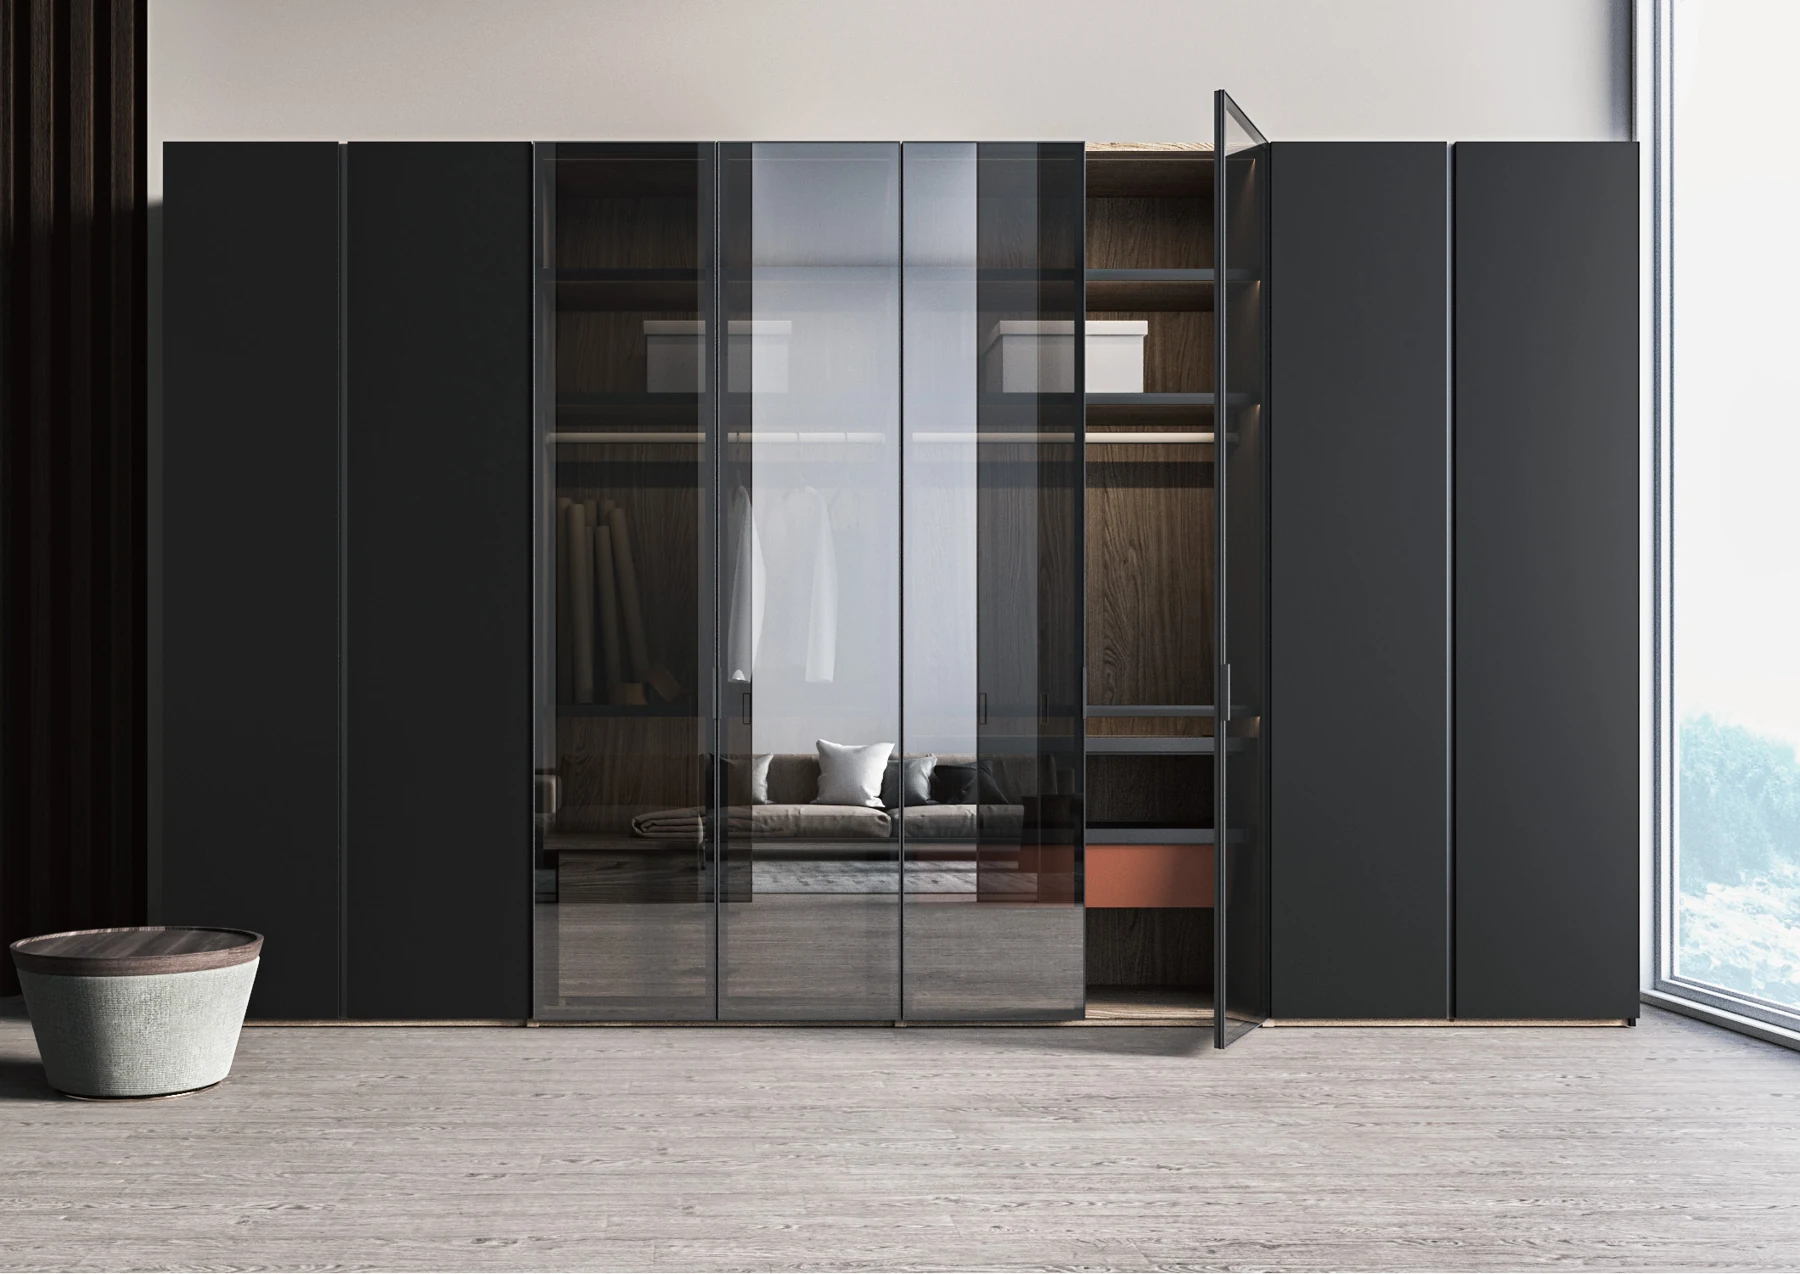
A full-height wardrobe combining dark solid fronts and transparent framed doors
Separate elevation / glass and solid fronts balance display and concealment.
02 / Design direction

Aluminum-framed glass wardrobes

Make the interior part of the room. Fine frames, glass, shelves and light create a visible composition, so the contents matter as much as the doors.

Control the view
Compare clear, tinted or textured glass with a solid-front partner. Review privacy and the actual glass sample under the room lighting.
Compose the contents
Align hanging rails, shelves and drawer fronts with the door divisions. Use concealed compartments for items that should not remain on display.
Coordinate the details
Name the frame finish, glass type, opening system and lighting separately. Keep hinges, wiring, controls and driver access in the drawings.

Design language: Vitrine

Discuss this direction
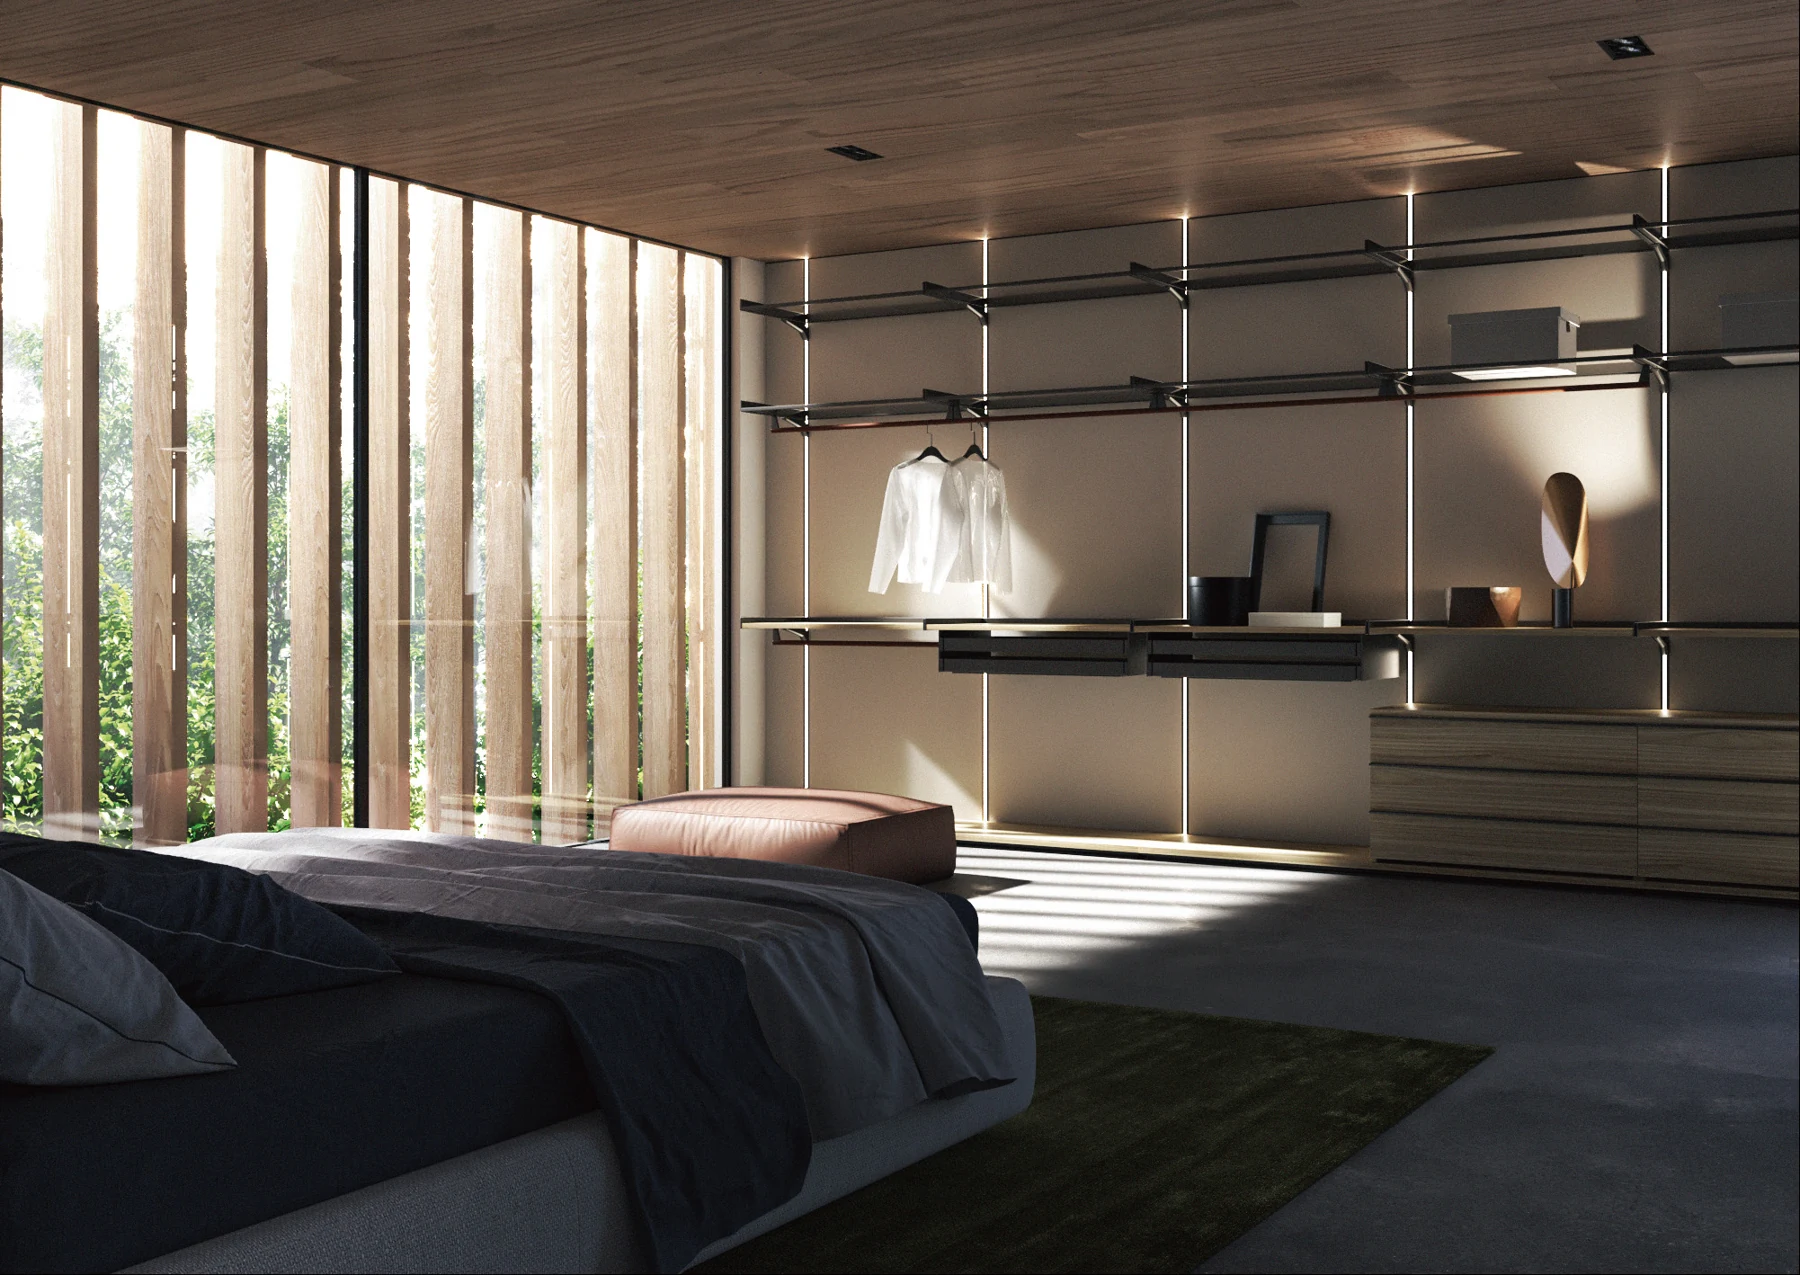
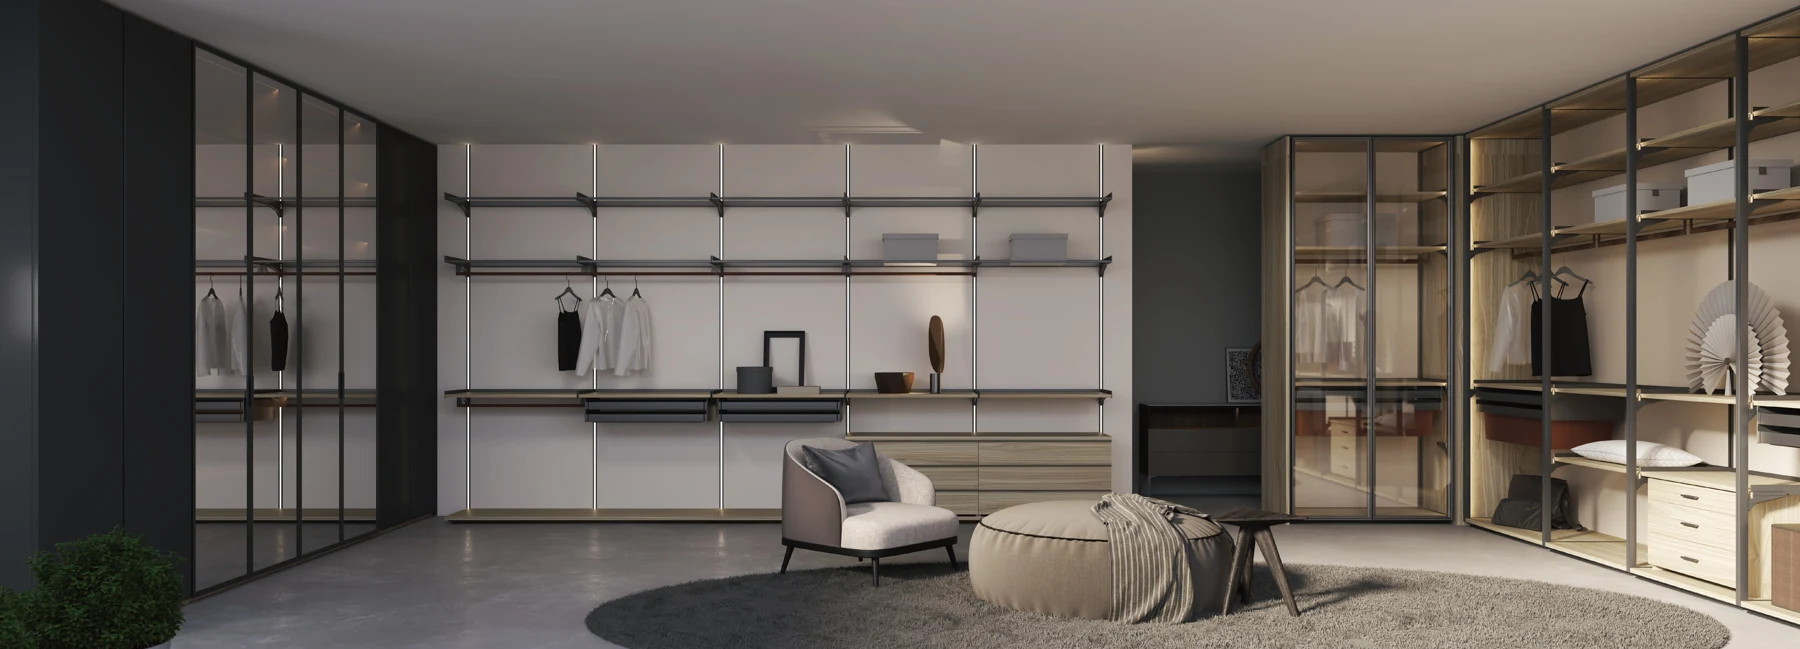
Open wall-mounted shelves, hanging storage and drawers beside a bed
Design study / an open dressing wall beside the bedroom.
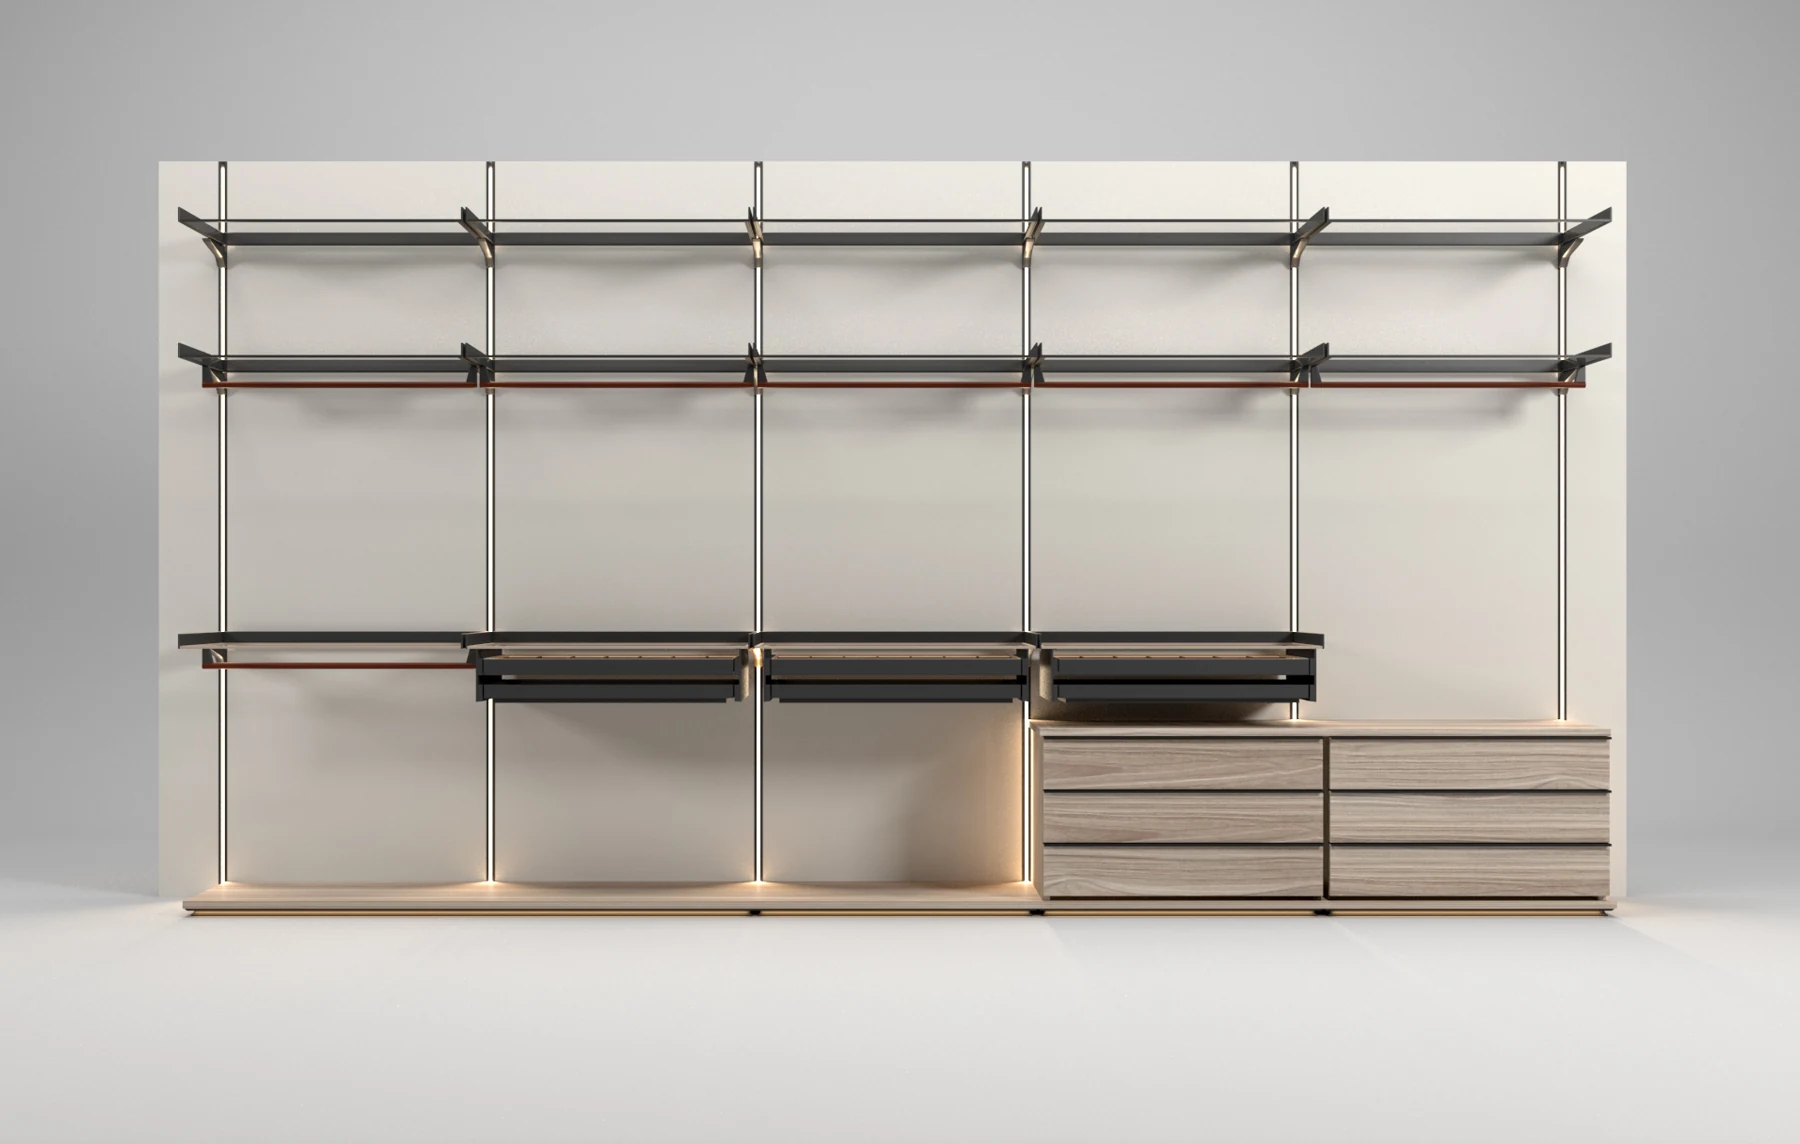
An open wall-mounted dressing elevation with shelves, hanging rails and drawers
Elevation study / a panel background carrying shelves, rails and drawer modules.
03 / Design direction

Wall-mounted dressing systems

Use the wall as the organizing surface. Shelves, hanging rails and drawer modules form an open composition with fewer visible cabinet sides.

Read the structure
This direction is organized around a supporting wall and its attachment system, rather than a row of enclosed cabinet boxes.
Choose the modules
Set hanging lengths, shelf positions and drawers from the clothes and accessories. An open arrangement needs an intentional place for less presentable everyday items.
Resolve the support
Review the wall construction, system fixings and intended loading with the installer. Keep services and lighting components accessible; appearance does not establish a load rating.

Design language: Natural Vitrine

Discuss this direction
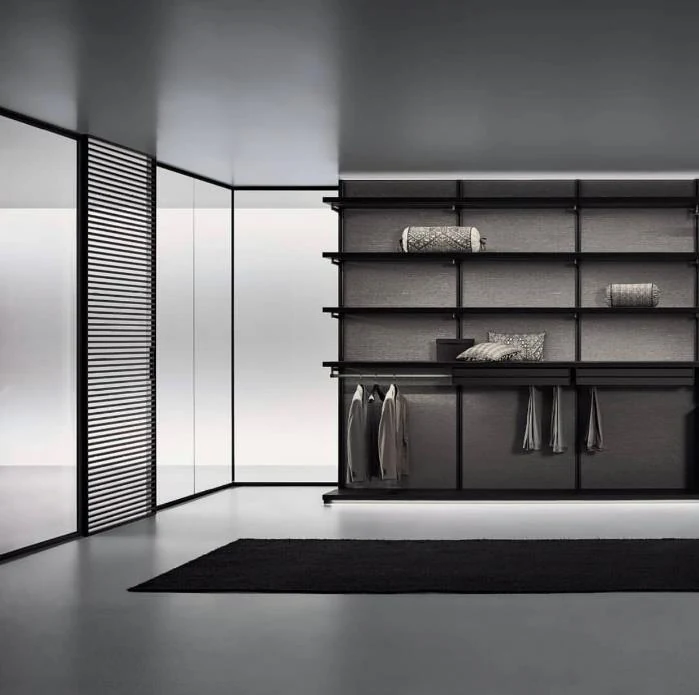
Dark vertical posts supporting open shelves and hanging rails in a dressing area
Design study / vertical metal members organize an open hanging and shelf system.
04 / Design direction

Post-and-shelf wardrobes

Let a visible structural rhythm organize the storage. Vertical posts, shelves and hanging rails make a lighter-looking alternative to enclosed cabinet bays.

Read the structure
Posts establish the spacing of the storage bays. Their actual wall, floor or ceiling connections depend on the selected system.
Balance open and closed
Place folded items and hanging garments in the open zone, with drawers or nearby closed storage for smaller belongings.
Confirm the assembly
Resolve post connections, shelf supports, adjustment, loading and any ceiling interface. Do not assume every post system can stand freely or use the same installation detail.

Design language: Linear Vitrine

Discuss this direction
Wardrobe access / Moving fronts

Compare the opening in a real composition.

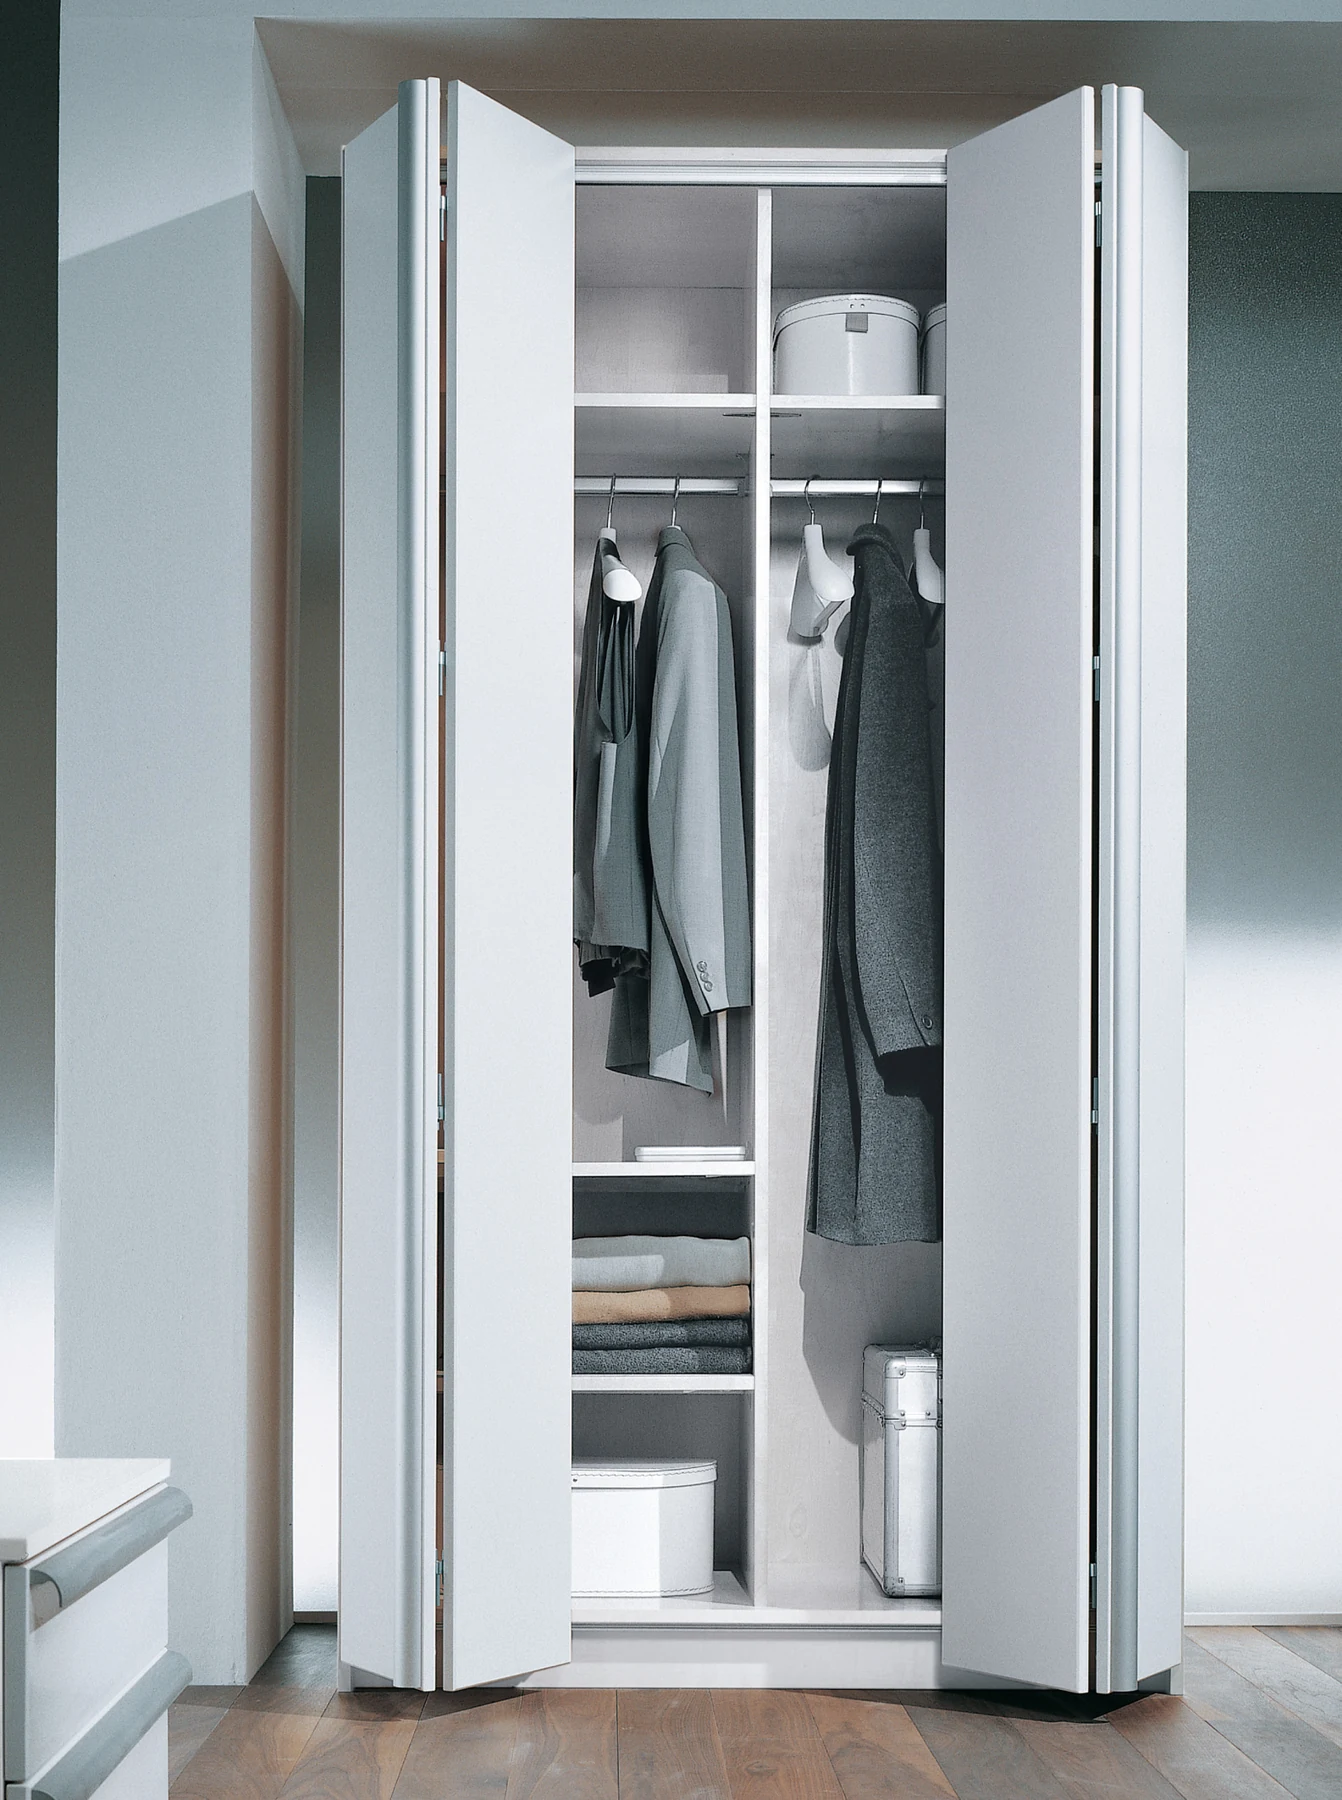
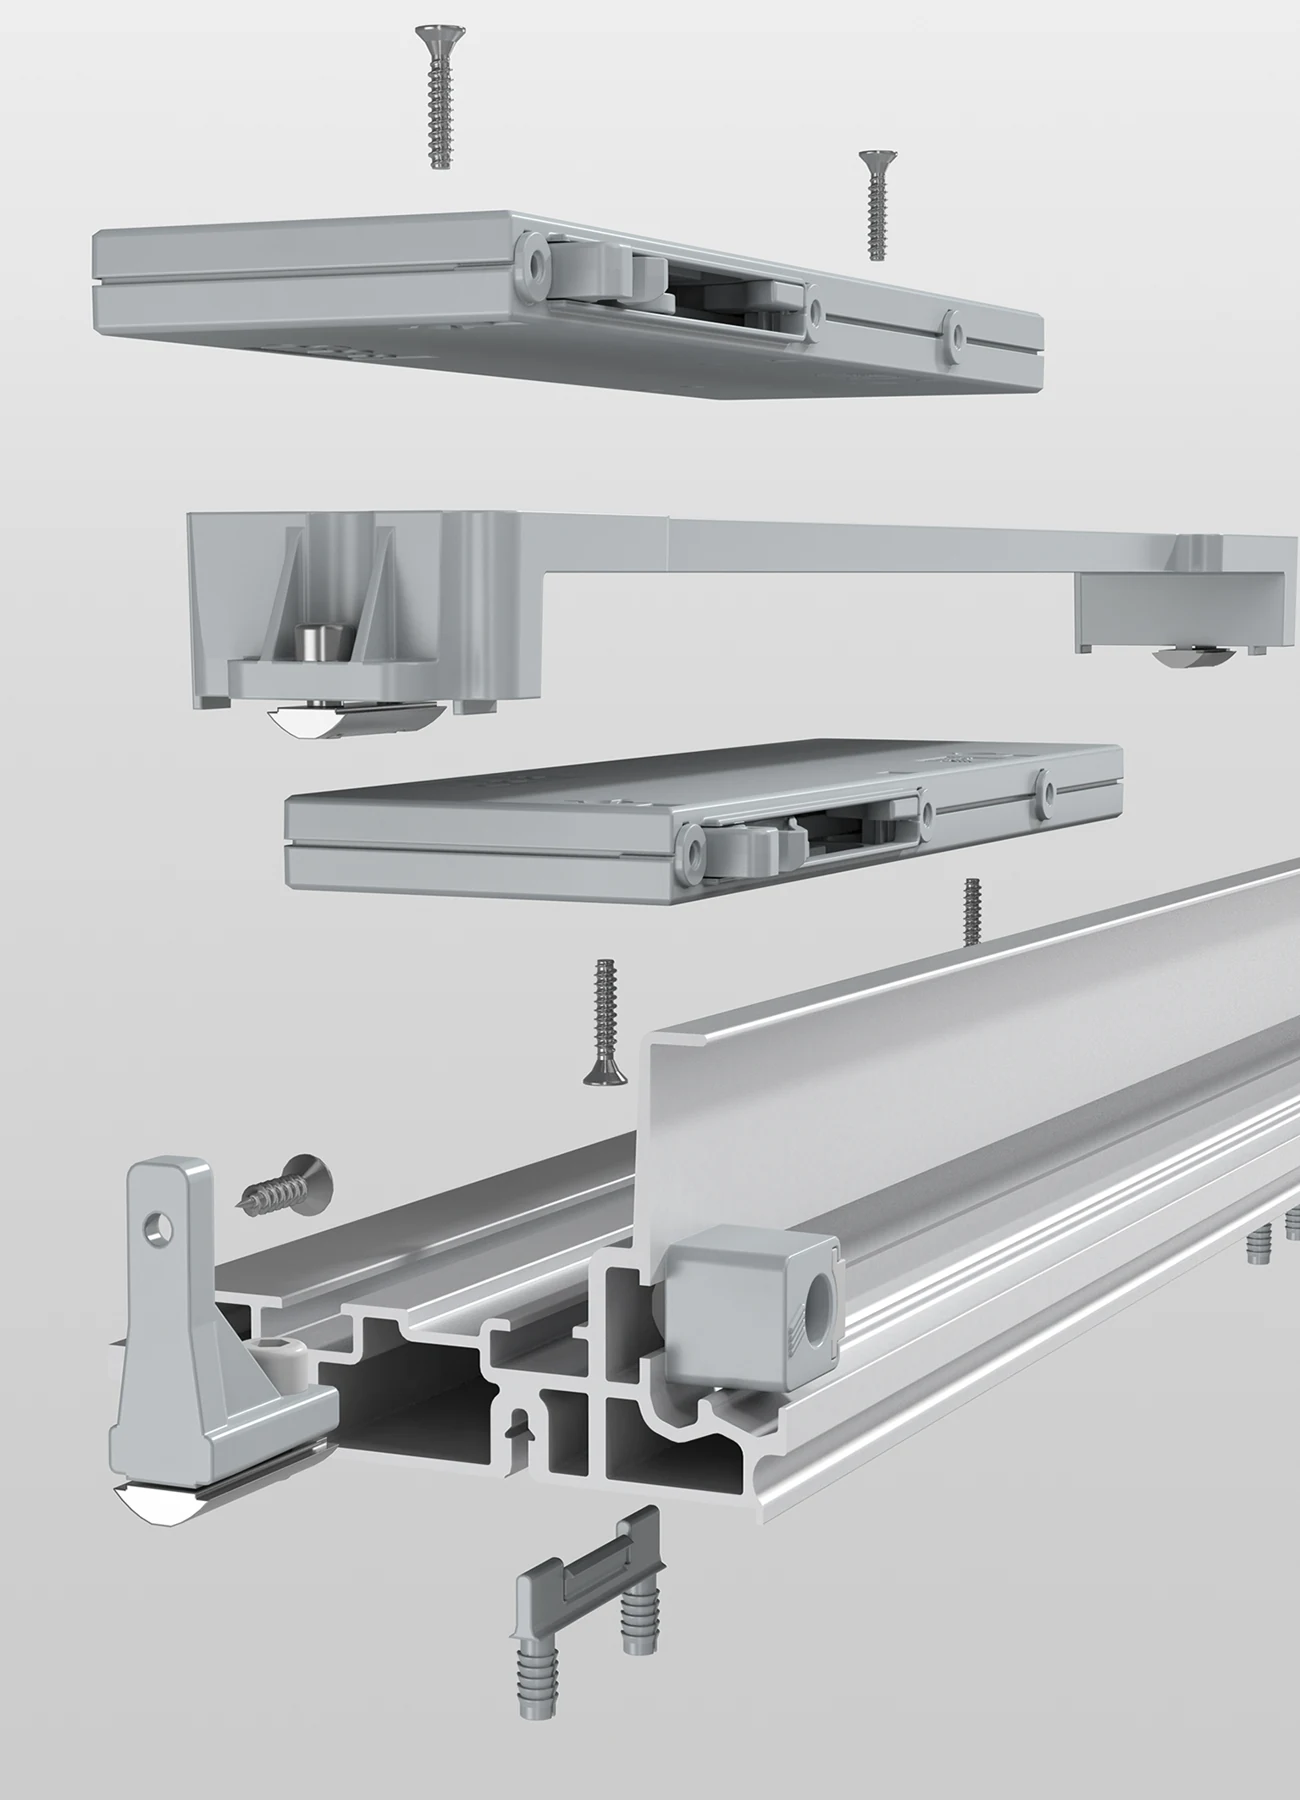
Use the sliding room view, the separate bifold elevation and the component reference to ask different questions about access. The studies do not depict matching open and closed states of one model.

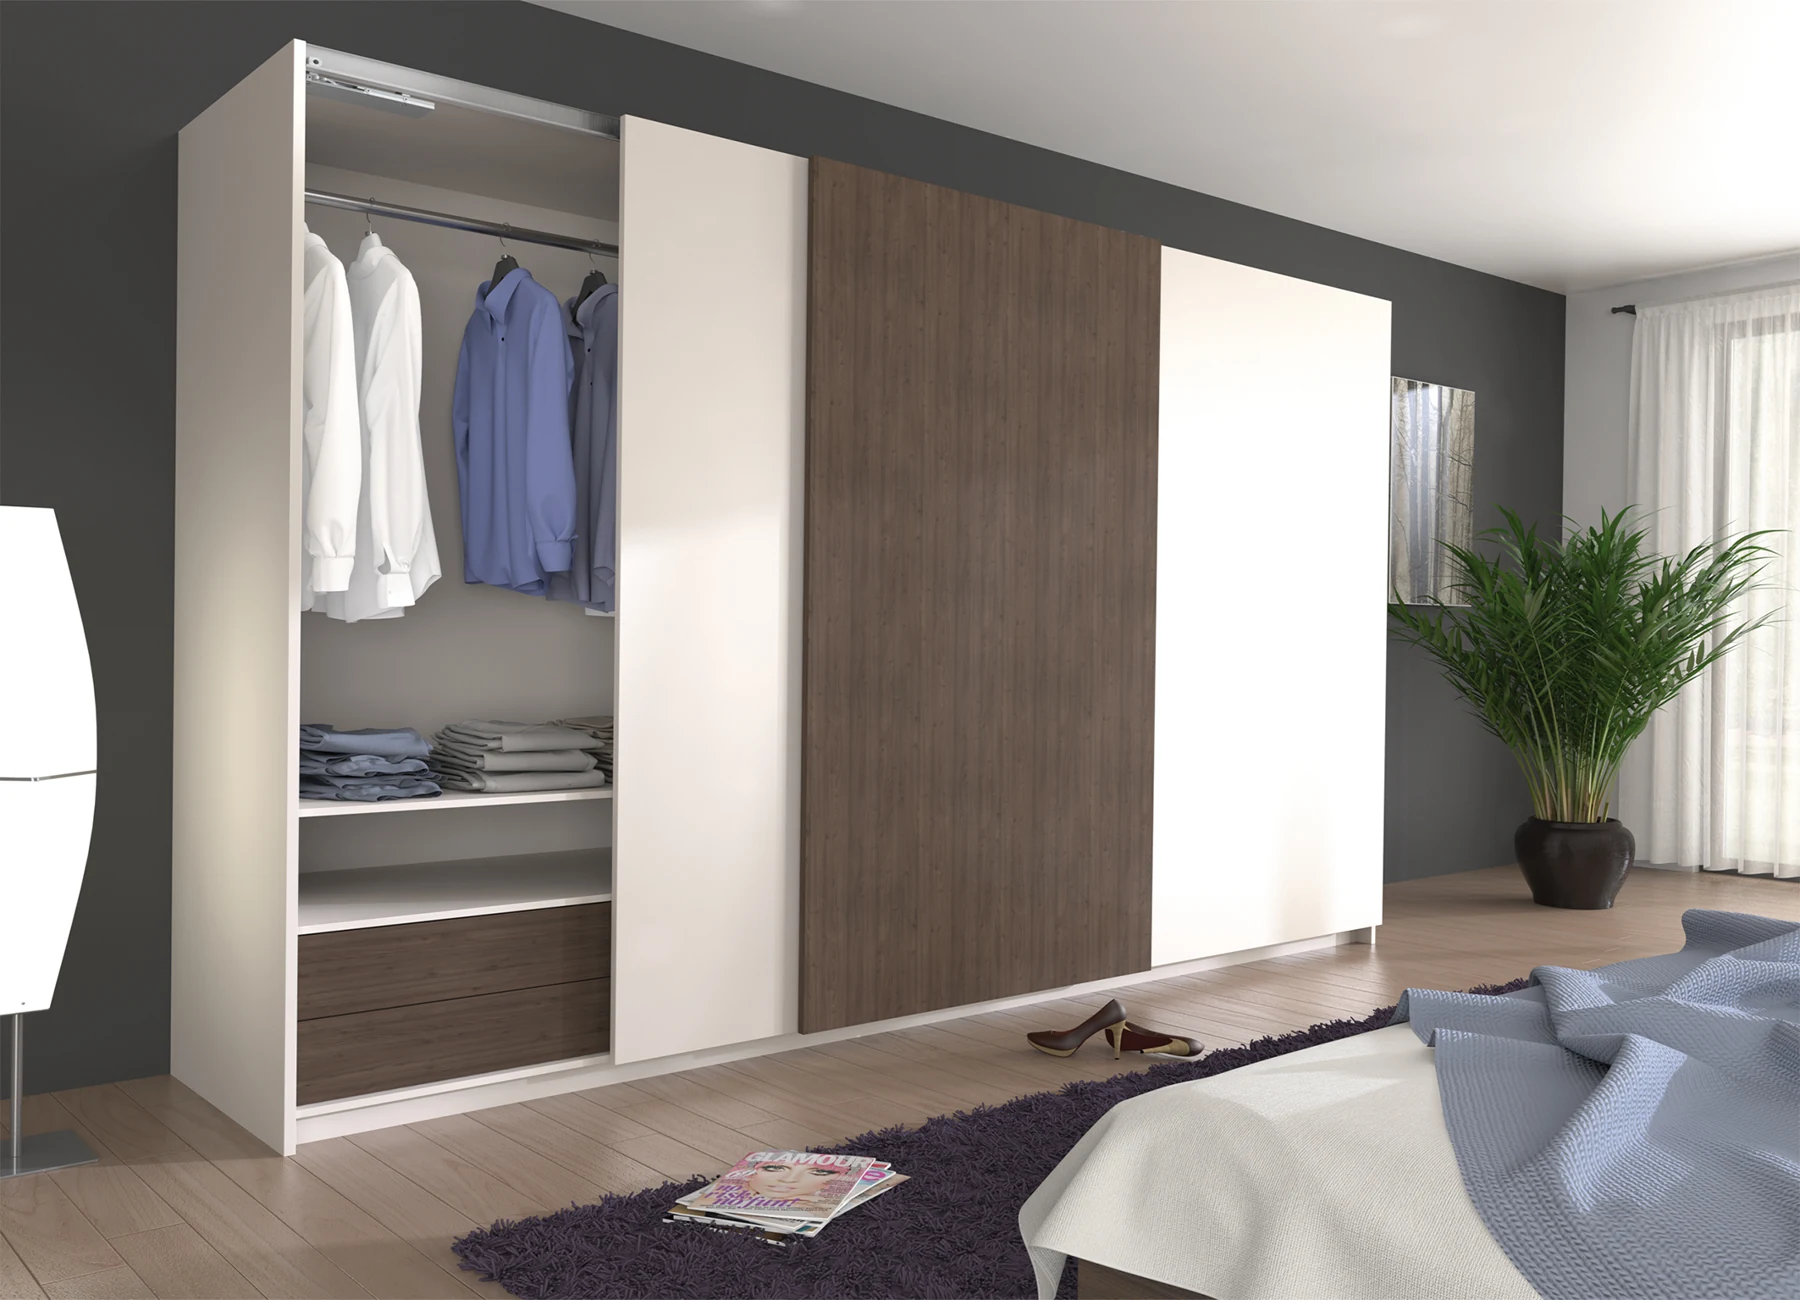
Sliding wardrobe design study with overlapping timber and plain panels, an exposed hanging bay and a visible top track
Sliding wardrobe design study / overlapping fronts and a visible top track beside an open hanging bay.
Bifold wardrobe design study with paired folding leaves opened beside hanging and shelf storage
Separate bifold study / paired leaves fold back beside the hanging and shelf compartments.
Component reference showing a wardrobe sliding track, roller assemblies and fixing screws
Separate component reference / track, roller and fixing arrangement; hardware suitability requires project review.
05 / Design direction

Folding and sliding wardrobes

Choose the movement around the room and the interior. Sliding fronts overlap across the elevation; folding leaves gather to the sides. Both change how much of the wardrobe you can reach and how the opening meets nearby furniture.

Compare access, not just appearance
Mark which hanging bays, drawers and shelves need access together. Check the leaf positions against the usable interior, lighting and any pull-out fittings.
Allow for the movement
For sliding doors, review track arrangement, overlap, panel alignment and service access. For folding doors, review the fold, stacking position, grip and the clearance beside furniture and adjacent walls.
Match hardware to the actual door
Confirm the opening, panel construction and dimensions with the selected hardware documentation. The track reference is separate from the room studies and does not establish a model, load rating or universal fit.

Design language: Frame Vitrine

Discuss this direction
Dressing rooms / Central storage

Dressing islands,
with storage in view.

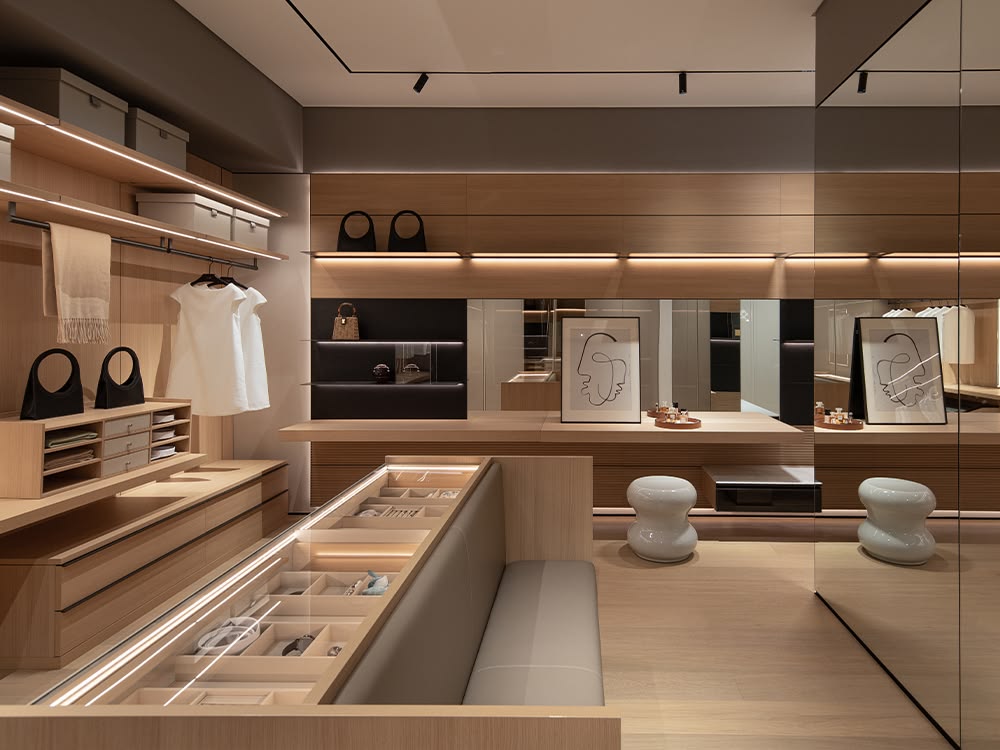
Bring small items into the room plan. A glazed display counter, a drawer island and a divided accessory tray solve different tasks; choose the contents and the access before deciding how much central furniture the room can hold.

Wardrobe reference with a glass-topped accessory island, illuminated shelves and a dressing counter
Design study / a glazed display counter with divided storage, open bag shelves and a dressing seat.

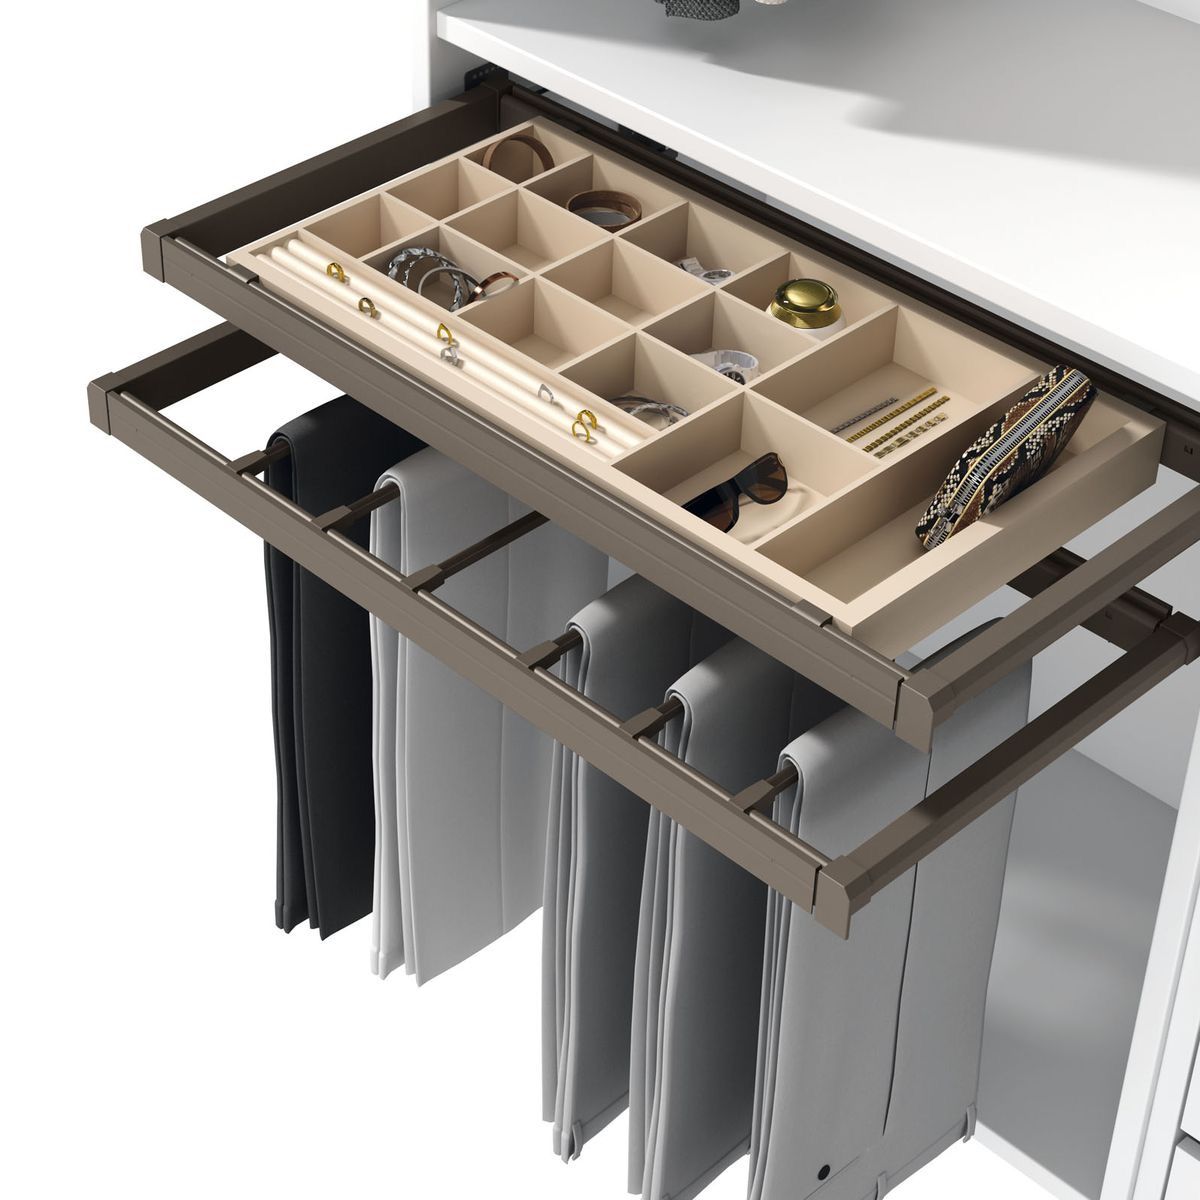
A glazed top, an organized interior.

A visible tray can keep jewelry and small pieces in view. Plan the compartment sizes, access, lighting and the finished edges; confirm the actual glazing and lining with the selected component.

Cream wardrobe island with several open drawers for small accessories and folded items
Separate design study / open island drawers with bag and shoe shelves behind.

Drawers for what you put away.

Map the contents before choosing the drawer divisions. Check the open drawer against the room route, neighboring wardrobe doors and the standing position beside the island.

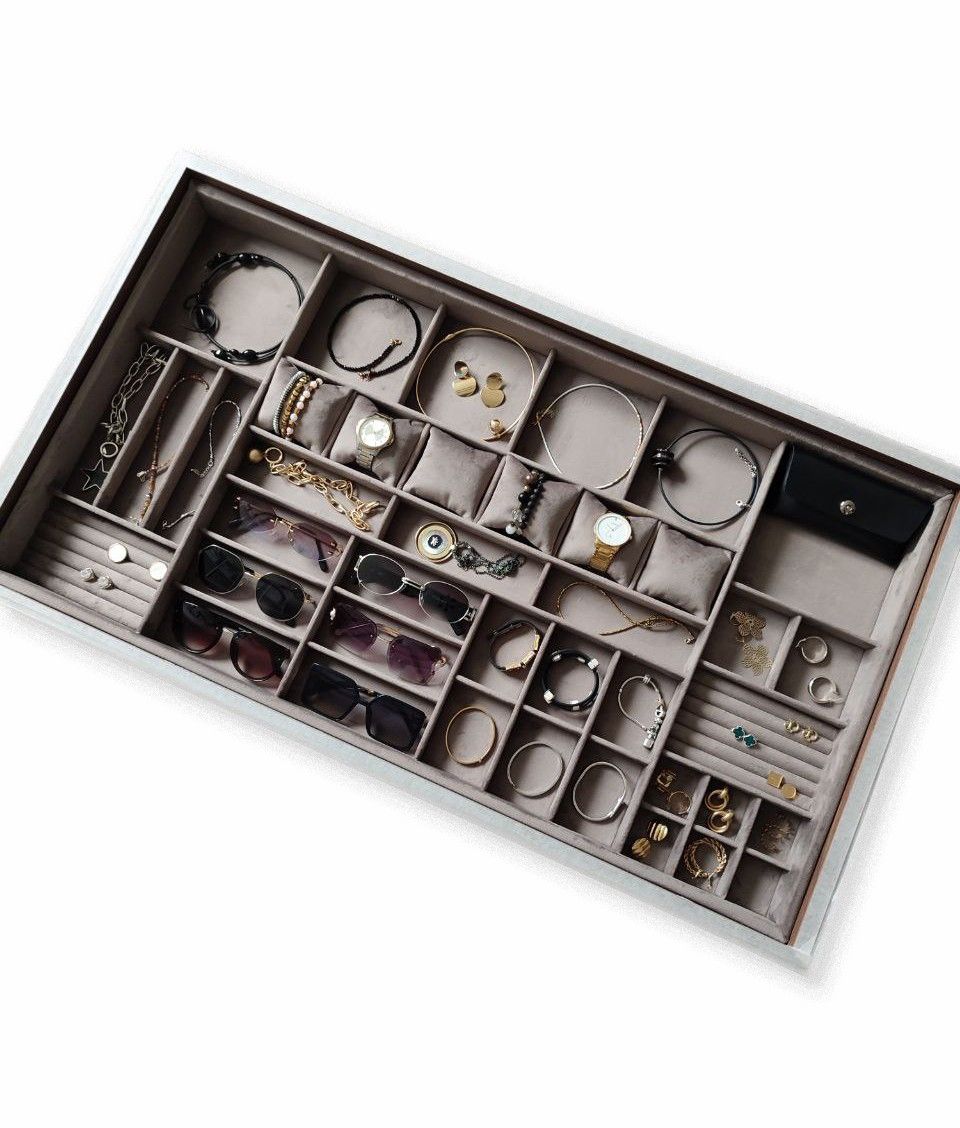
Shallow compartmented drawer tray holding watches, jewelry, eyewear and small accessories
Separate component reference / a divided tray for rings, watches, bracelets, glasses and other small items.
From the item to the compartment

Dressing islands and accessories

Jewelry, watches and glasses
List the items, their sizes and how often they are used. Choose dividers and a suitable lining from the actual product options; allow access for removal and cleaning.
Bags and shoes
Decide what belongs on visible shelves and what should be enclosed. Review the height and depth of the actual pieces, lighting, shelf support and care information. The bag and shoe shelves in the drawer study are a separate reference from the glazed counter.
The counter and its surroundings
Coordinate the visible top, fronts, frame, handles and drawer interior with the surrounding wardrobe. A wood-tone or pale surface in a photograph does not establish its material construction.
Compare the access

Three ways to organize the dressing routine.

An island is optional. A shallow tray, a central drawer unit or storage along the wall can be the more useful starting point, depending on the room and the contents.

Glazed displaySee the small items

Best starting point

A visible, compartmented counter for selected pieces and a deliberate display area.

Decision to resolve

Glazing, tray layout, lighting, lining, access and cleaning; approve the actual component.

Drawer islandSeparate and put away

Best starting point

Several categories organized in closed drawers, with a surface for laying out clothes or accessories.

Decision to resolve

Drawer functions, opening travel, counter edges and the route between the surrounding wardrobe bays.

Wall storageKeep the center open

Best starting point

Accessory drawers, bag shelves and shoe storage contained within the wardrobe elevation.

Decision to resolve

Usable bay access, shelf spacing, door movement and an appropriate place to stand and use the fittings.

These are separate design studies, not matching open and closed states of one model. The existing room-layout studies show how an island sits among the wardrobe bays. Materials, fittings, dimensions and project suitability are confirmed individually.

02 / Compare the access

The door changes
how the inside works.

Hinged, folding and sliding fronts give different access to the same storage volume. These plan concepts explain movement; they are not fabrication drawings or confirmed hardware models.

Folding fronts

Paired leaves fold together. Reserve their projection and gathering space.

Sliding fronts

Panels travel across one another. Plan the overlap and the bay that stays covered.

HingedA leaf swings into the room

Best starting point

Direct access to an individual bay with a clearly defined door swing.

Decision to resolve

Clear the swing and handle past beds, adjacent doors and fully extended drawers.

FoldingPaired leaves gather together

Best starting point

A wider access strategy where connected leaves fold toward a side.

Decision to resolve

Confirm the actual mechanism, folded leaf projection and the space needed for the leaves to gather.

SlidingFronts overlap on tracks

Best starting point

A room where door swing is limited and partial access is workable.

Decision to resolve

Coordinate tracks, overlap and drawer positions. The entire interior is not necessarily accessible at once.

03 / Plan the interior

Give each category
a useful place.

Count the garments and accessories before setting the doors. Clear internal space, daily reach and unobstructed access matter more than an outside cabinet dimension.

01

Hanging & folded storage

Separate long garments from shirts and jackets. Set shelf pitch from folded clothing, bags and shoes; record the usable space after panels and hardware.

02

Drawers & accessories

Choose divided trays, trouser rails or baskets around actual contents. Check that every pull-out can extend past the selected front and handle.

03

Light & maintenance

Locate controls, sensors, cables and accessible drivers. Review the actual finish and glass sample under the intended light.

Explore wardrobe organization · Read the wardrobe layout guide

04 / Make room for dressing

A room to move through.

An island is one layout choice. Keep the route between wardrobe bays, opened doors and drawers clear before adding a dressing counter or central storage.

Connected, with different structures

Use Natural for a wood-led background, Linear for quiet fronts, or Vitrine for framed glass and display. The finish language can connect different storage systems.

Bedroom to dressing room

Coordinate the boundary with doors and glass partitions, and align the background with wall panels. Review privacy, daylight and the route through the room.

What is the difference between a wardrobe and a dressing system?

A wardrobe commonly organizes storage within cabinet bays. An open dressing system may use wall-mounted components or posts and shelves. The visible structure and supporting assembly differ; neither name fixes a universal specification.

Should I choose glass or solid fronts?

Glass makes the contents and lighting part of the room. Solid fronts create a calmer, more concealed elevation. A mixed arrangement can separate display from everyday storage; compare actual finish and glass samples.

Are open wardrobes suitable for every bedroom?

Consider dust, daylight, visual privacy and how regularly the contents can remain organized. Open bays can be combined with drawers or closed storage rather than used everywhere.

Does a dressing room need an island?

No. Start with the usable room route and the storage you need. Review the island footprint, drawer travel, wardrobe doors and standing positions together; wall-based accessory storage may suit the plan better.

Can the accessory tray be specified separately?

Use the tray as a component reference. Record its dimensions, divisions, lining, support and access with the actual drawer or counter. The photograph does not establish universal fit or a hardware specification.

What information starts a wardrobe inquiry?

Send the room plan and elevations, photographs, garment and accessory requirements, preferred structure and project destination. Include nearby furniture, opened doors and any lighting or island in scope.

Your project / From reference to specification

Start with the room and the contents.

Share the arrangement, the wardrobe direction and what it needs to hold. Include the access requirements and the details you want to compare.

01

Share the room

Send a floor plan, elevations, room photographs and the project destination. Identify the openings, services and adjoining cabinetry.

02

Choose the direction

Name the product form, opening or storage needs, visual references and preferred collection. Include the details you want to compare.

03

Resolve the specification

Review construction, samples, hardware, installation interfaces and project scope before a quotation or technical approval.

All images on this page are design studies. They illustrate design directions and are not presented as Arcaya completed projects or confirmed stock models. Available configurations and project suitability are reviewed individually.

Keep the home in conversation

Connect the wall, the opening and the furniture.

Six collections · Materials & finishes · Whole-home cabinetry

Start a project brief