Custom cabinetry, specified for professional projectsSpecification guideFor the tradeStart a project
ARCAYACABINETRY
Start a project
MenuClose
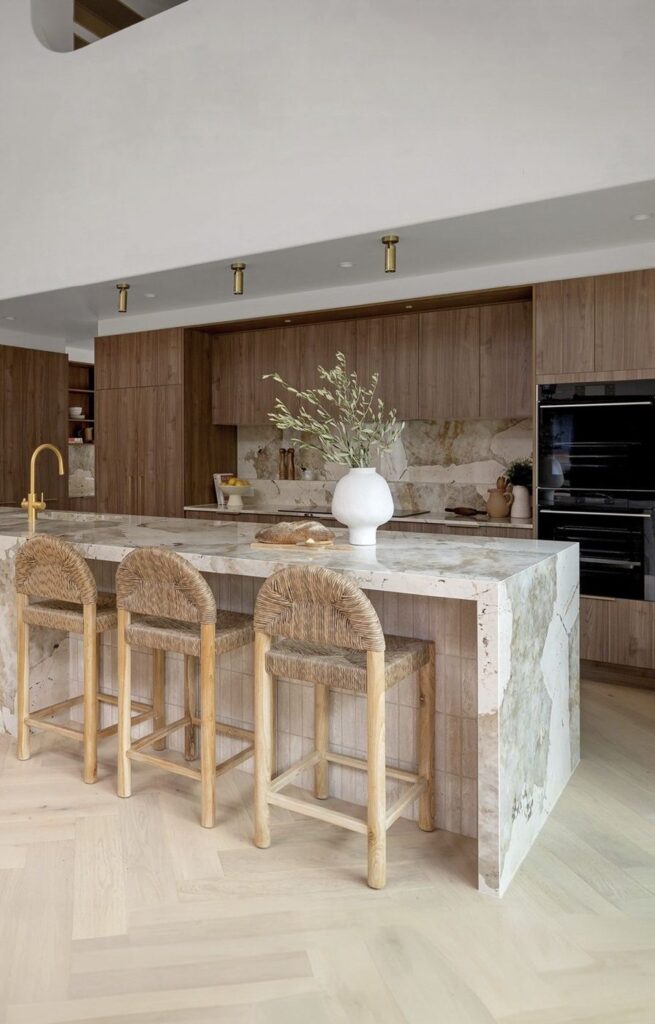
Kitchen with a long island, built-in banquette and pendant lights
Kitchen collections / Five design directions

A kitchen with character. A specification with clarity.

Explore flat fronts, wood veneer, metallic-effect lacquer, mica effects and classic framed doors. Compare the room, the surface and the storage, then shape the kitchen around your project.

Start a project brief
Design reference / Kitchen island, banquette seating and integrated cabinetry
Kitchen collections / Find your starting point

Five directions.
Many ways to combine them.

A door form and a surface are different choices. A flat-front kitchen can use veneer or a mica-effect finish; a framed door can be restrained or more decorative. Compare the visible character, then develop the construction and storage.

Flat-front kitchensA quiet, continuous elevation

Start with the composition

Start with broad, plain fronts and aligned cabinet divisions. A flat front is a door form; plain color, veneer or an effect finish can sit within that form.

View the room and details

Resolve before specification

Agree the opening detail, front divisions and exposed ends before choosing the supporting panel and surface.

Discuss this direction
Wood-veneer kitchensA grain-led composition

Start with the composition

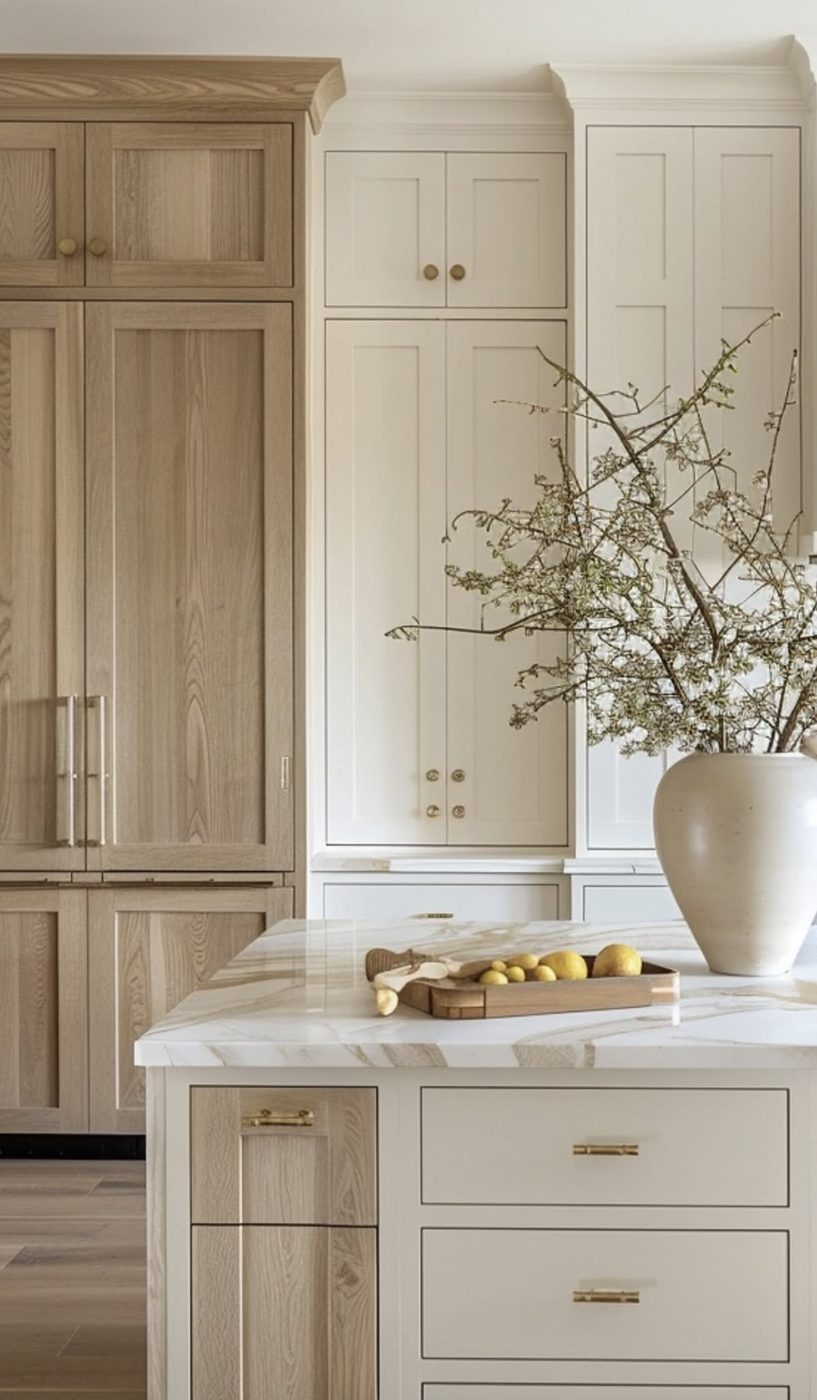
Let grain direction and matching connect the tall fronts, island and visible ends. Use a quieter plain finish where you want the timber to remain the focus.

View the room and details

Resolve before specification

Approve the veneer cut, matching sequence, edge treatment, finish and actual sample. Screen images do not establish a species or a supply option.

Discuss this direction
Metallic-effect lacquer kitchensReflective depth and contrast

Start with the composition

Consider a metallic appearance alongside warm edges, dark glazing or a restrained countertop. This describes a finish effect, not solid titanium.

View the room and details

Resolve before specification

Review the coated sample in the room lighting, then resolve sheen, edge detail, substrate, hardware and care information.

Discuss this direction
Mica-effect kitchensFine texture across a simple front

Start with the composition

Compare a subtle mineral-like surface with darker island fronts and clear cabinet lines. The effect can add variation without a strongly figured wood grain.

View the room and details

Resolve before specification

Confirm the actual decorative surface, substrate, texture, edge and care requirements. The name does not establish natural mica content.

Discuss this direction
Classic framed kitchensCharacter in the outline and proportions

Start with the composition

Use the door frame, panel depth, glazed cabinets and room detailing to set the level of ornament. Framed appearance and cabinet construction are separate decisions.

View the room and details

Resolve before specification

Review frame proportions, drawer divisions, handles, cornice and end treatment together. Confirm inset, overlay or face-frame construction separately.

Discuss this direction
Kitchen cabinetry / Design directions

Start with the front.
Plan the whole kitchen.

Compare flat-front and classic framed compositions through room views, separate detail studies and the decisions behind the appearance.

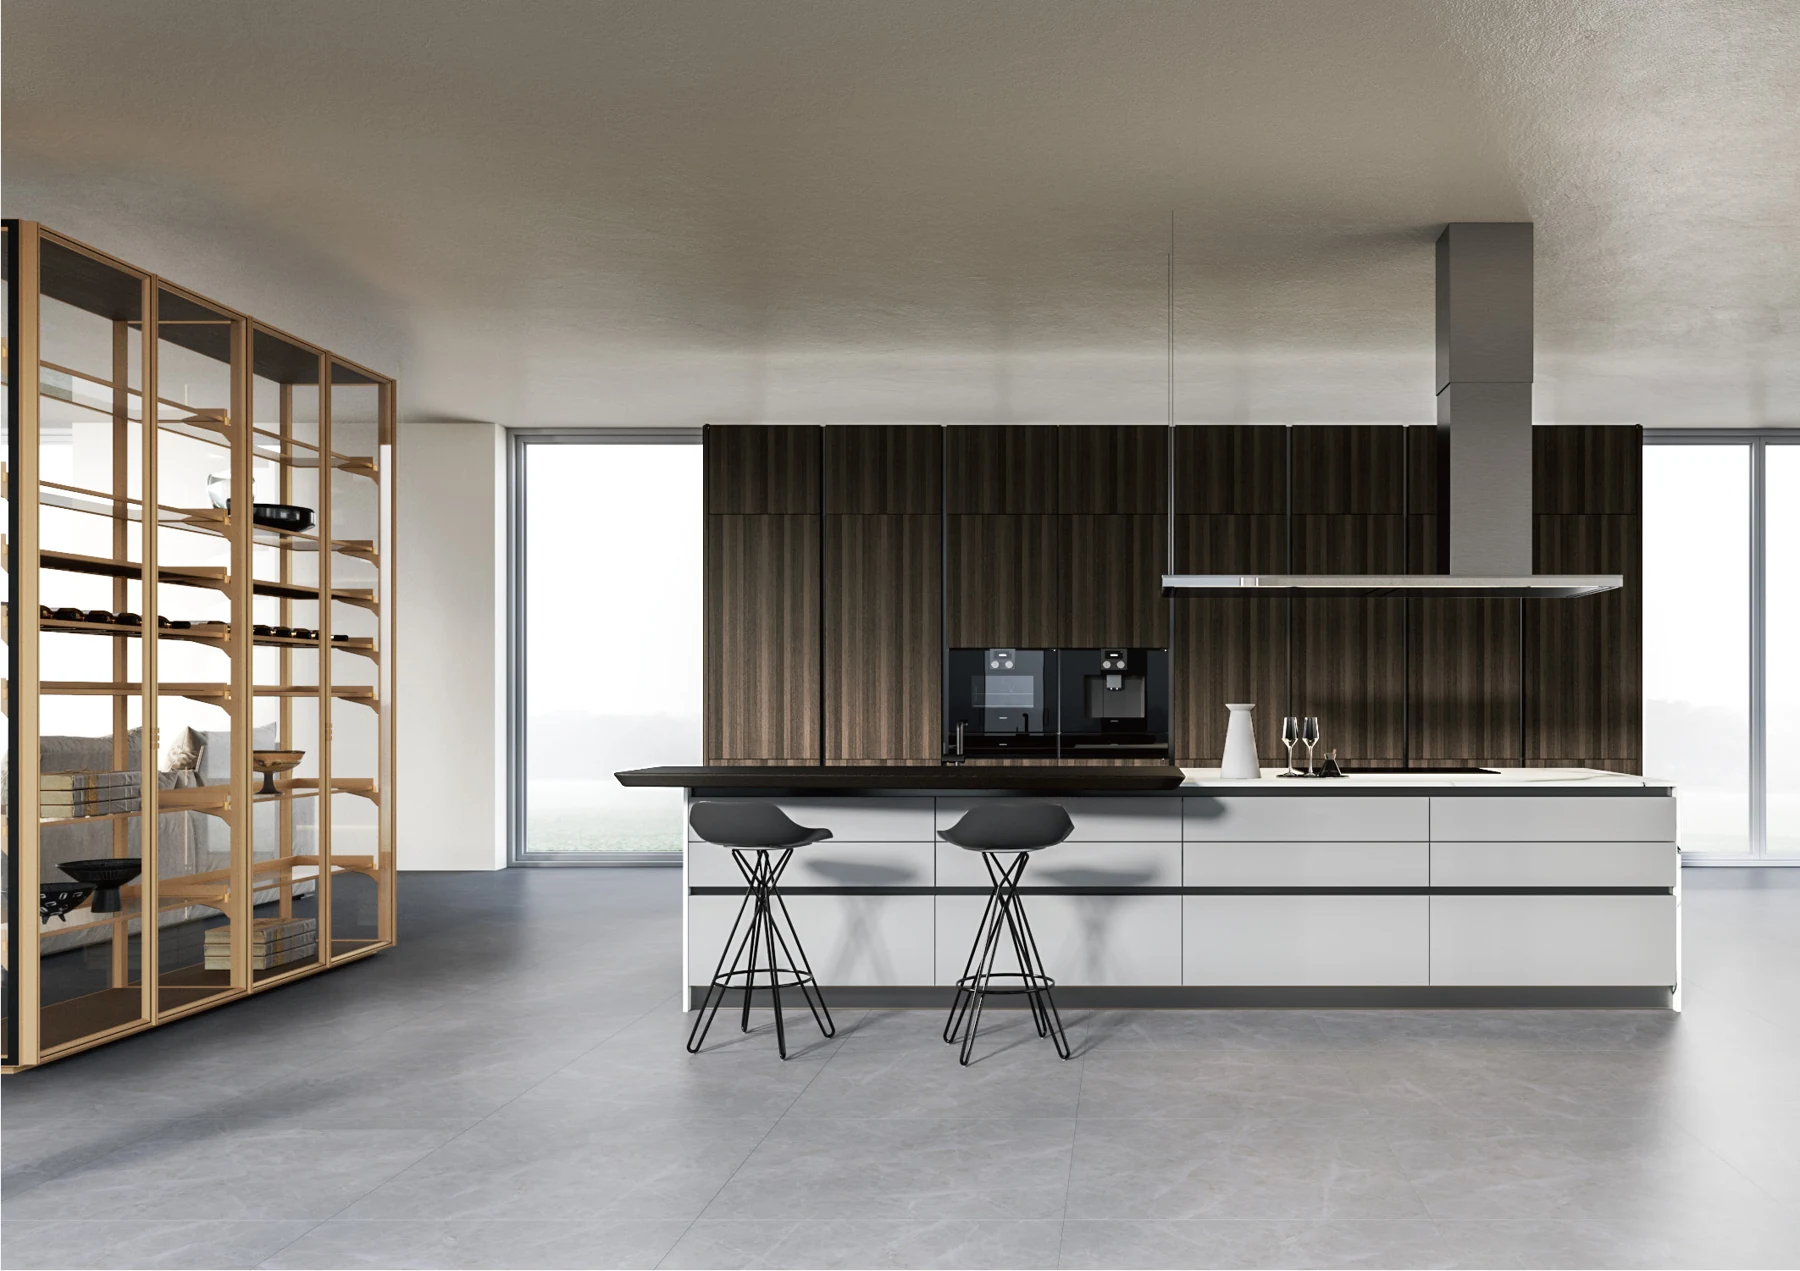
A kitchen with broad flat-front island drawers, a timber background and framed display storage
Design study / flat island drawers, a timber background and glazed display storage.
Flat white island fronts with dark horizontal opening lines and a stone-look end
Separate island study / broad white fronts and horizontal opening lines.
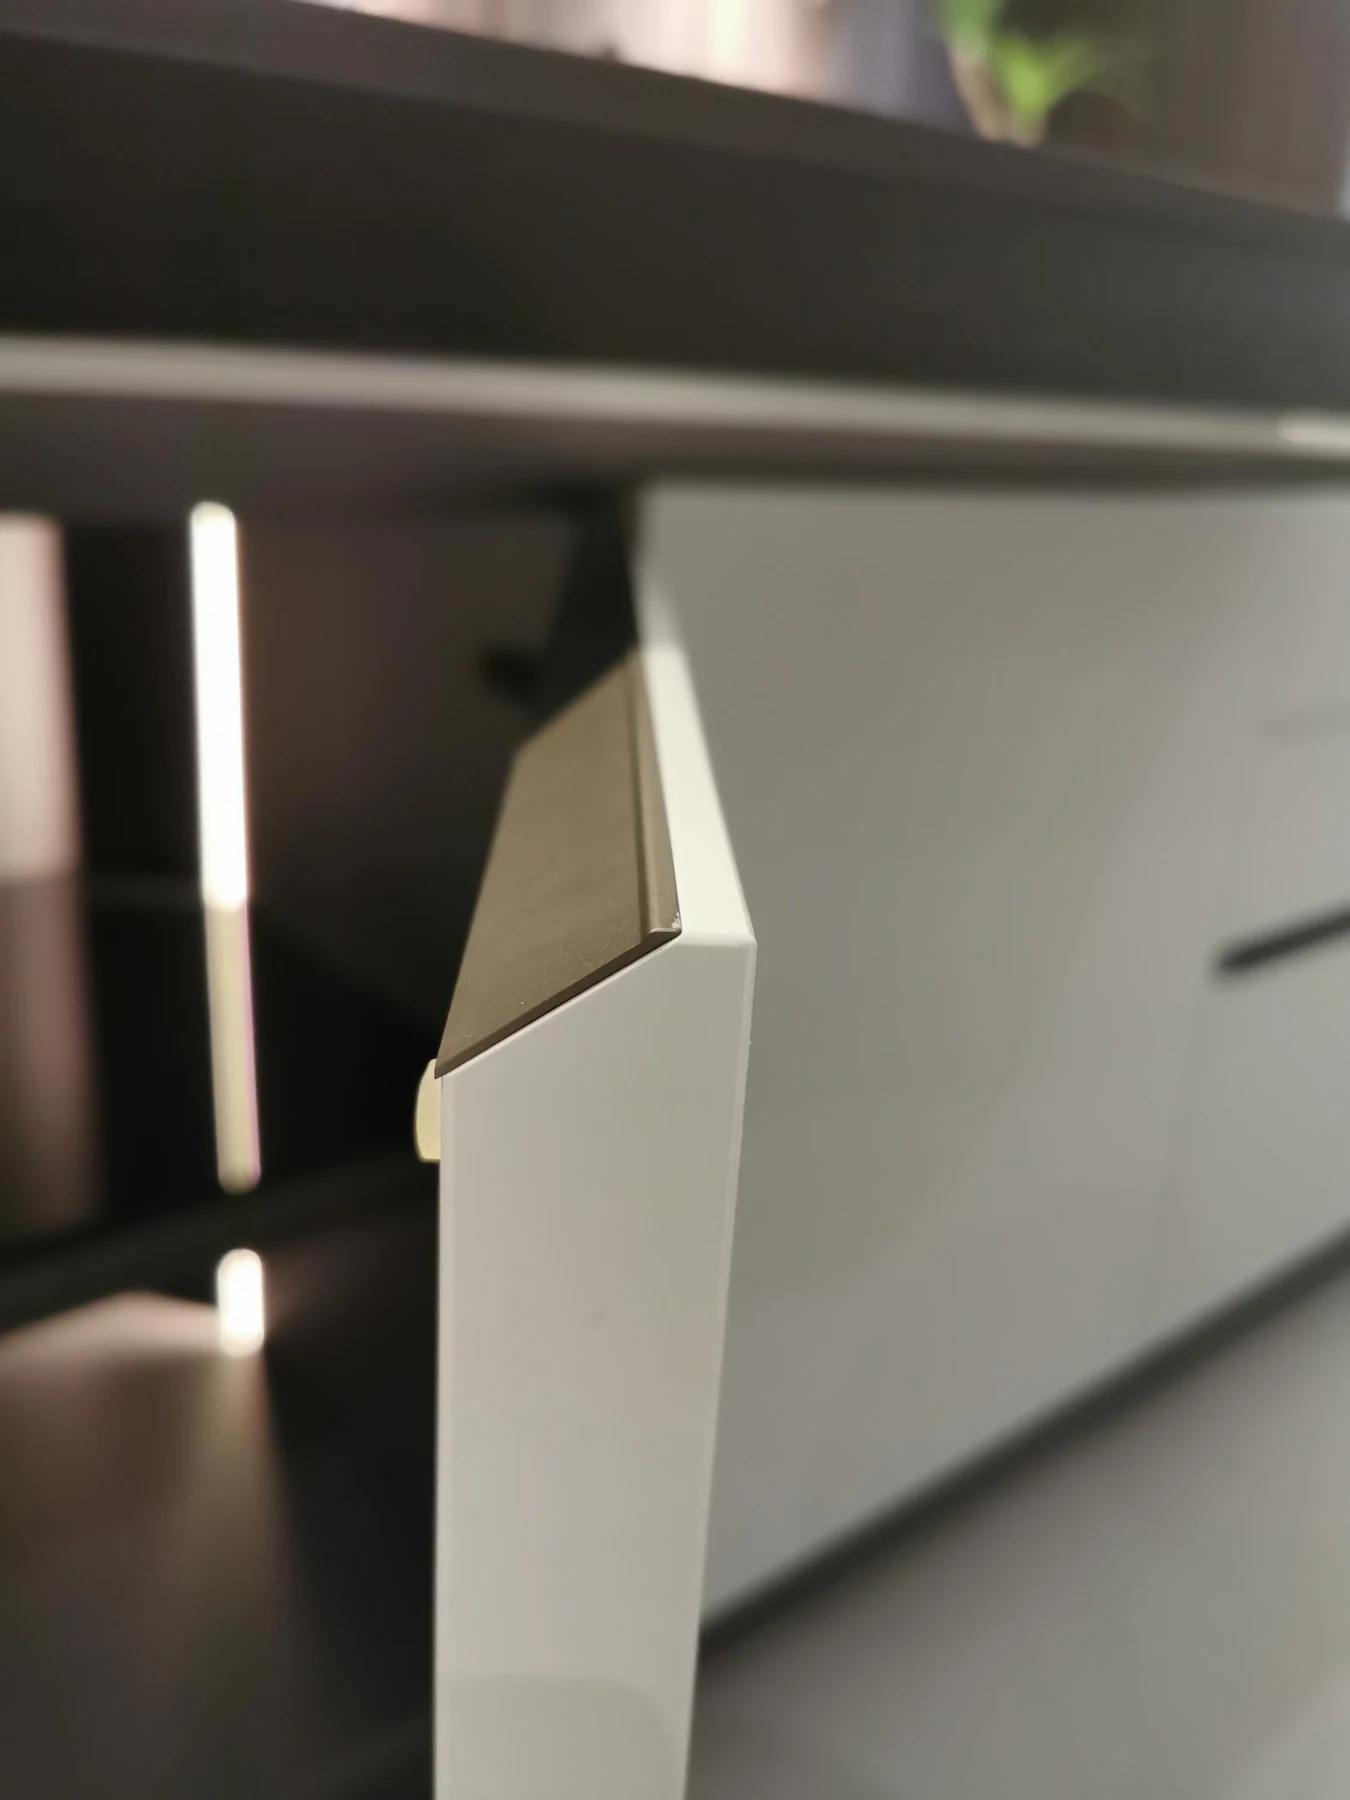
Close view of a flat cabinet front with a contrasting metal-tone edge opening detail
Separate component reference / a flat front and a contrasting edge-opening detail.
01 / Design direction

Flat-front kitchens

Let the alignment of the fronts organize the kitchen. Plain surfaces, wood-led backgrounds and framed display can work together without changing the basic flat-front language.

Read the elevation
Align drawers, tall doors, appliance fronts and visible end panels. A flat face describes the appearance, not a particular cabinet core or finish.
Choose the opening
Compare a visible pull, an edge detail and a recessed profile. Review hand access, working gaps and how the selected mechanism affects the usable interior.
Plan what is behind it
Set the appliance schedule, drawer functions and pantry access before finalizing the front divisions. Plain color, veneer and metallic effects remain separate surface choices.

Design language: Linear

Discuss this direction
A pale framed kitchen with an island and open display bay
Design reference / framed kitchen fronts and a restrained island composition.
A classic kitchen with solid framed fronts and glazed wall storage
Separate kitchen reference / framed fronts and glazed upper storage.
Detail of classic framed kitchen fronts, shaped cornice and decorative end treatment
Detail reference / profile, cornice and the treatment of exposed ends.
02 / Design direction

Classic framed kitchens

Build the character from the door outline and the way the cabinets meet the room. A restrained frame and a layered classical profile share a starting point, but ask for different details.

Choose the amount of detail
Compare frame width, the inner edge and center-panel depth. Coordinate tall doors with shallow drawers rather than repeating one border without checking proportion.
Complete the composition
Resolve the cornice, toe kick, visible ends, glazed cabinets and hardware as a set. Keep a focal cooking or island composition legible beside quieter storage.
Separate style from construction
A framed-looking door does not establish a face-frame cabinet, an inset door or solid timber construction. Confirm the actual door build-up, finish sample and hardware separately.

Design language: Frame Heritage

Discuss this direction
Classic frames / Room and storage study

Follow the frame into the working interior.

Compare the room elevation with an open cookware drawer and a separate basket pull-out view from the same catalog plate. These views illustrate access; they do not establish a hardware model, load rating or confirmed Arcaya specification.

English design-study plate showing a classic framed kitchen, an open cookware drawer and basket pull-outs
Design study / classic framed fronts, a cookware drawer and a basket pull-out.

Open all views at full size

The room and detail photographs are separate design references, not a matched project or confirmed Arcaya model. Select surfaces, construction and mechanisms through the project specification.

Kitchen cabinetry / Surface directions

Three surface directions.
Different decisions.

A door form and a surface are separate choices. Explore veneer character, metallic-effect lacquer or a mica-like texture, then coordinate the construction, interior and room around the approved sample.

01 / Design direction

Wood-veneer kitchens

Let the grain organize the elevation. Broad island fronts, full-height storage and a quieter plain surface can share one composition, with the veneer direction and matching decided across the complete run.

English design-study plate showing a wood-veneer kitchen, its open drawers and an edge detail
Design study / a veneer-led kitchen, drawer organization and an edge detail.

Open all views at full size

Read the grain across the room
Compare the vertical grain on tall fronts with the island and visible ends. Decide which pieces should continue as a sequence and where a plain surface or open niche creates a deliberate break.
Bring the edge and interior into the choice
The reference plate shows exposed drawers and an edge detail alongside the room. Specify the actual drawer function, edge treatment, reverse face and supporting panel separately from the visible veneer.
Approve a real finish sample
Confirm the veneer species, cut, matching method, stain or treatment, coating and sample reference. The catalog direction is not a current stock model, a species guarantee or an Arcaya completed project.
02 / Design direction

Metallic-effect lacquer kitchens

Introduce a metallic appearance through the surface finish. A restrained gray elevation, a warm edge and dark glass can give the kitchen depth while keeping the cabinet divisions clear.

English design-study plate showing metallic-effect lacquer kitchen fronts, an open appliance compartment and an edge detail
Design study / metallic-effect lacquer fronts, an open appliance compartment and a contrasting edge.

Open all views at full size

Separate the effect from the material
Metallic-effect lacquer describes the appearance of a finish. It does not mean solid titanium or establish a metal-clad door. Confirm the actual substrate, coating system and available finish sample.
Review it under the intended lighting
Compare sheen, visible texture, reflections and the adjoining glass, countertop and metal accents together. Approve the coated sample and acceptable variation rather than selecting from a screen alone.
Resolve opening and use
Coordinate the edge detail, grip, appliance access, clearances and care instructions. The compartment and edge views are design references; final hardware and construction are selected for the project.
03 / Design direction

Mica-effect kitchens

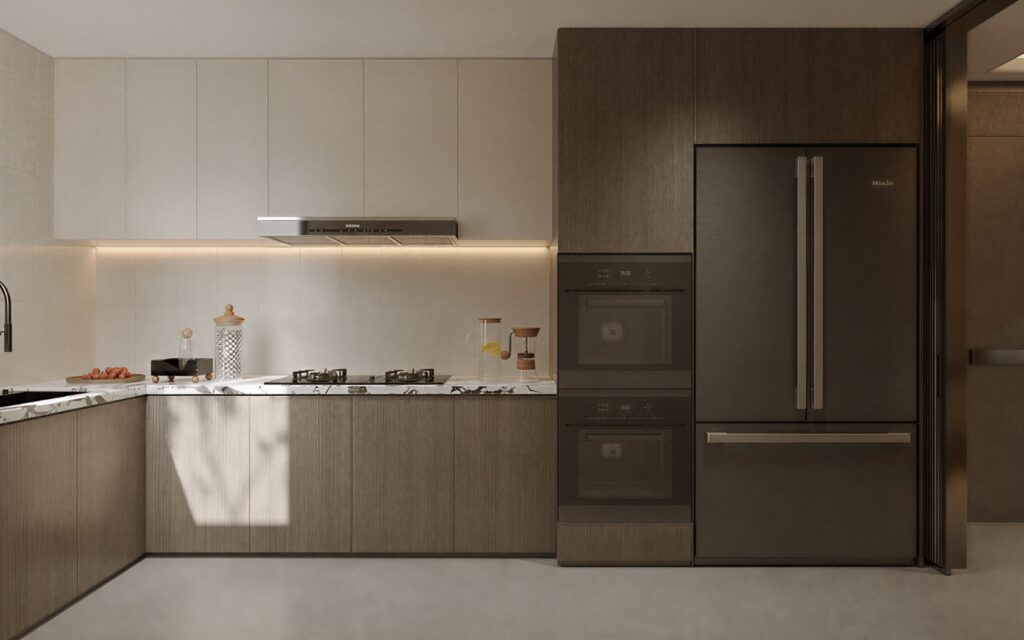
Bring a fine mineral-like texture to a simple cabinet composition. The reference pairs pale tall and wall fronts with a darker island, leaving the divisions and overall elevation clear.

English design-study plate showing a mica-effect kitchen, an alternate room view and a close view of the door texture
Design study / a mica-effect kitchen, an alternate room view and the front texture.

Open all views at full size

Read the effect at two scales
Look at the complete run and the close view together. Review color variation, texture direction, sheen and how the joins read across adjacent doors.
Specify what produces the appearance
Mica-effect describes a visual direction. It does not establish natural mica content, a stone slab, a coating process or a performance rating. Confirm the actual surface, supporting panel and edge construction.
Coordinate the room around the sample
Compare the front with the countertop, backsplash, open niches, metal details and room lighting. Confirm cleaning guidance and use conditions for the selected material before approval.

These are catalog design studies. They show design directions and are not Arcaya completed projects or confirmed supply models. Current materials, hardware and configurations are reviewed individually.

Compare veneer families · Understand painted finishes · Choose the supporting panel

01 / Door styles

Different looks. A defined set of decisions.

Six door families drawn at the same scale, one drawer over one door, so profile and proportion can be compared before any finish is chosen. Each family opens a system page with its own drawings, parameters and compatible combinations.

Door profiles drawn at one scale. Illustrative finish families; confirm the final selection against approved samples. Explore styles and collections →

Kitchen modules

Build the kitchen around everyday tasks.

A kitchen can include more than base and wall cabinets. Group the appliances, ingredients and cookware around the routines they support.

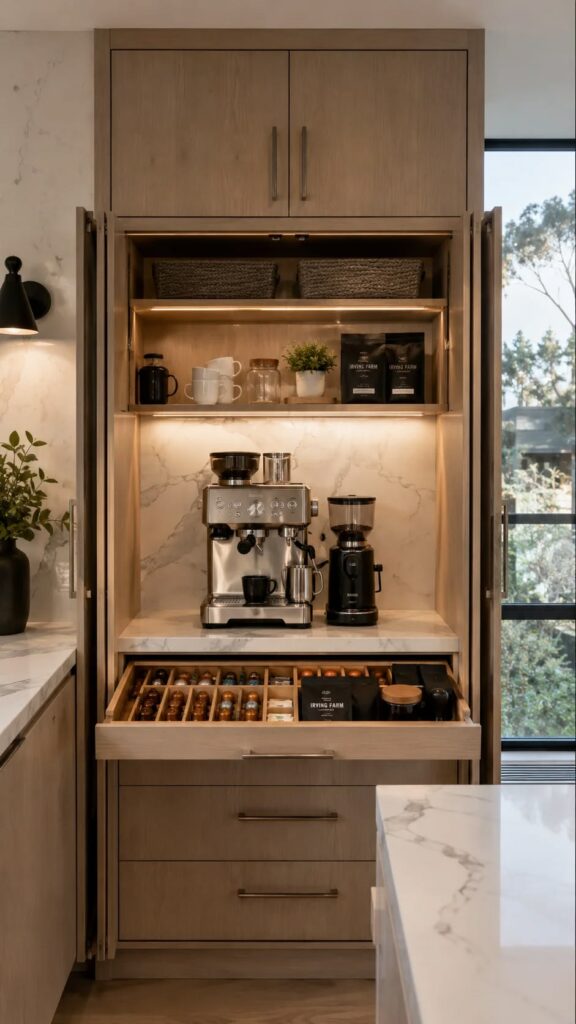
Wood-tone coffee cabinet with cup shelves, a preparation niche and a divided shallow drawer
Breakfast & coffee cabinetsShelves, a work surface and a divided drawer keep cups, coffee and small appliances together. Doors can close the station into the tall cabinet elevation.
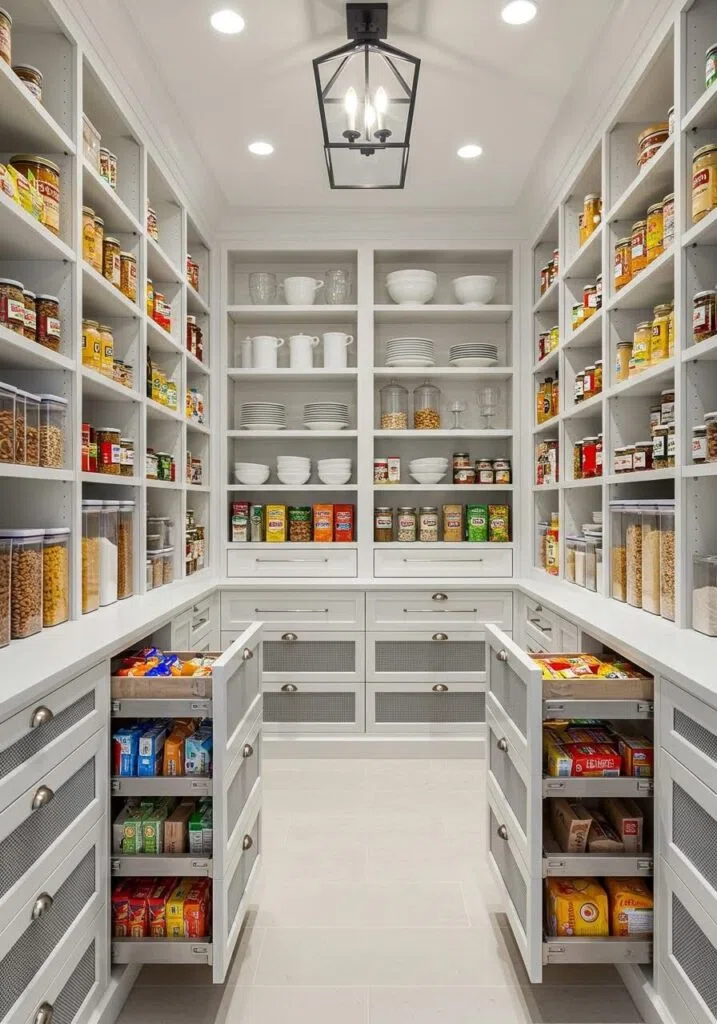
Design reference of a walk-in pantry with open food shelves, dish storage and extended lower pull-outs
Walk-in pantriesOpen shelves make food and serving pieces easy to see. Lower pull-outs bring stored items forward, while a clear central aisle connects both sides.
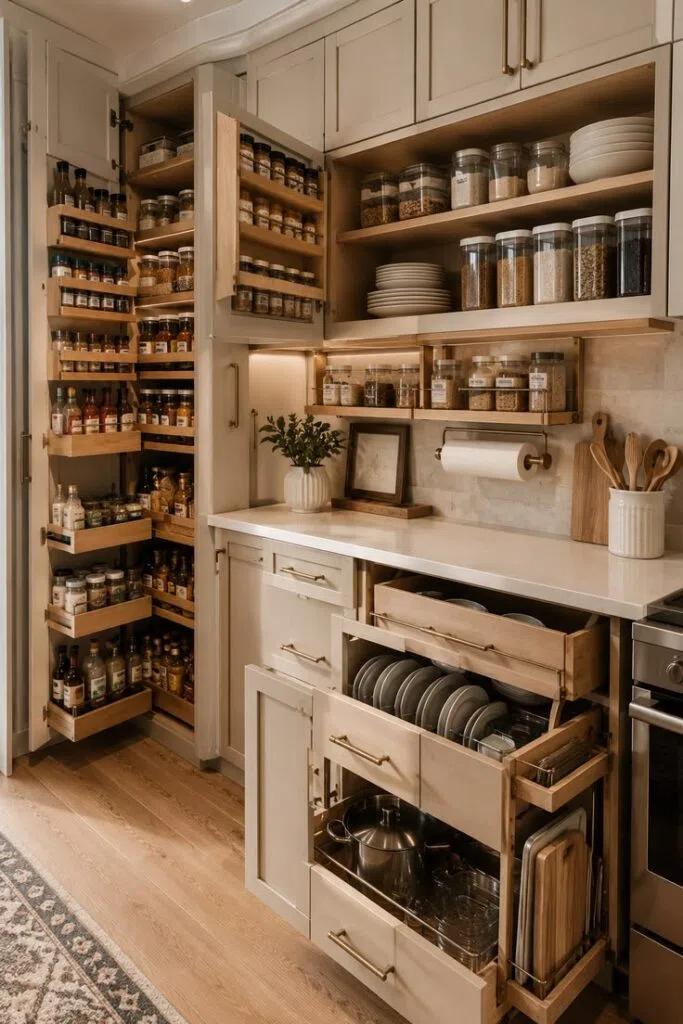
Kitchen storage reference combining a narrow tall pantry pull-out with deep plate and cookware drawers
Cookware & tray modulesCombine door-mounted spice racks, plate drawers, deeper pot storage and a narrow tray pull-out so each item has a useful access direction.

Product and design references from the supplied image library. Dimensions, hardware and finishes are developed for each project.

02 / Make it yours

Pick a door family. Try a finish family.

The specimen recolours with the finish family. Color on screen is a reference only; the combination is confirmed against a supplier record and a physical sample before any quotation.

Illustrative specimen / One drawer over one door; approve the final finish against a physical sample.

Door family

Finish family

Your combinationShaker in Sage

Finish direction: confirmed against a supplier record before quotation

  • OpeningBar handle, knob or integrated rail
  • EdgesSquare or softened stile edge
  • ConstructionFrameless or inset
  • Finish layersPainted, veneer, PET (five-piece)
STRAIGHT GALLEY L-SHAPED U-SHAPED ISLAND Illustrative layouts. Each is checked against appliance interfaces, clearances and services before the cabinet schedule is fixed. No generic minimum dimensions are given.
Original layout diagram · illustrative, not a design rule
03 / Configuration

Plan the room before selecting the finish.

  • LayoutStraight, galley, L-shaped, U-shaped or island arrangement.
  • Cabinet scheduleBase, wall and tall units; appliance housings; fillers and end panels.
  • InterfacesAppliance dimensions, sink cut-outs, services and countertop coordination.
  • AccessDoor swing, drawer travel, clearances and internal storage.
Start a project brief
04 / The specification

Five layers to decide together.

01Cabinet core

Record the substrate and thickness for every cabinet component.

02Fronts & finish

Define the door profile, decorative surface, finish and color reference.

03Countertops

Confirm material, edge profile, cut-outs and site measurement responsibility.

04Hardware

Specify the manufacturer, model, opening method and load requirements.

05Internal organization

Map drawers, pantry storage, waste sorting and accessories to each unit.

05 / Detail spotlight

Make everyday access part of the design.

Internal organization is specified per unit: pull-out pantry, drawer systems, waste sorting and accessories, each with its manufacturer, model and installation conditions on the detail page. A rendering shows intent; the record carries the evidence.

Explore pantry storage
Kitchen brief / From direction to specification

Bring the decisions into one brief.

Choose a direction above, then connect the visible room with the cabinet schedule. Your brief should distinguish design intent from the materials, hardware and responsibilities that still need confirmation.

  • Floor plan, room photographs and elevations, where available
  • Project destination, intended use and the rooms to coordinate
  • Preferred front form and surface direction; include sample references
  • Appliance schedule, sink position, services and countertop interfaces
  • Cabinet functions: cookware, food, coffee, waste and everyday access
  • Delivery and installation responsibilities to clarify in the quotation
Start a project brief
07 / Questions

Questions before choosing a kitchen.

These answers explain how to compare the directions. The final specification and available configurations are reviewed for each project.

Are the five directions separate fixed kitchen models?

They are design starting points. Flat-front and framed describe the form; veneer, metallic-effect lacquer and mica effects describe surfaces. They can overlap, subject to the selected construction and material review.

How is a mica effect different from metallic-effect lacquer?

A mica effect suggests fine mineral-like texture; metallic-effect lacquer suggests a metallic appearance in a coated surface. Compare real samples for texture, color and sheen. Neither name alone establishes material content or performance.

Can a framed kitchen use modern internal storage?

The door appearance and storage function are separate choices. Map the drawer and pull-out requirements to the cabinet schedule, then confirm clearances, fixing conditions and the selected hardware documentation.

What should I compare on a finish sample?

Review the face, edge, reverse, texture or grain direction and appearance under the intended lighting. Compare the approved sample beside the countertop, backsplash and adjoining cabinetry.

Do the room and detail photographs show Arcaya completed projects?

They are design studies and reference images. Where separate studies are used, captions say so. They illustrate visual and functional choices; current materials, supply and configuration need project review.

What should the quotation identify?

Ask for the agreed cabinet schedule, construction and surfaces, hardware, countertop scope, appliance interfaces, packing, delivery and installation responsibilities. Commercial terms and project timing must be confirmed for the actual scope.

Your next step

Bring your next project into focus.

Share your plans, priorities and destination market.

Start a project brief