

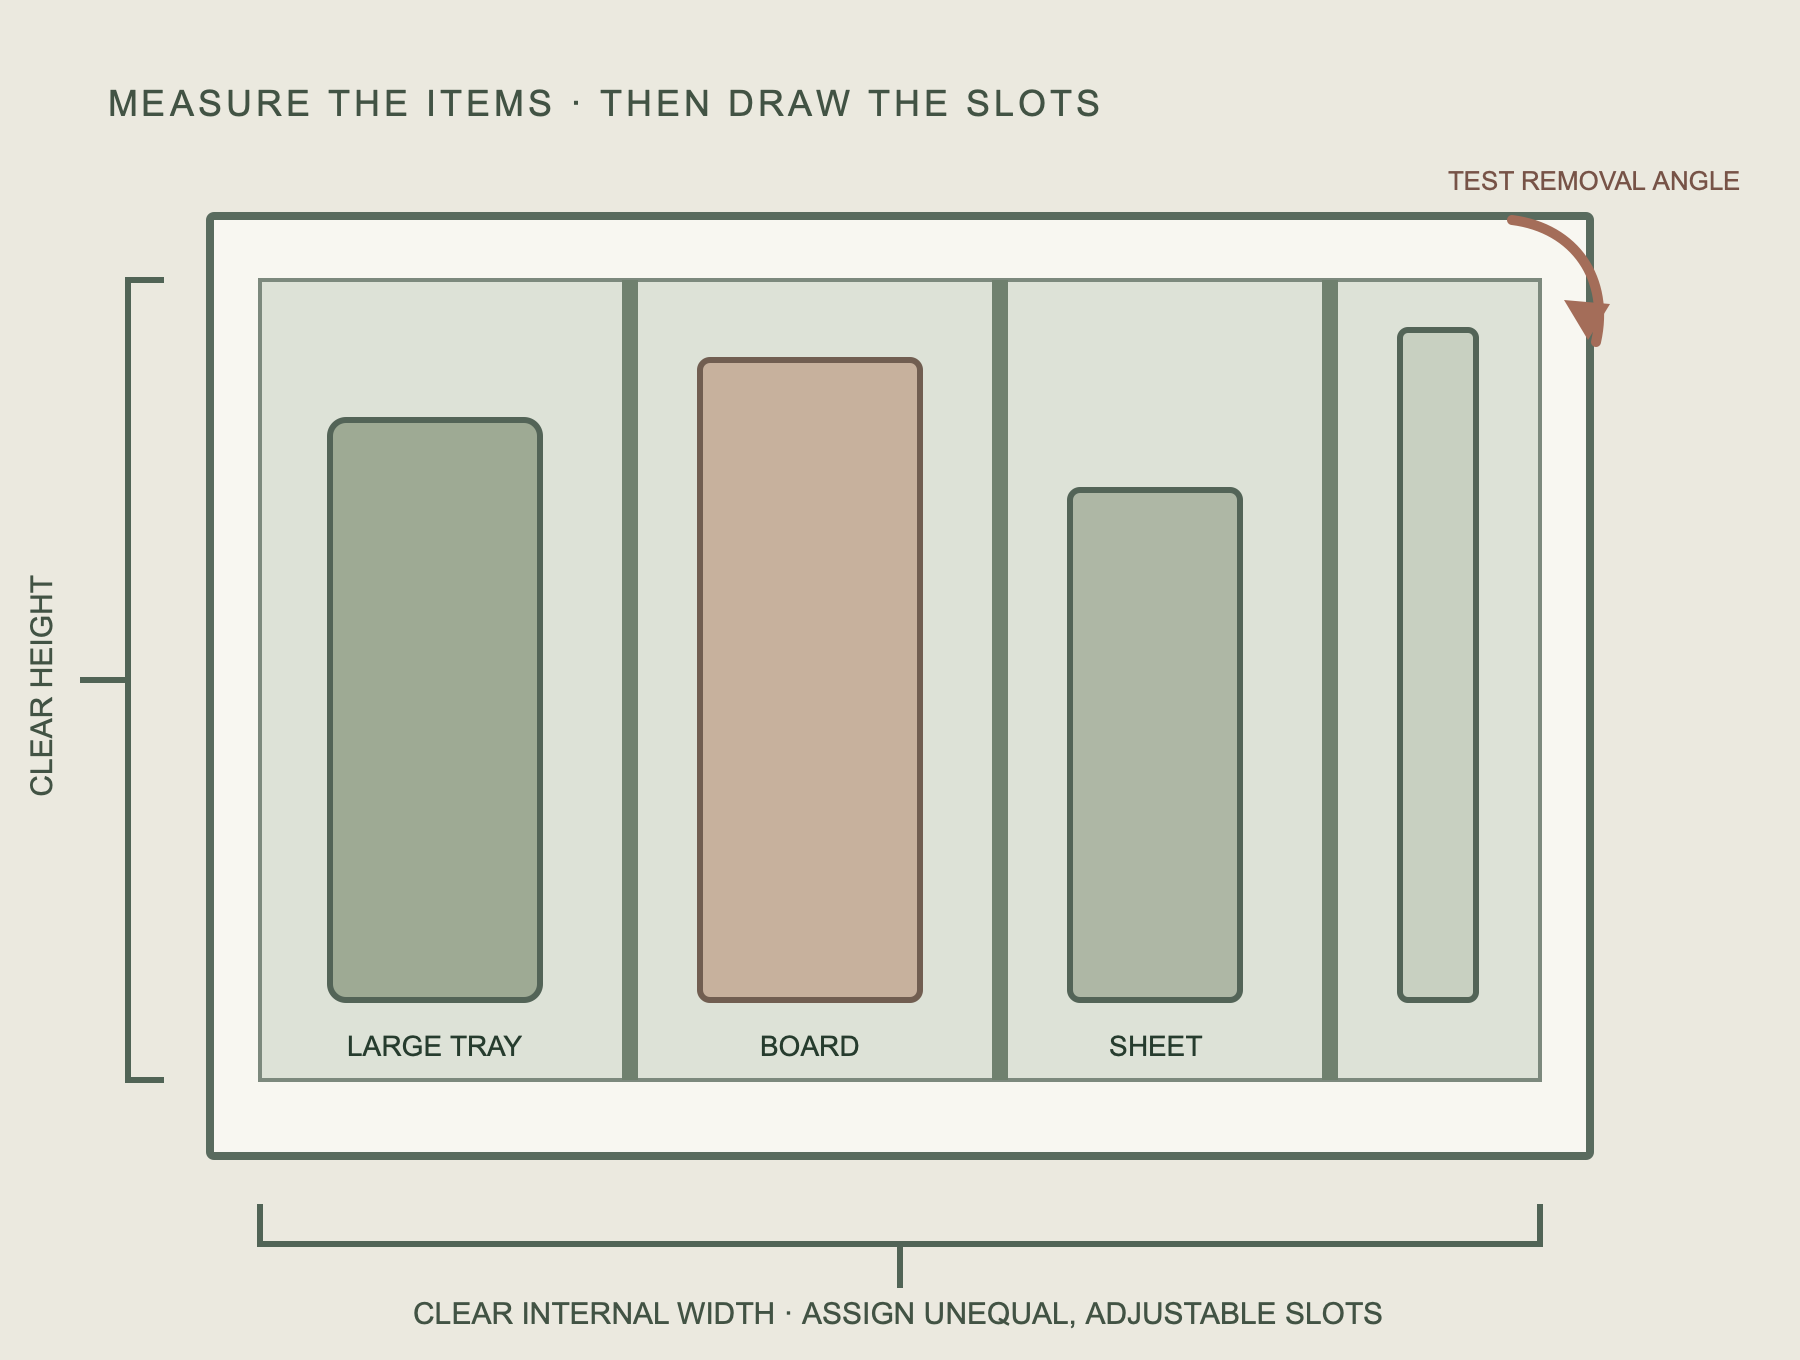
Start with the objects, not a standard slot count
Vertical storage works because a flat object can be removed independently instead of being lifted from the bottom of a stack. The cabinet should therefore be planned around the household’s actual baking sheets, chopping boards, cooling racks, pizza boards and serving trays. Photograph them together and record the tallest height, deepest dimension, thickest edge, handle projection and weight.
Do not divide the cabinet into equal spaces before this inventory is complete. A thin baking sheet may need a narrow slot, a timber board needs air around its surfaces, and a large serving tray may need extra hand clearance at the top. The useful result is not the maximum number of lines on an elevation; it is a set of slots that lets each object leave the cabinet without moving its neighbors.
Use the largest real item to establish the cabinet envelope, then assign each slot by thickness, grip space and removal angle.
Sort baking sheets, cutting boards and trays as three item families
These objects look similar in elevation but behave differently in use. Baking sheets and cooling racks are thin, rigid and often stored near the oven. Cutting boards may be thick, heavy and damp after washing. Large trays can be wide, have raised rims or handles, and may be used less frequently. Separate them before deciding where the divider belongs.

Create an item schedule rather than a generic label such as “tray storage.” Give every large object an identifier and mark whether it is stored alone, paired with another item, or nested. If new bakeware is expected, leave one adjustable bay rather than filling every millimeter with fixed partitions.
Record clear cabinet dimensions and test the removal angle
Nominal cabinet width is not the same as usable internal width. Side panels, face frames, hinges, doors, pull-out hardware, top rails and rear services reduce the opening. Ask the drawing to show clear internal width, clear depth and clear height at the actual storage position. If the divider is behind hinged doors, also show the clear opening between the doors and hinge arms.

A tall object does not always leave vertically. The user may tilt it forward, rotate a handle past the door or lift it over a front rail. Test this movement with the largest item and the cabinet at full scale. The required clear height is determined by that path, not only by the item’s standing height. A divider placed under a fixed shelf can fail even when the stored object appears to fit in a closed elevation.
| Record | Why it matters | What the drawing should show |
|---|---|---|
| Item envelope | Rims, handles and warped corners can be larger than the flat body. | Maximum height, depth, thickness and weight for each item family. |
| Clear opening | Doors and hinges can narrow the path before the object reaches the cabinet interior. | Door angle, hinge position and the narrowest usable opening. |
| Removal path | A large tray may need to tilt or rotate into the aisle. | Largest item shown in the open state, with adjacent fronts and aisle clearance. |
| Support points | Thin sheets can lean or slip beneath short dividers. | Divider height, depth and fixing method at the base and rear. |
Use adjustable dividers for different-sized items
Fixed timber partitions are stable and visually integrated, but they lock the slot pattern to today’s objects. Adjustable dividers use a slotted base, peg locations or removable rails so that one bay can widen when a new tray arrives. The mechanism should be simple enough to reconfigure without dismantling the cabinet.
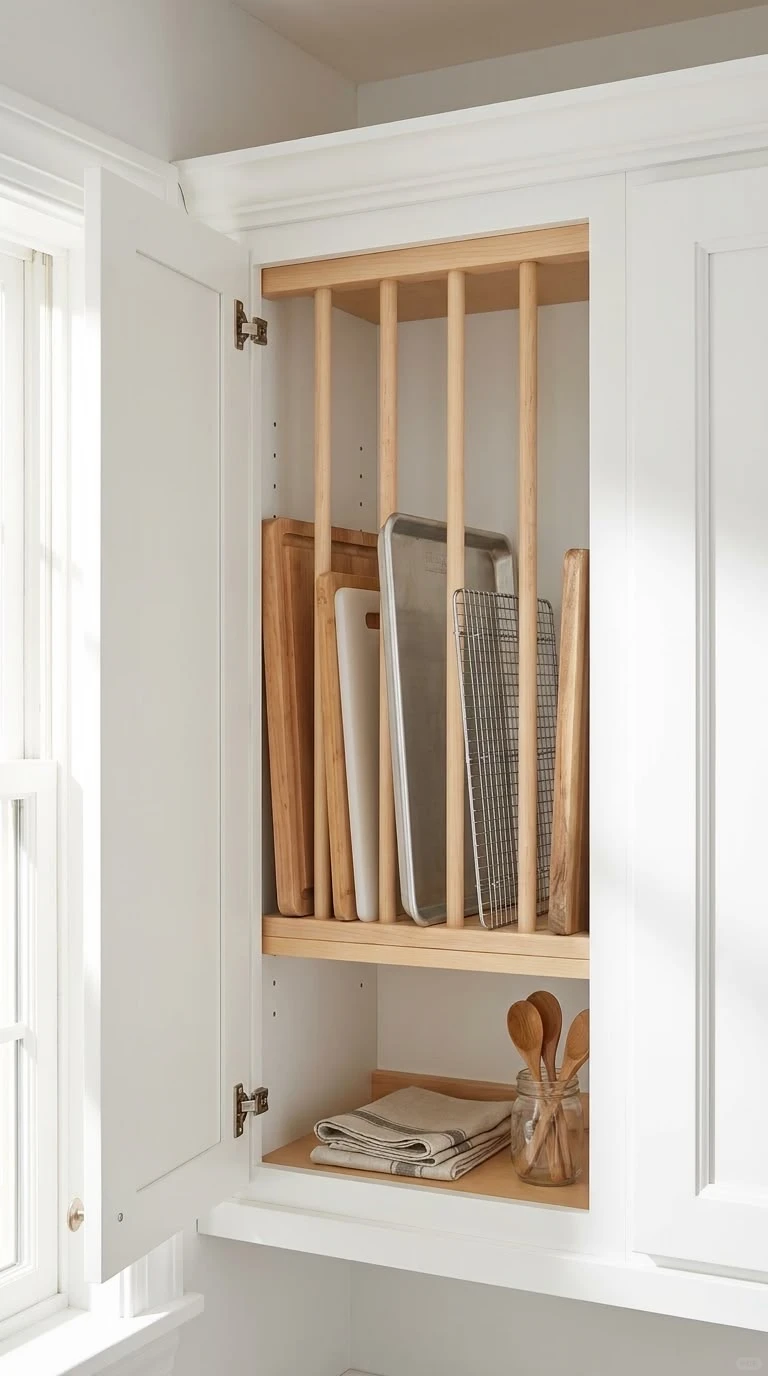
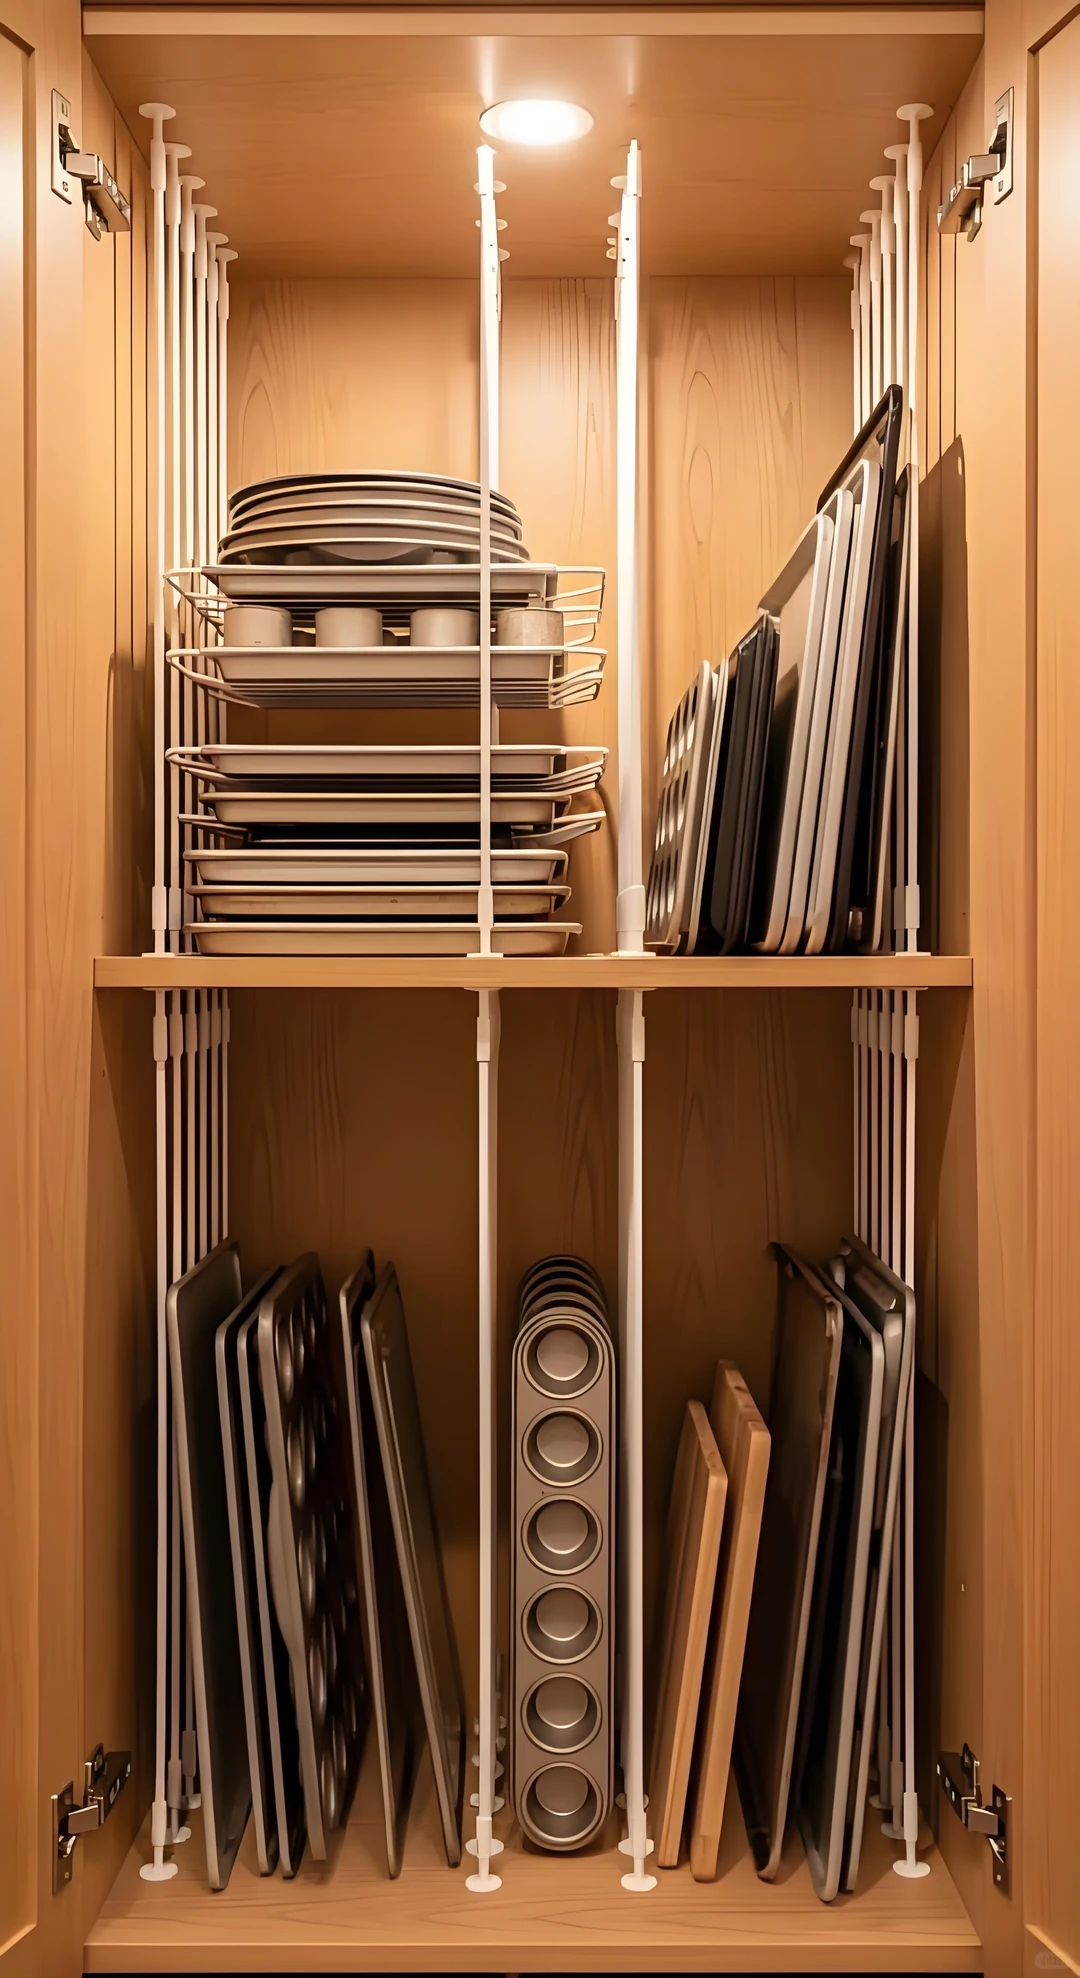
Support each item across enough depth to keep it upright. A short front peg may organize small boards but allow a tall tray to lean and twist. A full-depth divider or paired front-and-rear supports control that movement. The panel, rail or metal rod must be fixed to a cabinet surface that can accept the load; do not assume a thin shelf or liner will hold repeated side pressure.
Allow deliberate grip space. Fingers need to reach the upper edge without scraping the cabinet top, and a heavy board may need two-handed access. Unequal slots are usually more efficient than identical ones: narrow for sheets, medium for boards, wide for handled trays. Keep one wider adjustable slot for nested items or future changes.
Prototype before production
Use cardboard strips or temporary rods inside a full-size cabinet opening. Load the actual items, open the adjacent doors and remove each object five times. The test will reveal hidden conflicts between rims, fingers, hinges and the aisle more reliably than an empty 3D rendering.
Choose a cabinet location that follows the work route
Locate baking sheets near the oven when they are used frequently, but do not place them where an open oven door blocks access. Cutting boards usually belong near the main preparation surface or sink route, provided damp boards can dry. Large serving trays may sit at the end of a run or in a tall cabinet if they are used less often and can be removed without crossing the main cooking zone.
A base cabinet keeps heavy objects low and can place the hand near the worktop. A tall cabinet can provide more clear height but may make the longest tray harder to turn into a narrow aisle. An above-oven slot uses otherwise difficult space, yet it is unsuitable for heavy objects or users who cannot lift safely. Choose the position by frequency, weight and open-state clearance, not only by leftover space.
Keep the divider out of sink-base plumbing and appliance ventilation zones unless the cabinet system has been designed for those services. If a pull-out vertical frame is selected, show the runner, handle and full extension on the plan. It should not collide with an island, opposite handle or doorway.
Plan for moisture, abrasion, noise and cleaning
Cutting boards should not return wet to a tightly closed slot. Provide airflow between faces, a surface that can be wiped, and a removable liner or drip tray where water may collect. Separate damp boards from steel baking sheets if prolonged contact could mark either surface. The cabinet finish and edge treatment should tolerate repeated cleaning.

Metal sheets can rattle and scratch one another. A non-slip removable base mat or small protected contact points can reduce movement, but the material must not trap crumbs and moisture. Avoid permanent fabric or deep grooves that are difficult to clean. Every divider should either lift out or leave enough access for a cloth and vacuum nozzle.
Heavy trays belong at the lowest practical level and should not rely on a flexible divider alone. Record the expected contents and ask the cabinetmaker to confirm the panel, fixing and shelf capacity. “Heavy duty” is not a specification; the approved drawing should name the construction and hardware.
Specify the divider system on the cabinet drawings
The elevation should label every slot or adjustable range, the clear internal height and depth, and the opening direction. The cabinet schedule should identify the divider material, thickness, edge finish, fixing method, removability and any liner. Add the item schedule or a photograph so the intended contents remain visible when the order is reviewed.
Before approval, compare the cabinet drawing with the oven, dishwasher, refrigerator and door openings around it. Then verify the largest item at full scale. If the design depends on tilting a tray through the opening, show that movement rather than leaving it to the installer or homeowner to discover.
| Approval check | Record before production |
|---|---|
| Contents | Photograph, item names, maximum dimensions, weight and frequency of use. |
| Cabinet | Clear width, depth, height, door/hinge intrusion and adjacent open-state clearance. |
| Dividers | Quantity, adjustable range, support depth, material, finish and fixing. |
| Care | Ventilation, removable liner, cleaning access and wet-board return routine. |
For an Arcaya custom-kitchen discussion, send the cabinet plan and a single photograph of the baking sheets, boards and trays standing together beside a tape measure. That gives the design team a practical starting envelope before slot widths and hardware are finalized.