
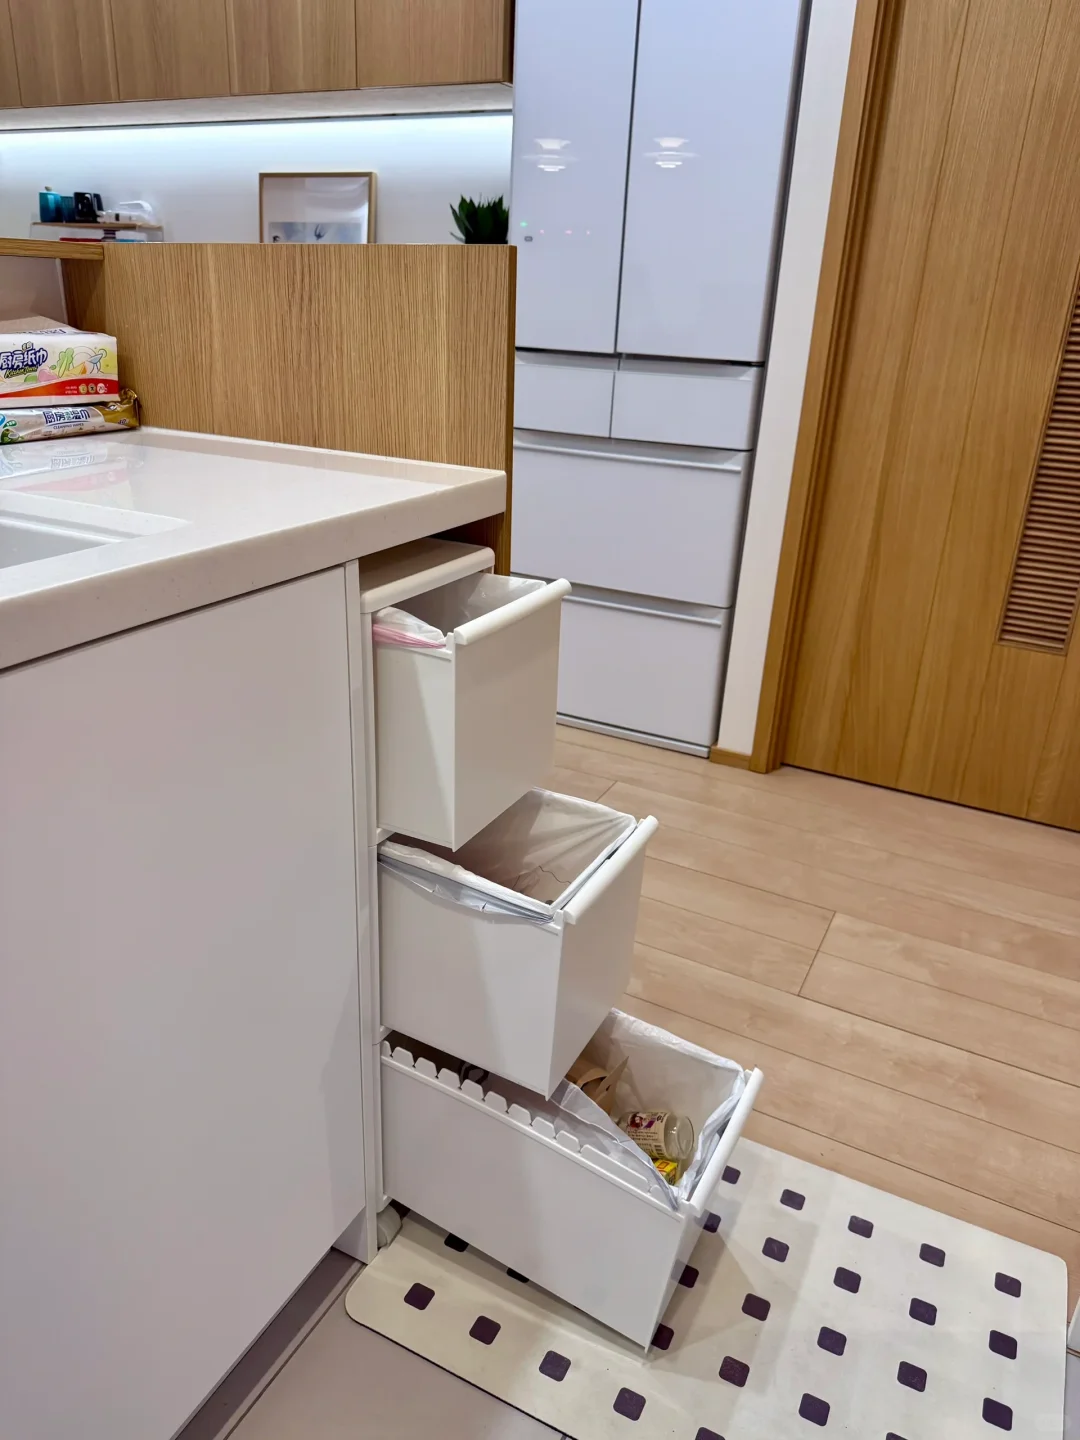
Start with the household’s waste streams
List what is actually separated inside the kitchen. Common streams include food waste, general waste, mixed recycling and returnable bottles or cans. Local collection rules matter, but so do the household’s habits. A category collected once a week may need more capacity than a category emptied every evening.
Record each stream for several normal cooking days. Note how quickly the bag fills, whether the waste is wet or dry, and where it is produced. This separates a real storage requirement from an attractive three-bin product shown without context.
Not every category needs a rigid bin in the main kitchen cabinet. Low-volume recyclables may work better in a bag near the exit, a pantry container or a utility area. Keeping that category out of the pull-out can preserve a practical bin size for food and general waste.
Choose two bins when volume matters more than a third category
A double pull-out is often the clearer choice when food waste and general waste dominate daily kitchen use. Each bin can have more useful capacity within the same cabinet envelope, and the system has fewer edges and containers to remove for cleaning.
Two bins can also support a third household category elsewhere. For example, bottles and clean packaging may move directly to a collection bag near the exit. This is not a compromise when that route matches how the household already takes recycling out.


Double-bin strengths
Larger individual bins, simpler bag changes, fewer parts to clean and a better chance of fitting a narrower cabinet.
Questions to resolve
Where will the third category go, and will anyone combine materials in the larger bin because the alternate collection point is inconvenient?
Choose three bins when the third stream is frequent and distinct
A triple pull-out earns its cabinet space when three categories are produced in the kitchen every day and the household reliably separates them. The third bin should remove a repeated task, not create a small compartment that is rarely used.
Check the volume ratio rather than dividing the cabinet evenly. Food waste may need a small bin that is emptied often, while dry packaging may need a larger bin. A manufacturer may offer unequal containers, a split upper level or a frame designed for different bin heights. Use that product data instead of assuming three identical rectangles.
Three bins can require a wider frame, smaller containers or a taller arrangement. Each option changes cabinet width, removal clearance and the possibility of an internal drawer above the bins. Compare the complete assembly, not just the number of labels.
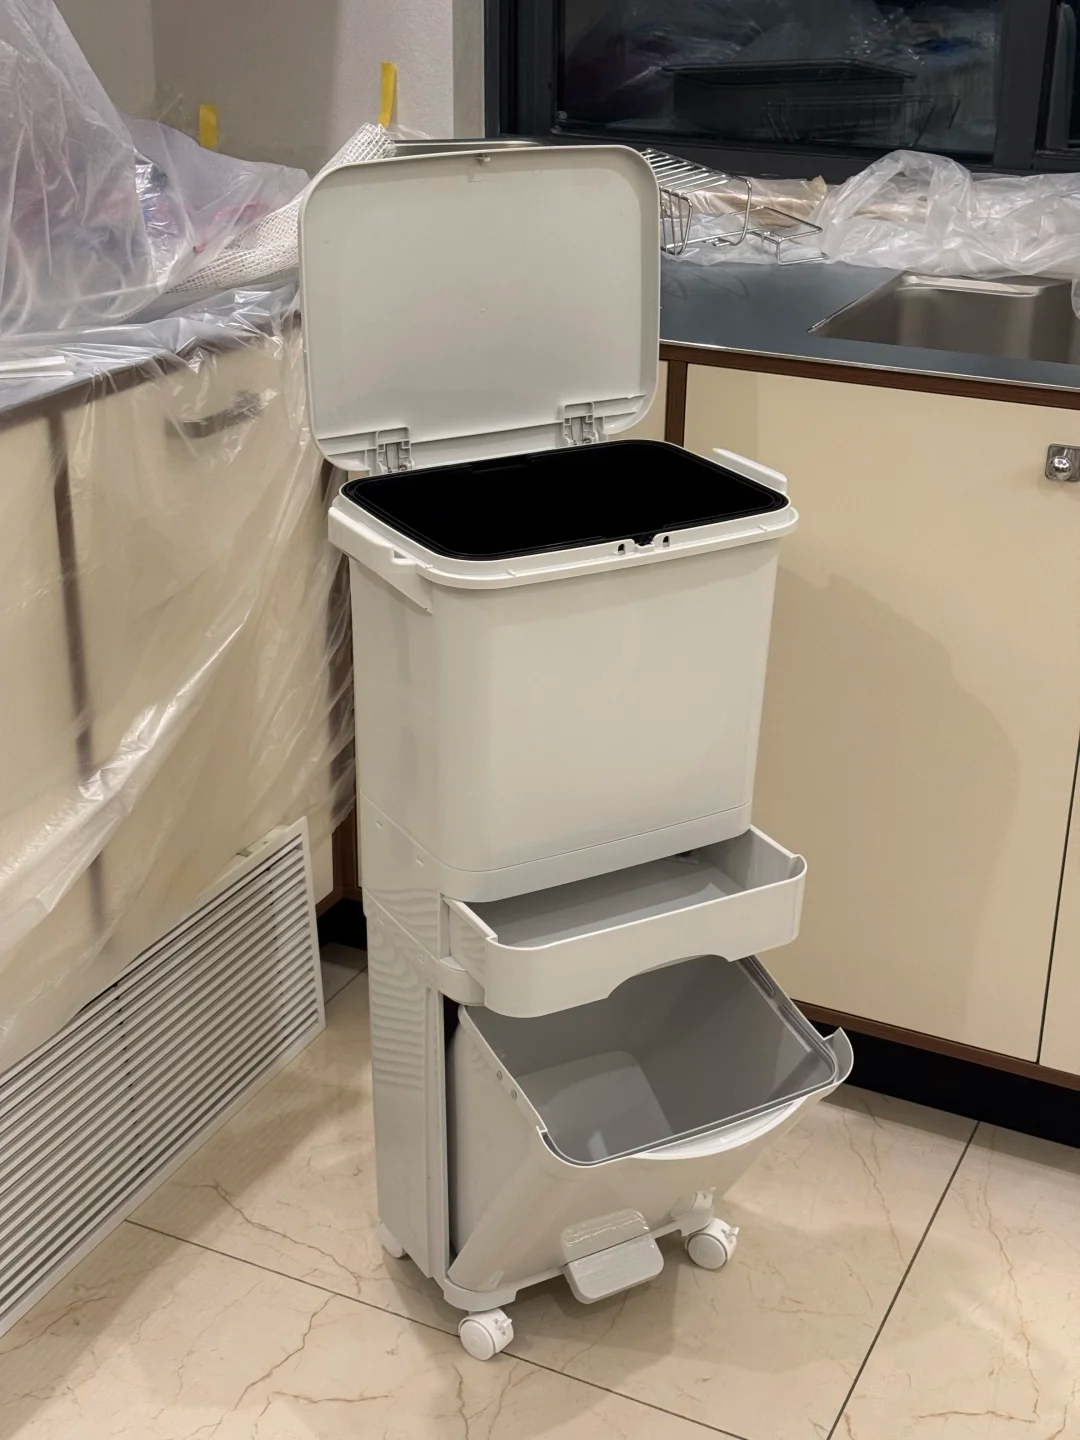

Double or triple: compare the trade-offs
| Decision | Double pull-out | Triple pull-out |
|---|---|---|
| Best fit | Two high-volume kitchen streams; other categories collected elsewhere. | Three frequent streams that need one shared drop point. |
| Capacity | Usually more volume per bin within a similar cabinet envelope. | Usually less volume per bin unless the cabinet grows or bins stack. |
| Cleaning | Fewer bins, dividers and frame edges to remove and wipe. | More components; check whether every bin lifts out without obstruction. |
| Cabinet impact | May preserve width for drawers or another base cabinet. | May require more width, height or a product-specific internal arrangement. |
| Approval test | Confirm the alternate home for the third category. | Confirm the third bin is used often and has enough practical capacity. |
The decision should preserve the kitchen’s storage priorities. A wider trash cabinet may remove a drawer bank, reduce tray storage or change the sink run. Compare those consequences on the full cabinet elevation before approving a larger system.
Convert the bin system into a cabinet specification
Select a real pull-out assembly before finalizing the cabinet. Obtain the frame’s outside width, depth and height, the manufacturer’s minimum installation clearances, runner fixing positions, door-mounting requirements, permitted load and full-extension distance. Record the individual bin sizes and the clearance needed to lift them out.
Then calculate the cabinet’s internal clear space. Account for cabinet side thickness, back construction, face frame or door overlay, hinges where applicable, rails and any services. A nominal cabinet width describes the outside module; it does not guarantee the space available to the hardware.
Use product-specific numbers in the approved drawing. If the hardware is substituted, repeat the calculation. “Fits a 450 cabinet” is not enough when the replacement frame requires a different internal width or fixing pattern.

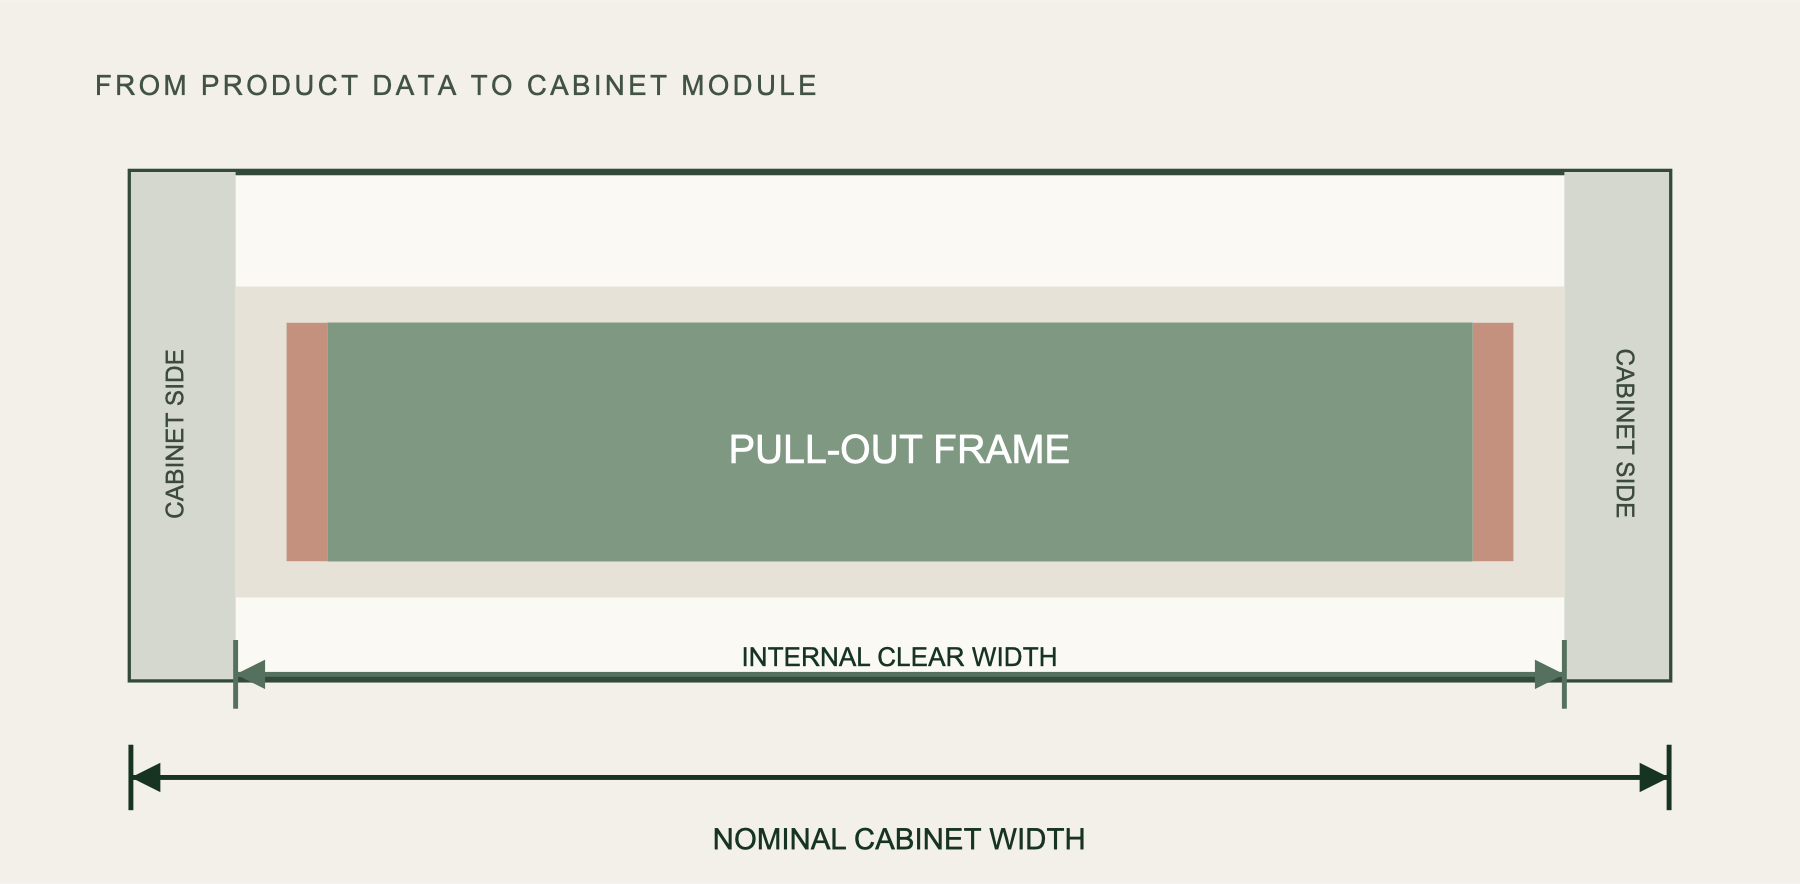
Nominal width is not usable width
A cabinet described by a nominal width includes its sides and construction details. The usable opening is smaller. The deduction is not universal because frameless, face-frame and inset constructions use different parts, and the selected door and runner can introduce additional restrictions.
Start with the required internal clear width shown by the hardware supplier. Add any stated side clearance. Then design the cabinet box that produces that opening. Check the result again after door thickness, pulls and adjacent fillers are known.
Depth and height deserve the same treatment. Rear rails, a service void or a projecting pipe can reduce depth. A top drawer, lid or worktop rail can reduce height. Record the smallest clear dimension through the full travel of the frame, not only the empty box dimension.
Check height, bin removal and cleaning
Open the pull-out fully and remove every bin on the drawing or with a sample assembly. A bin may fit during use but collide with the worktop, an internal drawer or a lid when lifted out. Triple systems deserve particular attention because the center container can be difficult to grip.
Confirm that bags can be changed without removing neighboring bins and that the frame does not trap residue below the containers. If a lid is included, show its opening or automatic lift path. If the cabinet sits near a sink, keep valves, traps and service panels accessible.


Test the loaded system. The runner rating, door fixing and cabinet anchorage must support the combined weight of the frame, bins and contents. Use the manufacturer’s permitted load and fixing instructions; do not infer capacity from the number or apparent size of the bins.
Approve the bin schedule with the cabinet drawing
The approval set should identify the cabinet number, nominal width, internal clear width, depth and height, selected pull-out model, runner and lid, bin quantity and individual capacities. Show the door mounting method, full extension and the clearance needed to remove each bin.
Beside the drawing, list the intended stream for each bin and the expected emptying frequency. That record explains why the project uses two or three bins and prevents a later substitution from changing the working routine without review.
When the categories, capacities and hardware all fit, the cabinet specification is ready for pricing and production. If any one of them is still assumed, keep the decision open.