
Why total countertop length can mislead
A one-wall kitchen places the main cabinets and appliances along a single line. That simplicity suits many narrow rooms, but it can hide an important difference: total countertop length is not the same as usable, uninterrupted prep space.
A 4,200 mm wall might contain 1,950 mm of countertop in two or three pieces. If the only clear section between the sink and cooktop is 450 mm, vegetables, a chopping board and a mixing bowl compete for the same small area. Another sequence can use the same wall, the same appliance widths and almost the same total countertop, yet create one 900 mm prep zone.
For this article, continuous prep length means the clear edge-to-edge worktop between the sink and cooktop after excluding tall cabinets, raised joints and appliances that will live permanently on the counter. It is a design measure, not a pricing measure.
Start with the work you need to perform, then assign cabinets to the wall. A long elevation is not useful if full-height blocks divide the counter at the wrong points.
Map fixed conditions before moving cabinets
Begin with a measured wall, not a cabinet catalogue. Mark door swings, windows, radiators, structural projections, the drain and water supply, electrical points, gas or ventilation routes, and every required service clearance. Record the finished-wall dimensions rather than relying on the original plan.
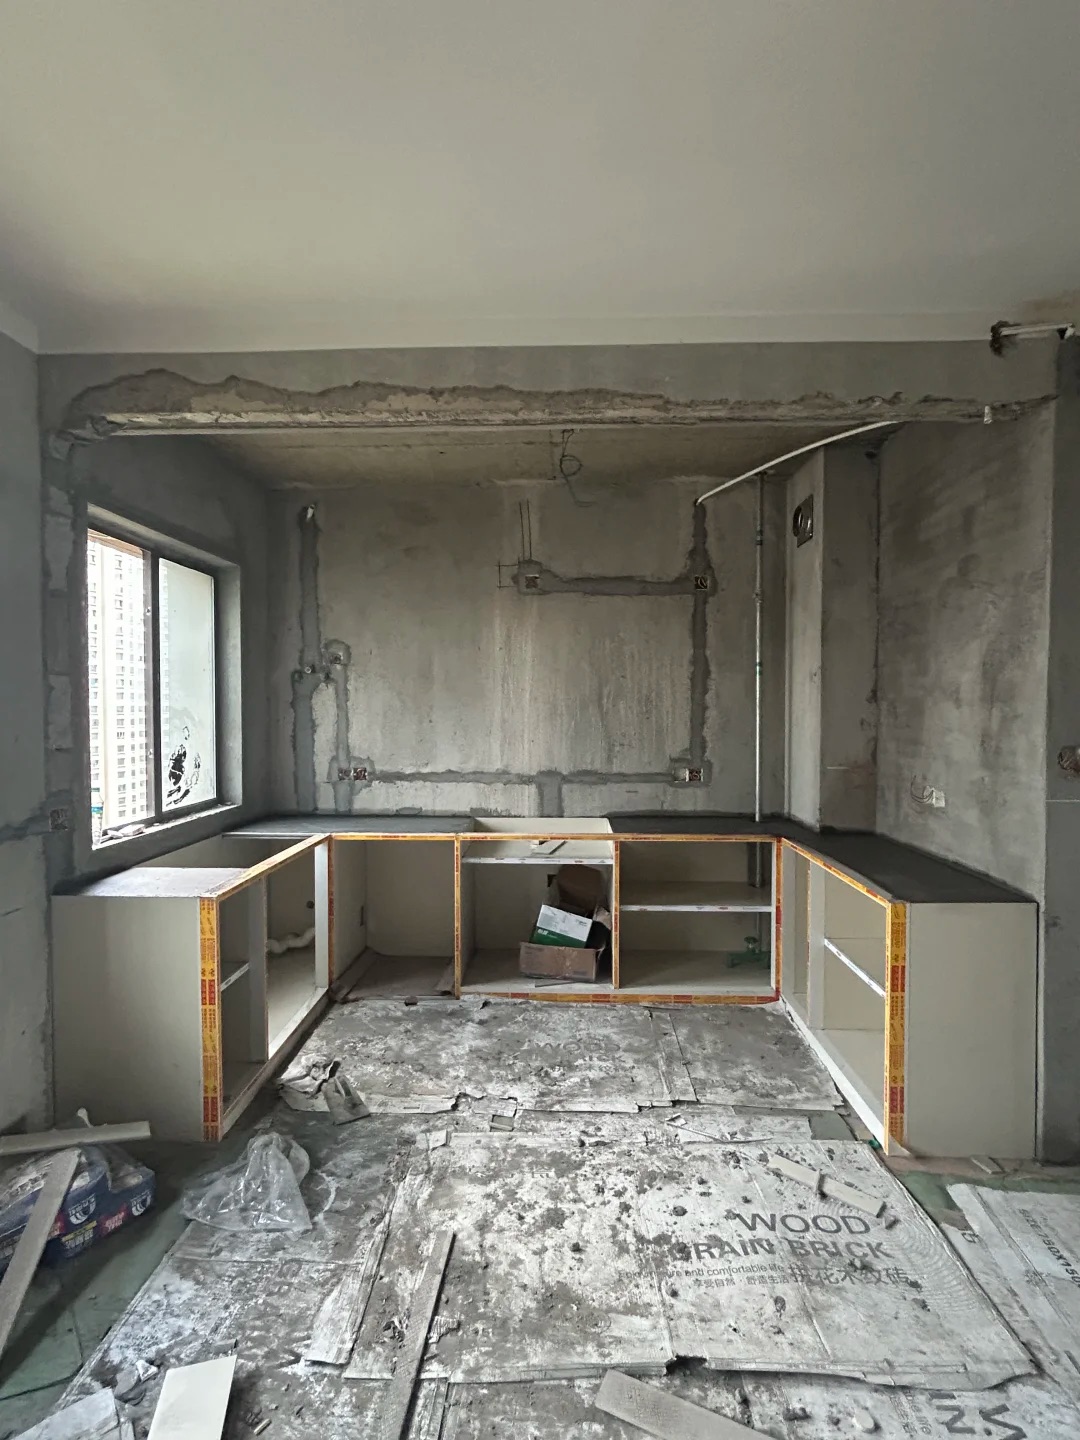

Next, confirm the appliance list and actual model dimensions. A refrigerator needs more than its nominal width when the manufacturer requires side ventilation, rear clearance or room for the door and drawers to open. An integrated dishwasher needs a cabinet opening, door panel and a practical connection route. A freestanding range and a built-in cooktop create different cabinet conditions.
Separate the constraints into three groups:
- Hard constraints: elements that cannot reasonably move, such as a flue, structural column or an approved gas point.
- Movable services: plumbing or electrical points that may move after cost, access and compliance are confirmed.
- Design choices: pantry location, drawer widths, appliance garages and wall-storage positions.
Do not sacrifice the prep counter to avoid every service adjustment by default. Equally, do not redraw the kitchen around an ideal sequence until a qualified tradesperson has confirmed that the services can move.
Compare two 4,200 mm layouts
The two examples below use the same wall length and the same principal components. They are deliberately simplified so that the effect of sequence is visible. Fillers and exact panel thicknesses must still be resolved in the detailed cabinet drawing.
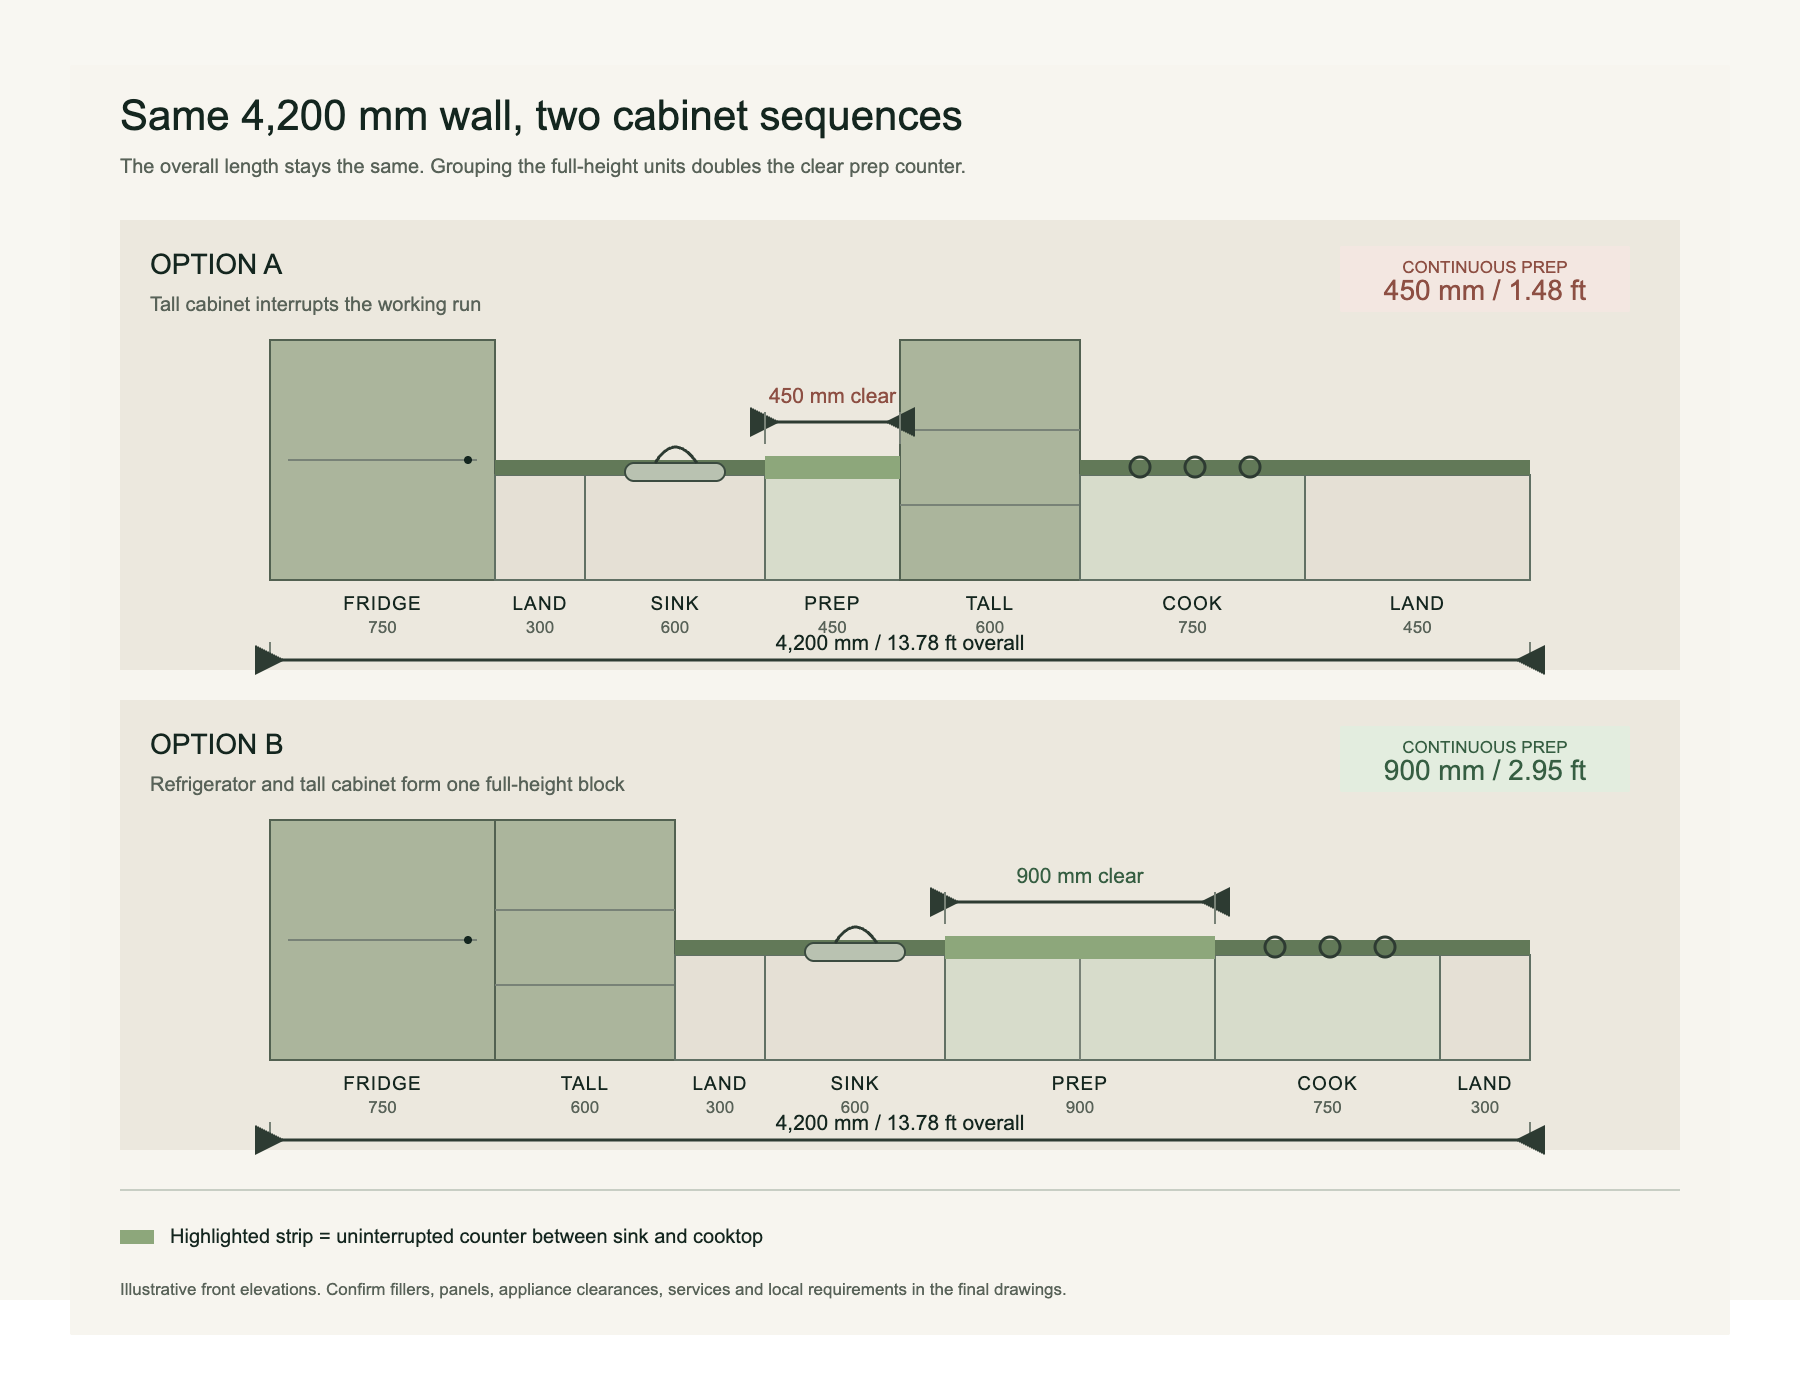
| Measure | Option A: divided run | Option B: grouped tall units |
|---|---|---|
| Overall wall length | 4,200 mm / 13.78 ft | 4,200 mm / 13.78 ft |
| Tall elements | Refrigerator at one end; tall oven/pantry interrupts the working run | Refrigerator and tall oven/pantry form one full-height block |
| Longest clear prep counter | 450 mm / 1.48 ft | 900 mm / 2.95 ft |
| Sink-to-cooktop relationship | Separated by a tall cabinet | Connected by one clear worktop |
| Total countertop shown | 1,950 mm in several sections | 2,100 mm, with one useful central section |
The important gain is not only the extra 150 mm of total counter. It is the consolidation of that counter into a 900 mm working surface where washed ingredients naturally move toward the cooktop. If the room works better in the opposite direction, mirror the entire sequence; preserve the relationship rather than copying left and right.
Group full-height items to protect the worktop
A refrigerator, oven tower and full-height pantry remove countertop wherever they stand. Scattering them through the run creates several short surfaces. Grouping them near one end usually protects a longer central counter and makes the elevation calmer.

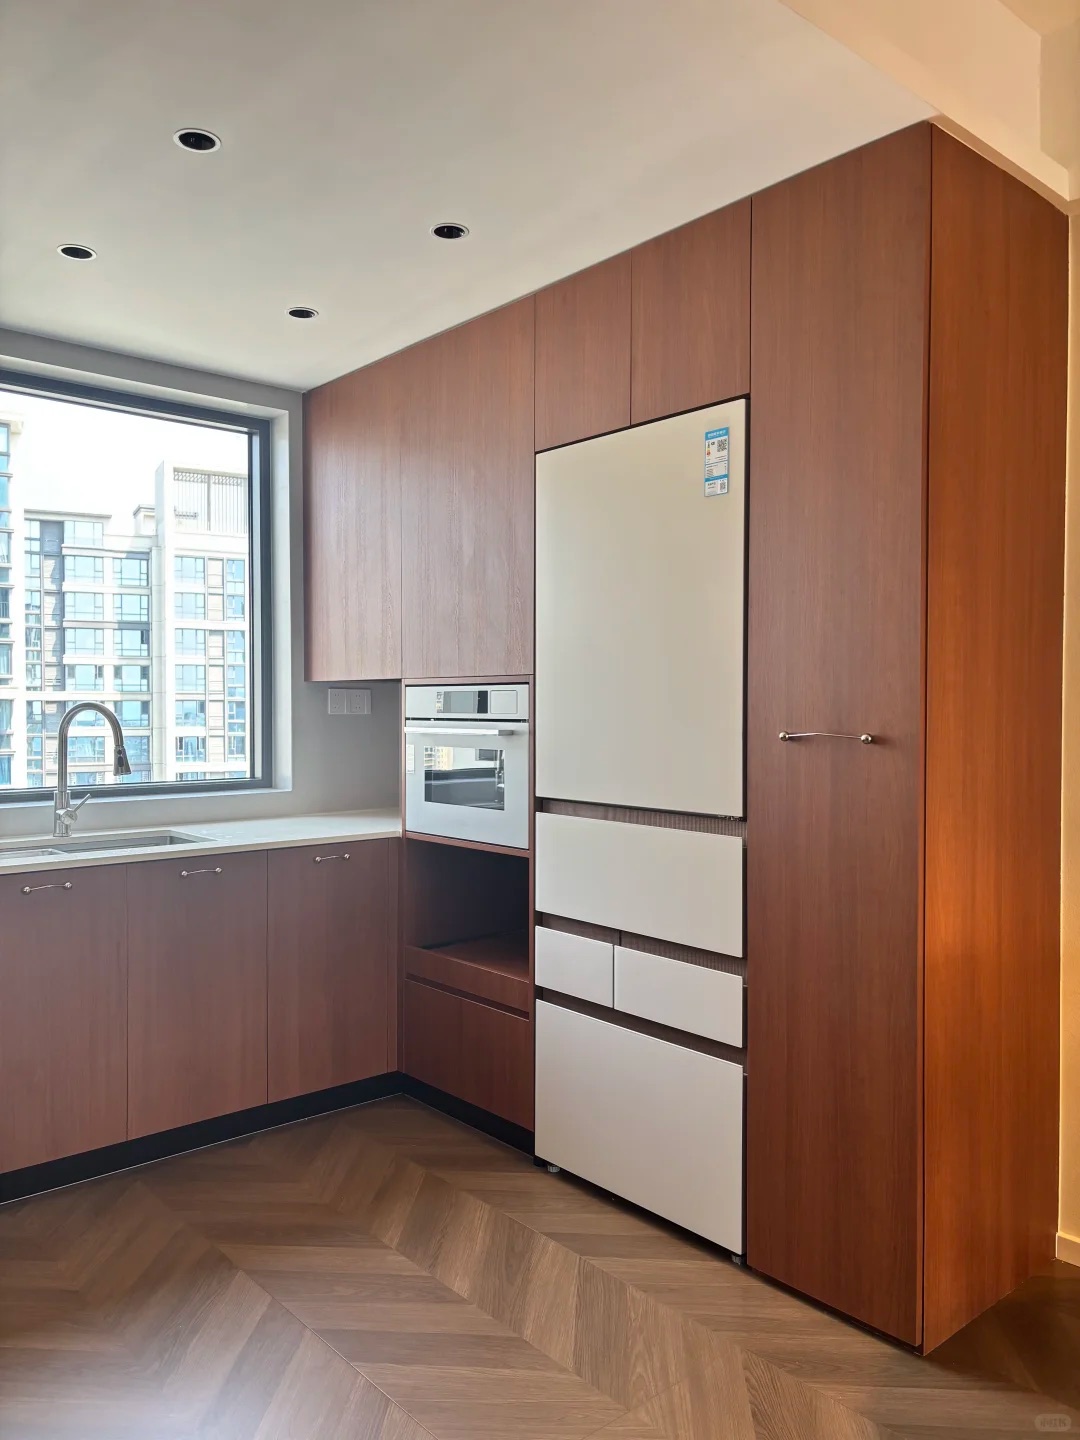
The group still needs to work in use. Check that the refrigerator door can open without hitting a wall, handle or adjacent tall panel. Provide the required filler and ventilation. If an oven tower sits next to the refrigerator, follow both manufacturers’ installation and separation requirements rather than assuming the panels alone are sufficient.
Place the tall block at the end that best suits arrival and food storage when the room permits. Then provide a landing surface nearby so groceries and hot dishes do not have to cross the sink. In a very short run, one tall unit may be worth more than another: compare a pantry, oven tower and countertop appliance storage by what they release from the worktop.
Decide where the sink, dishwasher and cooktop go
A practical one-wall sequence often moves from food storage to washing, preparation and cooking, with landing space at the ends. It can run in either direction. The useful rule is to keep the main preparation counter between the sink and cooktop whenever the fixed conditions allow.

Keep the dishwasher close to the sink so the water connection and loading route remain practical. Check that an open dishwasher door does not block the only exit or the standing position at the sink. Draw the open doors, not only the closed appliance fronts.
Do not push the sink or cooktop tight against a wall merely to enlarge the center. Both need safe, usable edge conditions. Verify the cooktop clearances, ventilation, splash protection and local requirements. At the sink, allow for the bowl, tap, waste system, any water equipment and the cabinet hardware below.
Windows may favour a sink position, but the sill, tap height and opening direction must be checked together. A drain location may make one sequence less costly, yet the final decision should compare the service work with the everyday value of a better prep counter.
Keep the prep zone clear after move-in
A 900 mm worktop on the drawing can become a 400 mm worktop after a kettle, coffee machine, rice cooker and knife block arrive. List the appliances that will remain plugged in and give them a deliberate home before approving the cabinets.

Use drawers below the prep zone for knives, boards, utensils and mixing tools. Store plates near the serving end and cooking tools near the cooktop. Wall cabinets, rails or a shallow shelf can move frequently used items off the counter, but they should not create head-clearance or cleaning problems.
If small appliances are used daily, consider a dedicated landing section, an appliance garage with compliant ventilation, or a tall pull-out shelf. The goal is not to hide everything. It is to prevent the only uninterrupted prep surface from becoming permanent storage.
Mark the clear prep dimension on the plan and elevation. A label such as “900 mm clear worktop — no sink, cooktop or permanent appliance” turns an intention into something the designer, cabinet maker and installer can all verify.
Six checks before approving the cabinet drawings
- Measure the finished wall. Record the smallest width, openings, projections and services.
- Confirm the appliances. Use actual models, installation clearances and door swings.
- Test one complete meal. Trace storage, washing, preparation, cooking and plating; flag conflicts.
- Mark the clear worktop. Exclude sinks, cooktops, seams and permanent countertop appliances.
- Draw the doors open. Check the refrigerator, oven, dishwasher, pull-outs and room doors together.
- Coordinate the documents. Align the plan, elevations, cabinet schedule, worktop and service drawings.
Option B is an example, not a template. Windows, flues, structure or access may change the order. Map the constraints, group the full-height units, protect one clear prep zone and verify it with actual appliance data. For an Arcaya discussion, send the measured wall, photographs, appliance list and required clear prep length before finishes are finalized.